Résultats de la recherche pour "pican"
-
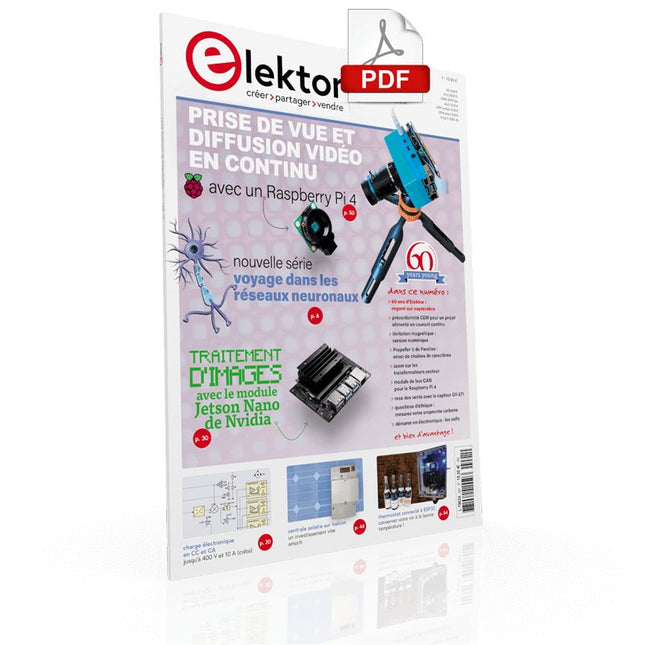
Elektor Digital Elektor septembre/octobre 2021 (PDF)
VOYAGE DANS LES RÉSEAUX NEURONAUX (1ÈRE PARTIE)Les neurones artificielsTEST DE PRÉCONFORMITÉ CEM POUR UN PROJET ALIMENTÉ EN COURANT CONTINUPartie 1 : RSIL double continuCHARGE ÉLECTRONIQUE EN CC ET CAJusqu'à 400 V et 10 A (crête)DÉMARRER EN ÉLECTRONIQUE (9)N'ayez pas peur du choc... un peu de « self control » suffit !TRAITEMENT D'IMAGES AVEC LE MODULE JETSON NANO DE NVIDIA (1ÈRE PARTIE)Matériel et logicielZOOM SUR LES TRANSFORMATEURS SECTEURComportement transitoire à l'allumage et l'extinction« YES WE CAN » AVEC PICAN 3Module de bus CAN pour le Raspberry Pi 4CENTRALE SOLAIRE SUR BALCONUn investissement vite amortiPRISE DE VUE ET DIFFUSION VIDÉO EN CONTINU AVEC UN RASPBERRY PI 4La caméra Raspberry Pi HQ en actionUTILISATION D'ÉCRANS DANS LES PROJETS RASPBERRY PIExtrait : écrans à diodes électroluminescentes organiques (OLED)PROPELLER 2 DE PARALLAX (4)Envoi de chaînes de caractères60 ANS D'ELEKTORRegard sur septembreDANS L'ANTRE DE…Menno van der Veen et de ses tubes amplificateursCIRCUITS HYBRIDESROSE DES VENTS AVEC LE CAPTEUR GY-271Ou pourquoi il faut faire des huit pour calibrer un capteurMESUREZ VOTRE EMPREINTEÉlectronique et émissions de gaz à effet de serreTHERMOSTAT CONNECTÉ À ESP32Conservez votre vin à la bonne température !LÉVITATION MAGNÉTIQUE, VERSION NUMÉRIQUEComparateur analogique remplacé par un ESP32 PicoULTIMATE ARDUINO UNO HARDWARE MANUAL - FR TRANSLATIONExtrait : chargeur d'amorçage du microcontrôleur principalMICROPYTHON POUR L'ESP32 ET SES COPAINSPartie 2 : piloter facilement les écrans matricielsCARTE MADMACHINE SWIFTIOUn langage récent pour du matériel tout nouveauSUR LE VIFPassions incertainesHEXADOKUCasse-tête pour elektorniciens
€ 10,95
-

Elektor Academy Pro Raspberry Pi Pico with MicroPython (Cours de programmation)
Ce cours complet de programmation de microcontrôleurs basé sur le Raspberry Pi Pico comprend un manuel, un kit de composants, des projets pratiques ainsi qu’un cours en ligne complet avec simulations. Il est idéal pour apprendre pas à pas la programmation des systèmes embarqués avec MicroPython grâce à une approche pratique. Une introduction pratique aux systèmes embarqués avec le Raspberry Pi Pico Ce cours s’adresse aux débutants en systèmes embarqués recherchant une approche structurée et basée sur des exemples. Un kit de composants comprenant des LED et des résistances, des interrupteurs, des capteurs et actionneurs, des afficheurs, une breadboard et des fils est inclus. Ceux-ci sont utilisés dans le cours pour illustrer des applications concrètes. Aucune expérience préalable avec Arduino ou le développement embarqué n’est requise. Chaque section propose des exemples pratiques et des mini-projets conçus pour renforcer les concepts clés et encourager l’exploration. À la fin du cours, vous serez capable non seulement de reproduire les exemples, mais aussi de développer vos propres idées et applications. Que allez-vous apprendre ? Programmation de microcontrôleurs en MicroPython sur le Raspberry Pi Pico via l'IDE Thonny Utilisation des entrées/sorties numériques, lecture de boutons et encodeurs, commande de LED et relais Lecture des entrées analogiques, tensions et capteurs analogiques Génération de signaux analogiques et PWM Utilisation des communications série comme UART, I²C et SPI pour piloter des afficheurs et lire des capteurs numériques et cartes SD Gestion du temps Utilisation des interruptions Entrées capteurs en temps réel et contrôle via boutons, LED et afficheurs Commande d’actionneurs comme relais et servomoteurs À qui s’adresse ce cours ? Étudiants et autodidactes explorant les systèmes embarqués Makers et passionnés d’IoT souhaitant améliorer leurs compétences en hardware Formateurs et enseignants à la recherche de matériel pédagogique prêt à l’emploi Contenu de la boîte Accès au cours complet sur la plateforme Elektor Academy Pro Carte microcontrôleur Raspberry Pi Pico + câble USB Livre : Programming Microcontrollers in MicroPython Fichiers de projet téléchargeables pour chaque module Boîte de composants : 2× LED, rouge, 5 mm LED, verte, 5 mm 3× résistance, 470 Ω, 0,25 W LDR Potentiomètre, 10 kΩ, linéaire Bouton-poussoir Module encodeur rotatif Module relais Capteur DHT22 (température & humidité) Afficheur 7 segments 4 digits compatible TM1637 MPU-6050 IMU avec connecteurs Afficheur OLED I²C compatible SSD1306 Adaptateur carte micro SD avec connecteur Buzzer Micro servo SG90 Écran TFT SPI 240×320 compatible ILI9341 20× fils jumper Breadboard Tous les cours de programmation (et différences de contenu) Cours Arduino Raspberry Pi Pico with Arduino C/C++ ESP32 with Arduino C/C++ Raspberry Pi Pico with MicroPython ESP32 with MicroPython Cours en ligne Access to Arduino Course Access to Pico with Arduino C/C++ Course Access to ESP32 with Arduino C/C++ Course Access to Pico with MicroPython Course Access to ESP32 with MicroPython Course Carte Uno R3 Raspberry Pi Pico ESP32 Raspberry Pi Pico ESP32 Livre Programming Microcontrollers in C/C++ Using Arduino Programming Microcontrollers in C/C++ Using Arduino Programming Microcontrollers in C/C++ Using Arduino Programming Microcontrollers in MicroPython Programming Microcontrollers in MicroPython Kit Boîte de composants (40 pièces) Boîte de composants (40 pièces) Boîte de composants (40 pièces) Boîte de composants (40 pièces) Boîte de composants (40 pièces)
€ 69,95
Membres : € 62,96
-

Elektor Academy Pro ESP32 with Arduino C/C++ (Cours de programmation)
Ce cours complet de programmation du microcontrôleur ESP32 comprend un manuel, un kit de composants, des projets pratiques ainsi qu’un cours en ligne complet avec simulations. Il est idéal pour apprendre pas à pas la programmation des systèmes embarqués avec Arduino, grâce à une approche concrète et pratique. Une introduction pratique aux systèmes embarqués avec l’ESP32 Ce cours s’adresse aux débutants en systèmes embarqués recherchant une approche structurée et basée sur des exemples. Un kit de composants comprenant des LED et des résistances, des interrupteurs, des capteurs et actionneurs, des afficheurs, une breadboard et des fils est inclus. Ceux-ci sont utilisés dans le cours pour illustrer des applications concrètes. Aucune expérience préalable avec Arduino ou le développement embarqué n’est requise. Chaque section propose des exemples pratiques et des mini-projets conçus pour renforcer les concepts clés et encourager l’exploration. À la fin du cours, vous serez capable non seulement de reproduire les exemples, mais aussi de développer vos propres idées et applications. Que allez-vous apprendre ? Programmation du microcontrôleur ESP32 à l'aide de l'IDE Arduino Utilisation des entrées/sorties numériques, lecture de boutons et encodeurs, commande de LED et relais Lecture des entrées analogiques, tensions et capteurs analogiques Génération de signaux analogiques et PWM Utilisation des communications série comme UART, I²C et SPI pour piloter des afficheurs et lire des capteurs numériques et cartes SD Gestion du temps Utilisation des interruptions Entrées capteurs en temps réel et contrôle via boutons, LED et afficheurs Commande d’actionneurs comme relais et servomoteurs À qui s’adresse ce cours ? Étudiants et autodidactes explorant les systèmes embarqués Makers et passionnés d’IoT souhaitant améliorer leurs compétences en hardware Formateurs et enseignants à la recherche de matériel pédagogique prêt à l’emploi Contenu de la boîte Accès au cours complet sur la plateforme Elektor Academy Pro Carte microcontrôleur ESP32 + câble USB Livre : Programming Microcontrollers in C/C++ Using Arduino Fichiers de projet téléchargeables pour chaque module Boîte de composants : 2× LED, rouge, 5 mm LED, verte, 5 mm 3× résistance, 470 Ω, 0,25 W LDR Potentiomètre, 10 kΩ, linéaire Bouton-poussoir Module encodeur rotatif Module relais Capteur DHT22 (température & humidité) Afficheur 7 segments 4 digits compatible TM1637 MPU-6050 IMU avec connecteurs Afficheur OLED I²C compatible SSD1306 Adaptateur carte micro SD avec connecteur Buzzer Micro servo SG90 Écran TFT SPI 240×320 compatible ILI9341 20× fils jumper Breadboard Tous les cours de programmation (et différences de contenu) Cours Arduino Raspberry Pi Pico with Arduino C/C++ ESP32 with Arduino C/C++ Raspberry Pi Pico with MicroPython ESP32 with MicroPython Cours en ligne Access to Arduino Course Access to Pico with Arduino C/C++ Course Access to ESP32 with Arduino C/C++ Course Access to Pico with MicroPython Course Access to ESP32 with MicroPython Course Carte Uno R3 Raspberry Pi Pico ESP32 Raspberry Pi Pico ESP32 Livre Programming Microcontrollers in C/C++ Using Arduino Programming Microcontrollers in C/C++ Using Arduino Programming Microcontrollers in C/C++ Using Arduino Programming Microcontrollers in MicroPython Programming Microcontrollers in MicroPython Kit Boîte de composants (40 pièces) Boîte de composants (40 pièces) Boîte de composants (40 pièces) Boîte de composants (40 pièces) Boîte de composants (40 pièces)
€ 69,95
Membres : € 62,96
-

Elektor Digital PIC Cookbook for Virtual Instrumentation (E-book)
The software simulation of gauges, control-knobs, meters and indicators which behave just like real hardware components on a PC’s screen is known as virtual instrumentation. In this book, the Delphi program is used to create these mimics and PIC based external sensors are connected via a USB/RS232 converter communication link to a PC. Detailed case studies in this Book include a virtual compass displayed on the PC’s screen, a virtual digital storage oscilloscope, virtual -50 to +125 degree C thermometer, and FFT sound analyser, a joystick mouse and many examples detailing virtual instrumentation Delphi components. Arizona’s embedded microcontrollers – the PIC's are used in the projects and include PIC16F84A, PIC16C71, DSPIC30F6012A, PIC16F877, PIC12F629 and the PIC16F887. Much use is made of Microchip’s 44 pin development board (a virtual instrument ‘engine)’, equipped with a PIC16F887 with an onboard potentiometer in conjunction with the PIC’s ADC to simulate the generation of a variable voltage from a sensor/transducer, a UART to enable PC RS232 communications and a bank of 8 LED's to monitor received data is also equipped with an ISP connector to which the ‘PICKIT 2’ programmer may easily be connected. Full source code examples are provided both for several different PIC’s, both in assembler and C, together with the Pascal code for the Delphi programs which use different 3rd party Delphi virtual components.
€ 19,95
Membres : € 15,96
-
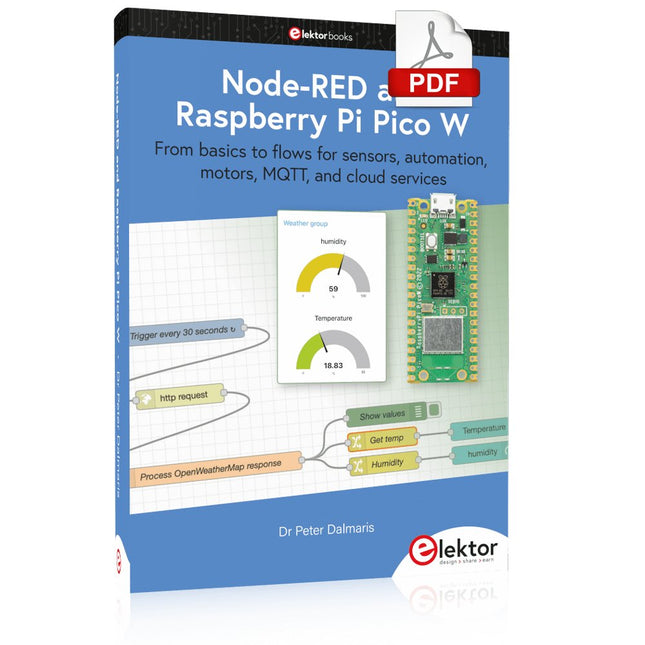
Elektor Digital Node-RED and Raspberry Pi Pico W (E-book)
From basics to flows for sensors, automation, motors, MQTT, and cloud services This book is a learning guide and a reference. Use it to learn Node-RED, Raspberry Pi Pico W, and MicroPython, and add these state-of-the-art tools to your technology toolkit. It will introduce you to virtual machines, Docker, and MySQL in support of IoT projects based on Node-RED and the Raspberry Pi Pico W. This book combines several elements into a platform that powers the development of modern Internet of Things applications. These elements are a flow-based server, a WiFi-enabled microcontroller, a high-level programming language, and a deployment technology. Combining these elements gives you the tools you need to create automation systems at any scale. From home automation to industrial automation, this book will help you get started. Node-RED is an open-source flow-based development tool that makes it easy to wire together devices, APIs, and online services. Drag and drop nodes to create a flowchart that turns on your lights at sunset or sends you an email when a sensor detects movement. Raspberry Pi Pico W is a version of the Raspberry Pi Pico with added 802.11n Wi-Fi capability. It is an ideal device for physical computing tasks and an excellent match to the Node-RED. Quick book facts Project-based learning approach. Assumes no prior knowledge of flow-based programming tools. Learn to use essential infrastructure tools in your projects, such as virtual machines, Docker, MySQL and useful web APIs such as Google Sheets and OpenWeatherMap. Dozens of mini-projects supported by photographs, wiring schematics, and source code. Get these from the book GitHub repository. Step-by-step instructions on everything. All experiments are based on the Raspberry Pi Pico W. A Wi-Fi network is required for all projects. Hardware (including the Raspberry Pi Pico W) is available as a kit. Downloads GitHub
€ 39,95
Membres : € 31,96
-

Elektor Publishing Node-RED and Raspberry Pi Pico W
From basics to flows for sensors, automation, motors, MQTT, and cloud services This book is a learning guide and a reference. Use it to learn Node-RED, Raspberry Pi Pico W, and MicroPython, and add these state-of-the-art tools to your technology toolkit. It will introduce you to virtual machines, Docker, and MySQL in support of IoT projects based on Node-RED and the Raspberry Pi Pico W. This book combines several elements into a platform that powers the development of modern Internet of Things applications. These elements are a flow-based server, a WiFi-enabled microcontroller, a high-level programming language, and a deployment technology. Combining these elements gives you the tools you need to create automation systems at any scale. From home automation to industrial automation, this book will help you get started. Node-RED is an open-source flow-based development tool that makes it easy to wire together devices, APIs, and online services. Drag and drop nodes to create a flowchart that turns on your lights at sunset or sends you an email when a sensor detects movement. Raspberry Pi Pico W is a version of the Raspberry Pi Pico with added 802.11n Wi-Fi capability. It is an ideal device for physical computing tasks and an excellent match to the Node-RED. Quick book facts Project-based learning approach. Assumes no prior knowledge of flow-based programming tools. Learn to use essential infrastructure tools in your projects, such as virtual machines, Docker, MySQL and useful web APIs such as Google Sheets and OpenWeatherMap. Dozens of mini-projects supported by photographs, wiring schematics, and source code. Get these from the book GitHub repository. Step-by-step instructions on everything. All experiments are based on the Raspberry Pi Pico W. A Wi-Fi network is required for all projects. Hardware (including the Raspberry Pi Pico W) is available as a kit. Downloads GitHub
€ 49,95
Membres : € 44,96


