Cette offre groupée contient :
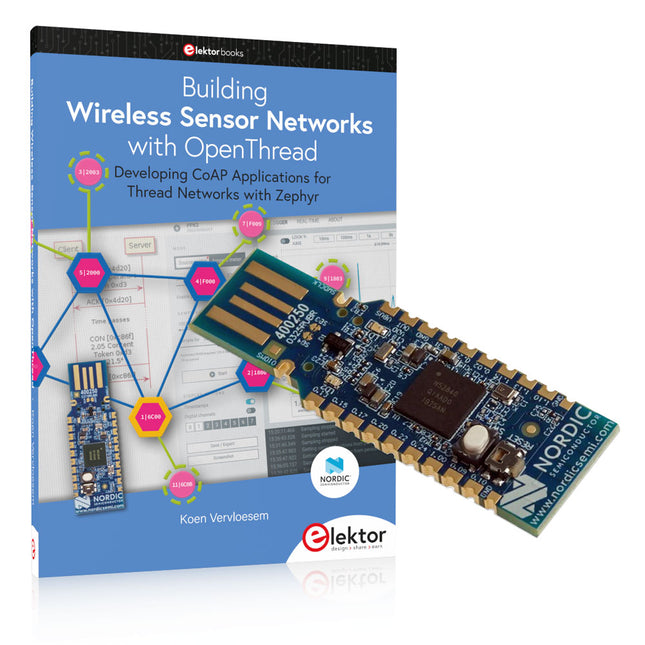
Livre : Building Wireless Sensor Networks with OpenThread (prix normal : 35 €)
Nordic Semiconductor nRF52840 USB Dongle (prix normal : 20 €)
Livre : Building Wireless Sensor Networks with OpenThread
This book will guide you through the operation of Thread, the setup of a Thread network, and the creation of your own Zephyr-based OpenThread applications to use it. You’ll acquire knowledge on:
The capture of network packets on Thread networks using Wireshark and the nRF Sniffer for 802.15.4.
Network simulation with the OpenThread Network Simulator.
Connecting a Thread network to a non-Thread network using a Thread Border Router.
The basics of Thread networking, including device roles and types, as well as the diverse types of unicast and multicast IPv6 addresses used in a Thread network.
The mechanisms behind network discovery, DNS queries, NAT64, and multicast addresses.
The process of joining a Thread network using network commissioning.
CoAP servers and clients and their OpenThread API.
Service registration and discovery.
Securing CoAP messages with DTLS, using a pre-shared key or X.509 certificates.
Investigating and optimizing a Thread device’s power consumption.
Once you‘ve set up a Thread network with some devices and tried connecting and disconnecting them, you’ll have gained a good insight into the functionality of a Thread network, including its self-healing capabilities. After you’ve experimented with all code examples in this book, you’ll also have gained useful programming experience using the OpenThread API and CoAP.
Nordic Semiconductor nRF52840 USB Dongle
The nRF52840 dongle is a small, low-cost USB dongle that supports Bluetooth 5.3, Bluetooth mesh, Thread, ZigBee, 802.15.4, ANT and 2.4 GHz proprietary protocols. The dongle is the perfect target hardware for use with nRF Connect for Desktop as it is low-cost but still support all the short range wireless standards used with Nordic devices.
The dongle has been designed to be used as a wireless HW device together with nRF Connect for Desktop. For other use cases please do note that there is no debug support on the dongle, only support for programming the device and communicating through USB.
It is supported by most of the nRF Connect for Desktop apps and will automatically be programmed if needed. In addition custom applications can be compiled and downloaded to the dongle. It has a user programmable RGB LED, a green LED, a user programmable button as well as 15 GPIO accessible from castellated solder points along the edge. Example applications are available in the nRF5 SDK under the board name PCA10059.
The nRF52840 dongle is supported by nRF Connect for Desktop as well as programming through nRFUtil.
Features
Bluetooth 5.2 ready multiprotocol radio
2 Mbps
Long Range
Advertising Extensions
Channel Selection Algorithm #2 (CSA #2)
IEEE 802.15.4 radio support
Thread
ZigBee
Arm Cortex-M4 with floating point support
DSP instruction set
ARM CryptoCell CC310 cryptographic accelerator
15 GPIO available via edge castellation
USB interface direct to nRF52840 SoC
Integrated 2.4 GHz PCB antenna
1 user-programmable button
1 user-programmable RGB LED
1 user-programmable LED
1.7-5.5 V operation from USB or external
Downloads
Datasheet
Hardware Files
Developing CoAP applications for Thread networks with Zephyr
This book will guide you through the operation of Thread, the setup of a Thread network, and the creation of your own Zephyr-based OpenThread applications to use it. You’ll acquire knowledge on:
The capture of network packets on Thread networks using Wireshark and the nRF Sniffer for 802.15.4.
Network simulation with the OpenThread Network Simulator.
Connecting a Thread network to a non-Thread network using a Thread Border Router.
The basics of Thread networking, including device roles and types, as well as the diverse types of unicast and multicast IPv6 addresses used in a Thread network.
The mechanisms behind network discovery, DNS queries, NAT64, and multicast addresses.
The process of joining a Thread network using network commissioning.
CoAP servers and clients and their OpenThread API.
Service registration and discovery.
Securing CoAP messages with DTLS, using a pre-shared key or X.509 certificates.
Investigating and optimizing a Thread device’s power consumption.
Once you‘ve set up a Thread network with some devices and tried connecting and disconnecting them, you’ll have gained a good insight into the functionality of a Thread network, including its self-healing capabilities. After you’ve experimented with all code examples in this book, you’ll also have gained useful programming experience using the OpenThread API and CoAP.
Projects with Arduino, ESPHome, Home Assistant, and Raspberry Pi & Co.
We start by learning about electrical engineering by looking at the basics of voltage and current and the types of resistors, diodes and transistors. In the second chapter, we get to know the most famous microcontroller, the Arduino Uno. We will analyze its structure, learn how to code and carry out illustrative examples.
In chapter three, we set up Home Assistant on a Raspberry Pi. We look at scenes, automations and the general handling of HA.
We then look at the MQTT protocol, which is the gold standard in home electronics communication, so to speak, but other interfaces such as I²C, SPI and UART are also explained in detail in this chapter.
In the following chapter we will take a look at the ESP8266, the more modern ESP32 and of course the ESP32-CAM. First some theory, followed by practical examples.
Indoor climate sensors for temperature and humidity, motion sensors, RFID readers and many more sensors are explained in detail in chapter 7, followed by practical examples.
Chapter 8 deals with actuators such as the 7-segment display, servo motors, displays, stepper motors and much more.
You can use ESPHome to integrate sensors and actuators into Home Assistant without any programming effort. In this chapter, you will be guided step by step through how to integrate your own sensors.
Do you want to bring more colorful light into your living space? Then the chapter on LEDs is just right for you. The different types of LED lights are explained here and, of course, the basics of lighting technology are not forgotten.
There are a lot of ICs in electronics that make our lives easier; in this chapter we get to know a few ICs and the basic knowledge is immediately put into practice.
All code examples do not have to be typed out, you can download them for free from GitHub and modify them. The respective link (with QR code) can be found in the code example.
Cool Projects for Test, Measurement, and Control
The Raspberry Pi has dominated the maker scene for many years. Freely accessible I/O pins have made it one of the most popular processor boards of all time. However, the classic Raspberry Pi has no analog inputs. Direct measurement of analog values is therefore not possible. Consequently, photodiodes, NTCs, Hall sensors, etc. cannot be read directly. In addition, the pins are connected directly to the exposed contacts, i.e. without a driver or protection circuit. This can quickly destroy the central controller and thus the entire Raspberry Pi.
These problems can be elegantly solved with the Pico. As a front-end, it can easily handle a wide range of measurement tasks. In addition, the Pico is much cheaper than a classic Raspberry Pi 4 or 5. If a faulty circuit leads to the destruction of the Pico, this is relatively easy to handle. This makes the combination of a classic Raspberry Pi 4 or 5 and the Pico an ideal pair.
The book introduces the broad and highly topical field of modern controller technology using the combined force of a Raspberry Pi 4 or 5 and a Raspberry Pi Pico. In addition to a detailed introduction to the operation and functionality of the controller boards themselves, the book also focuses on data acquisition and processing with digital processors. Especially the combination of both systems offers a wide range of interesting possibilities.
Some practical projects from the contents:
USB between Raspberry Pi 4 or 5 and Pico
I²C Communication and Pico as an I²C device
Voltmeter and Computer Thermometer
Pico W as a Web Server and WLAN Scanner
Frequency Meters and Generators
OLED Displays on Raspberry Pi 4 or 5 and Pico
Energy Saving Monitor
Which Astronauts are in Orbit?
Mini Monitor for Current Bitcoin Exchange Rate
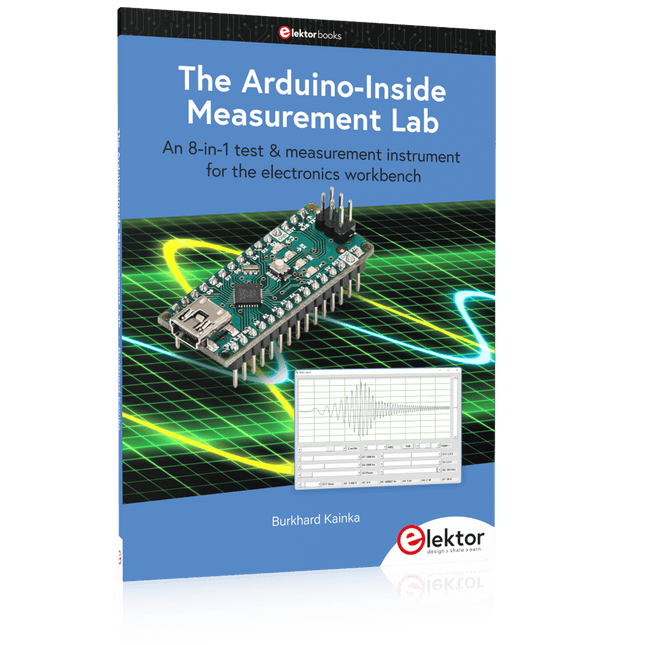
An 8-in-1 test & measurement instrument for the electronics workbench
A well-equipped electronics lab is crammed with power supplies, measuring devices, test equipment and signal generators. Wouldn‘t it be better to have one compact device for almost all tasks? Based on the Arduino, a PC interface is to be developed that’s as versatile as possible for measurement and control. It simply hangs on a USB cable and – depending on the software – forms the measuring head of a digital voltmeter or PC oscilloscope, a signal generator, an adjustable voltage source, a frequency counter, an ohmmeter, a capacitance meter, a characteristic curve recorder, and much more.
The circuits and methods collected here are not only relevant for exactly these tasks in the "MSR" electronics lab, but many details can also be used within completely different contexts.
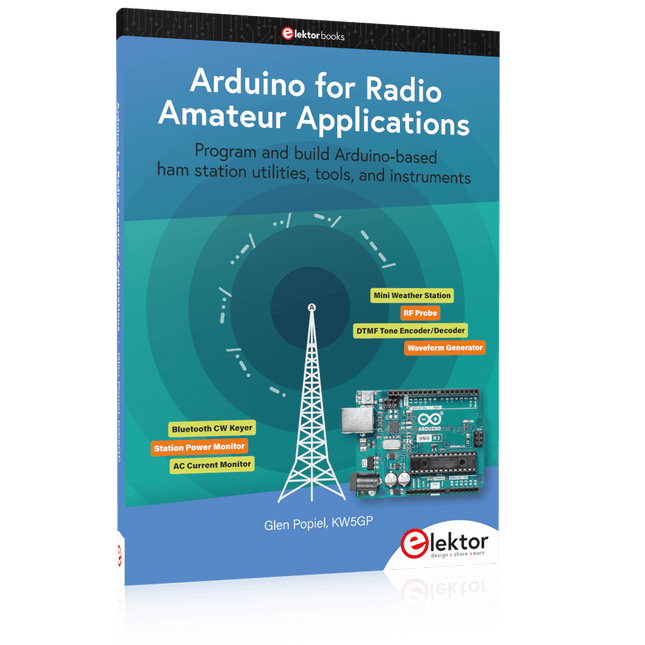
Program and build Arduino-based ham station utilities, tools, and instruments
In addition to a detailed introduction to the exciting world of the Arduino microcontroller and its many variants, this book introduces you to the shields, modules, and components you can connect to the Arduino. Many of these components are discussed in detail and used in the projects included in this book to help you understand how these components can be incorporated into your own Arduino projects. Emphasis has been placed on designing and creating a wide range of amateur radio-related projects that can easily be built in just a few days.
This book is written for ham radio operators and Arduino enthusiasts of all skill levels, and includes discussions about the tools, construction methods, and troubleshooting techniques used in creating amateur radio-related Arduino projects. This book teaches you how to create feature-rich Arduino-based projects, with the goal of helping you to advance beyond this book, and design and build your own ham radio Arduino projects.
In addition, this book describes in detail the design, construction, programming, and operation of the following projects:
CW Beacon and Foxhunt Keyer
Mini Weather Station
RF Probe with LED Bar Graph
DTMF Tone Encoder
DTMF Tone Decoder
Waveform Generator
Auto Power On/Off
Bluetooth CW Keyer
Station Power Monitor
AC Current Monitor
This book assumes a basic knowledge of electronics and circuit construction. Basic knowledge of how to program the Arduino using its IDE will also be beneficial.
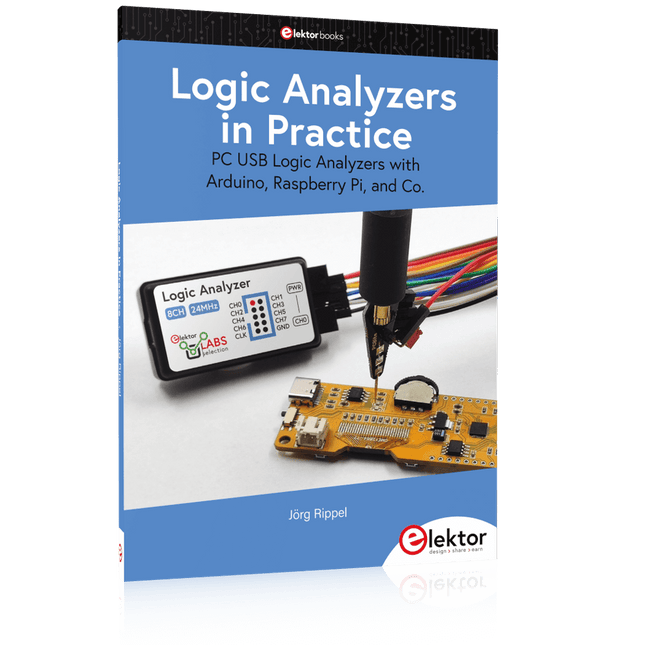
PC USB Logic Analyzers with Arduino, Raspberry Pi, and Co.
Step-by-step instructions guide you through the analysis of modern protocols such as I²C, SPI, UART, RS-232, NeoPixel, WS28xx, HD44780 and 1-Wire protocols. With the help of numerous experimental circuits based on the Raspberry Pi Pico, Arduino Uno and the Bus Pirate, you will learn the practical application of popular USB logic analyzers.
All the experimental circuits presented in this book have been fully tested and are fully functional. The necessary program listings are included – no special programming or electronics knowledge is required for these circuits. The programming languages used are MicroPython and C along with the development environments Thonny and Arduino IDE.
This book uses several models of flexible and widely available USB logic analyzers and shows the strengths and weaknesses of each price range.
You will learn about the criteria that matter for your work and be able to find the right device for you.
Whether Arduino, Raspberry Pi or Raspberry Pi Pico, the example circuits shown allow you to get started quickly with protocol analysis and can also serve as a basis for your own experiments.
After reading this book, you will be familiar with all the important terms and contexts, conduct your own experiments, analyze protocols independently, culminating in a comprehensive knowledge set of digital signals and protocols.
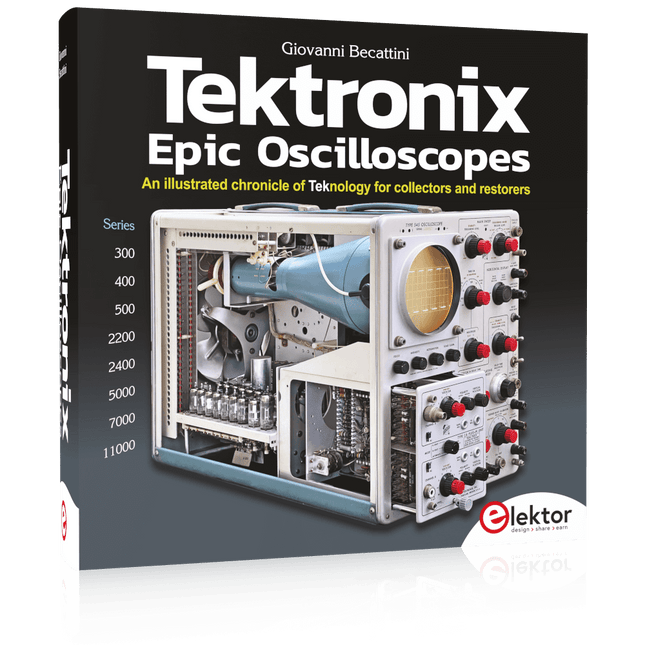
An illustrated chronicle of Teknology for collectors and restorers
Oscilloscopes have made a major contribution to the advancement of human knowledge, not only in electronics, but in all sciences, whenever a physical quantity can be converted into a timerelated electrical signal.
This book traces the history of a crucial instrument through many Tektronix products. This is the company that invented and patented most of the functions found in all oscilloscopes today. Tek is and will always be synonymous with the oscilloscope.
In nearly 600 pages, with hundreds of gorgeous photos, diagrams, anecdotes, and technical data, you'll travel through the history of Tektronix in a superb collector's edition with a technical point of view. The author is not afraid to get his hands dirty restoring his own Tek equipment. The journey starts in the early 1950s. It ends in the '90s, after exploring the ins and outs of the most interesting models in the 300, 400, 500, 5000, 7000, and 11000 series, from tubes to advanced hybrid technologies.
A Hands-on Guide to Crafting Your Own Power Plant
The book you are about to read provides a step-by-step guide for building a renewable energy power plant at home. Our goal was to make the book as practical as possible. The material is intended for immediate application with a small amount of theory. Yet, the theory is important as a foundation that saves time and effort by disabusing the readers of potential misconceptions. Specifically, upon having a firm understanding of photovoltaic physics, you will not be inclined to fruitlessly search for 90% efficient solar panels!
We want our readers to be the “doers”. If the book gets covered in grime and some pages become torn while you are building your power plant – this is the best compliment to us. The book covers solar and wind energy. Also, a curious power source based on manure is discussed as well, giving the doers an opportunity to further develop the manure fuel cell.
It is important to note that there are many companies offering installation of complete solar solutions. Upon installing the panels, the system is not owned by the customer. Therefore, there is no freedom for experimentation and optimization. Also, none can beat the cost of a DIY solution as well as the ultimate satisfaction.
All that is written here is a result of us building a renewable energy solution in Southern California. As the book was completed, the energy began flowing!
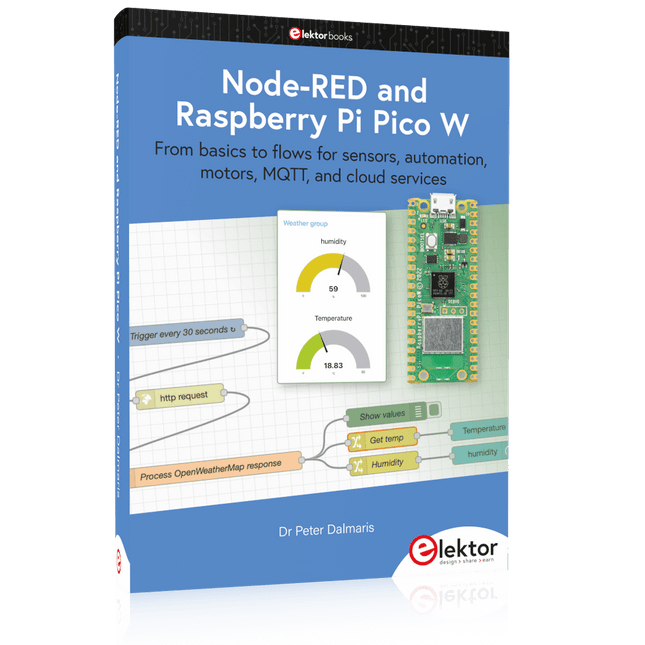
From basics to flows for sensors, automation, motors, MQTT, and cloud services
This book is a learning guide and a reference. Use it to learn Node-RED, Raspberry Pi Pico W, and MicroPython, and add these state-of-the-art tools to your technology toolkit. It will introduce you to virtual machines, Docker, and MySQL in support of IoT projects based on Node-RED and the Raspberry Pi Pico W.
This book combines several elements into a platform that powers the development of modern Internet of Things applications. These elements are a flow-based server, a WiFi-enabled microcontroller, a high-level programming language, and a deployment technology. Combining these elements gives you the tools you need to create automation systems at any scale. From home automation to industrial automation, this book will help you get started.
Node-RED is an open-source flow-based development tool that makes it easy to wire together devices, APIs, and online services. Drag and drop nodes to create a flowchart that turns on your lights at sunset or sends you an email when a sensor detects movement. Raspberry Pi Pico W is a version of the Raspberry Pi Pico with added 802.11n Wi-Fi capability. It is an ideal device for physical computing tasks and an excellent match to the Node-RED.
Quick book facts
Project-based learning approach.
Assumes no prior knowledge of flow-based programming tools.
Learn to use essential infrastructure tools in your projects, such as virtual machines, Docker, MySQL and useful web APIs such as Google Sheets and OpenWeatherMap.
Dozens of mini-projects supported by photographs, wiring schematics, and source code. Get these from the book GitHub repository.
Step-by-step instructions on everything.
All experiments are based on the Raspberry Pi Pico W. A Wi-Fi network is required for all projects.
Hardware (including the Raspberry Pi Pico W) is available as a kit.
Downloads
GitHub
Avec cette offre groupée, vous pouvez immédiatement créer plus de 30 projets testés et fonctionnels décrits dans le livre.
Cette offre groupée contient :
The Raspberry Pi Zero 2 W GO! Book (prix normal : 34,95 €)
Raspberry Pi Zero 2 W (prix normal : 22,95 €)
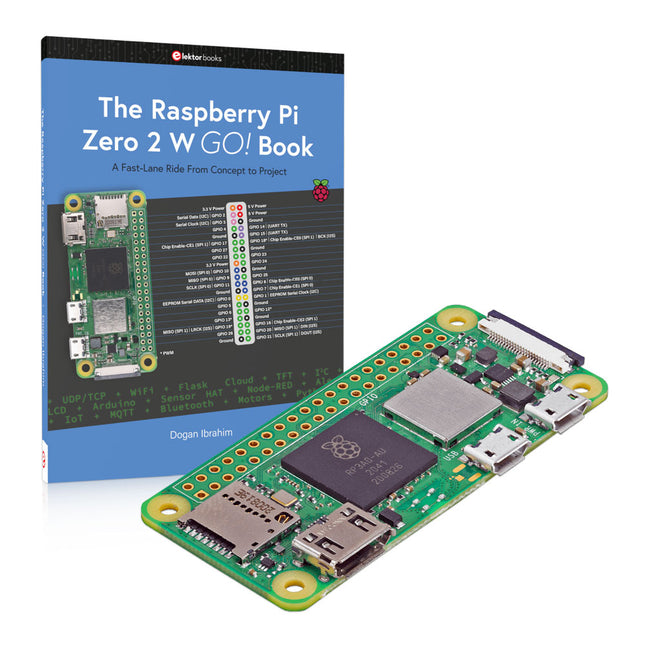
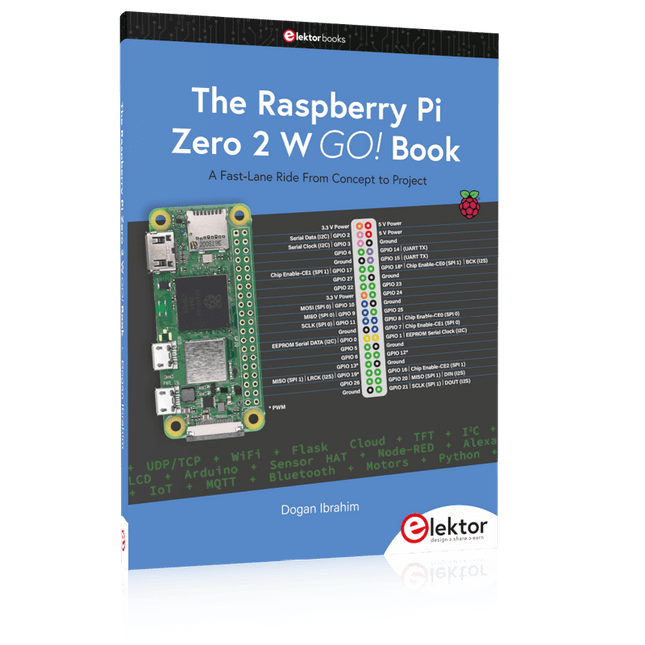
The Raspberry Pi Zero 2 W GO! Book
A Fast-Lane Ride From Concept to Project
The core of the book explains the use of the Raspberry Pi Zero 2 W running the Python programming language, always in simple terms and backed by many tested and working example projects. On part of the reader, familiarity with the Python programming language and some experience with one of the Raspberry Pi computers will prove helpful. Although previous electronics experience is not required, some knowledge of basic electronics is beneficial, especially when venturing out to modify the projects for your own applications.
Over 30 tested and working hardware-based projects are given in the book, covering the use of Wi-Fi, communication with smartphones and with a Raspberry Pi Pico W computer. Additionally, there are Bluetooth projects including elementary communication with smartphones and with the popular Arduino Uno. Both Wi-Fi and Bluetooth are key features of the Raspberry Pi Zero 2 W.
Some of the topics covered in the book are:
Raspberry Pi OS installation on an SD card
Python program creation and execution on the Raspberry Pi Zero 2 W
Software-only examples of Python running on the Raspberry Pi Zero 2 W
Hardware-based projects including LCD and Sense HAT interfacing
UDP and TCP Wi-Fi based projects for smartphone communication
UDP-based project for Raspberry Pi Pico W communication
Flask-based webserver project
Cloud storage of captured temperature, humidity, and pressure data
TFT projects
Node-RED projects
Interfacing to Alexa
MQTT projects
Bluetooth-based projects for smartphone and Arduino Uno communications
Raspberry Pi Zero 2 W
Le petit Raspberry Pi dispose d'un processeur à quatre coeur !
Caractéristiques
Processeur quad-core 64 bits
GPU VideoCore IV
512 MB LPDDR2 DRAM
802.11b/g/n LAN sans fil
Bluetooth 4.2 / Bluetooth à basse consommation (BLE)
Slot pour carte MicroSD
Ports Mini HDMI et USB 2.0 OTG
Alimentation Micro USB
Connecteur à 40 broches compatible avec HAT
Broches de vidéo composite et de reset via des points de test
Connecteur de caméra CSI
Spécifications
SoC
Broadcom BCM2710A1
CPU
64-bit ARM Cortex-A53 (4x 1 GHz)
GPU
Broadcom VideoCore VI
RAM
512 MB LPDDR2
Wireless LAN
2.4 GHz IEEE 802.11b/g/n
Bluetooth
Bluetooth 4.2, BLE
USB
1x micro USB (pour les données)1x micro USB (pour l'alimentation)
GPIO
Connecteur à 40 broches compatible avec HAT
Vidéo & Audio
1080P HD vidéo & stereo audio via un connecteur mini-HDMI
Carde SD
microSD (pour le système d'exploitation et le stockage)
Alimentation
5 VDC / 2,5 A (alimenté par un connecteur micro USB)
Dimensions
65 x 30 x 5 mm
L'empreinte du Raspberry Pi Zero 2 W est compatible avec les modèles Zero antérieurs.
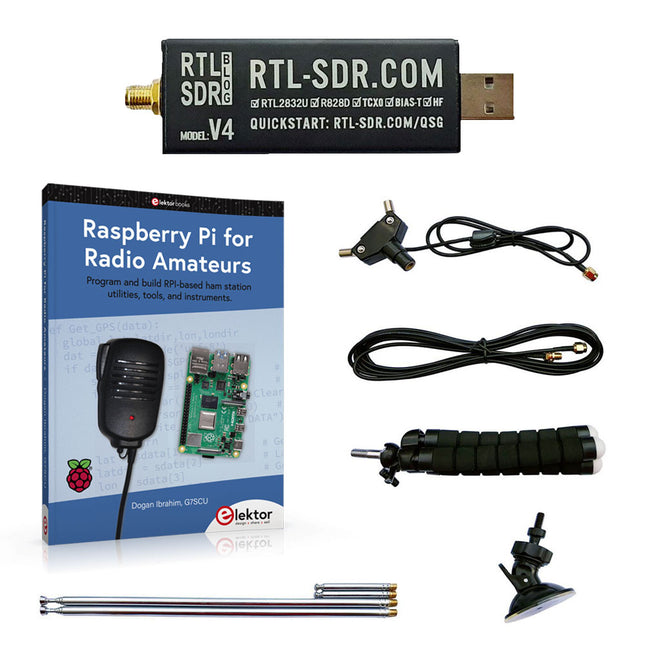
Programmez et construisez des utilitaires, des outils et des instruments de station radio amateur basés sur Raspberry Pi !La nouvelle version améliorée du RTL-SDR V4 permet de recevoir des signaux radio entre 500 kHz et 1,75 GHz provenant de stations utilisant différentes bandes (notamment la diffusion en ondes courtes (SW), moyennes (MW) et longues (LW)), de services de radiodiffusions, de services publics de contrôle du trafic aérien, de PMR, de SRD, d'ISM, de CB, de satellites météorologiques et de radioastronomie.Le livre Raspberry Pi for Radio Amateurs présente en détail l'utilisation du kit RTL-SDR avec un Raspberry Pi.Cette offre groupée contient :RTL-SDR V4 (Software Defined Radio) with Dipole Antenna Kit (prix normal : 59,95 €)Raspberry Pi for Radio Amateurs (prix normal : 34,95 €)RTL-SDR V4 (Software Defined Radio) avec kit antenne dipôleLa clé RTL-SDR est un appareil au coût abordable qui peut être utilisé comme scanner radio associé à un ordinateur, pour recevoir les signaux radio locaux entre 500 kHz et 1,75 GHz.La nouvelle version RTL-SDR V4 apporte plusieurs améliorations par rapport aux appareils de marques génériques, en particulier l'utilisation d'un chip tuner R828D, la présence d'un filtre d'entrée triplexé, d'un filtre coupe-bande, de composants aux tolérances améliorées, d'un oscillateur compensé en température à stabilité de 1 PPM (TCXO), d'un connecteur SMA F, d'un boitier en aluminium avec refroidissement passif, d'un circuit d'injection de tension continue en T, d'une alimentation améliorée, et d'un convertisseur HF élévateur.RTL-SDR V4 est fourni avec un kit antenne dipôle portable. C'est un atout pour débuter, car elle permet la réception des stations terrestres et des satellites. Son installation à l'extérieur est facile, elle est conçue pour un usage portable temporaire à l'extérieur.CaractéristiquesRéception HF améliorée : V4 utilise maintenant un convertisseur élévateur au lieu d'un circuit échantillonneur direct. Cela évite le phénomène de fréquence de repli de Nyquist se situant vers 14,4 MHz, une meilleure sensibilité et un gain HF ajustable. Tout comme pour V3, la fréquence limite basse de réception est de 500 kHz, et un signal reçu très fort nécessite l'utilisation d'un filtre atténuateur en entrée.Filtrage amélioré : La V4 utilise le circuit de réception R828D qui possède trois entrées. L'entrée munie d'un connecteur SMA a été triplexée en 3 bandes : HF, VHF et UHF. Les trois bandes sont ainsi isolées, ce qui minimise la diminution de la sensibilité et la présence de fréquences images, provoquées par les interférences dues aux stations de radiodiffusions puissantes en dehors de la bande reçue.Filtrage x2 amélioré : En plus du triplexage, une broche d'entrée aboutissant à un drain ouvert peut être utilisée, permettant l'ajout d'un filtre coupe-bande pour éliminer les interférences sur les bandes de radiodiffusion AM, FM ou DAB. Un tel filtre permet d'obtenir une atténuation limitée à quelques décibels, mais demeure efficace.Amélioration du bruit de phase sur les signaux puissants : La conception améliorée de l'alimentation permet de réduire le bruit de phase provenant de celle-ci.Dissipation calorifique réduite : Autre avantage résultant de l'amélioration du circuit d'alimentation, la consommation électrique est réduite, minimisant de fait la génération de chaleur, par rapport à la V3.Contenu1x Clé RTL-SDR V4 (R828D RTL2832U 1PPM TCXO SMA)2x Antennes télescopiques de 23 cm à 1 m2x Antennes télescopiques de 5 cm à 13 cm1x Embase d'antenne équipée d'un câble RG174 de 60 cm1x Câble prolongateur RG174 de 3 m1x Trépied de montage flexible1x Ventouse de fixationLiensUser GuideQuick Start GuideSDR# User GuideDipole Antenna GuideRaspberry Pi for Radio AmateursAlthough much classical HF and mobile equipment is still in use by many amateurs, the use of computers and digital techniques has now become very popular among amateur radio operators. Nowadays, anyone can purchase a Raspberry Pi computer and run almost all amateur radio software on the ‘RPi', which is slightly bigger than the size of a credit card.The RTL-SDR devices have become very popular among hams because of their very low cost and rich features. A basic system may consist of a USB-based RTL-SDR device (dongle) with a suitable antenna, an RPi computer, a USB-based external audio input-output adapter, and software installed on the Pi. With such a simple setup it is feasible to receive signals from around 24 MHz to over 1.7 GHz. With the addition of a low-cost upconverter device, an RTL-SDR can easily and effectively receive the HF bands.This book is aimed at amateur radio enthusiasts, electronic engineering students, and anyone interested in learning to use the Raspberry Pi to build electronic projects. The book is suitable for the full range of beginners through old hands at ham radio. Step-by-step installation of the operating system is described with many details on the commonly used Linux commands. Some knowledge of the Python programming language is required to understand and modify the projects given in the book. Example projects developed in the book include a station clock, waveform generation, transistor amplifier design, active filter design, Morse code exerciser, frequency counter, RF meter, and more. The block diagram, circuit diagram, and complete Python program listings are given for each project, including the full description of the projects.Besides wide coverage of RTL-SDR for amateur radio, the book also summarizes the installation and use instructions of the following ham radio programs and software tools you can run on your Raspberry Pi: TWCLOCK, Klog, Gpredict, FLDIGI, DIRE WOLF, xcwcp, QSSTV, LinPsk, Ham Clock, CHIRP, xastir, and CQRLOG.
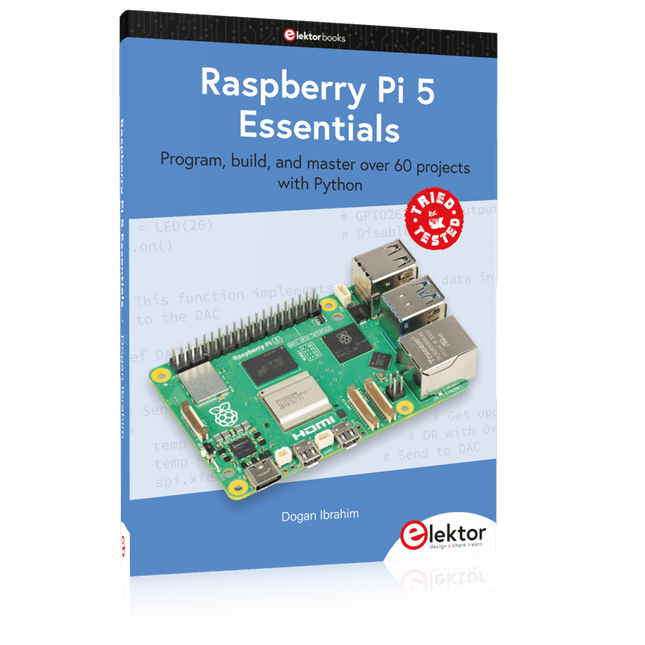
Program, build, and master over 60 projects with Python
The Raspberry Pi 5 is the latest single-board computer from the Raspberry Pi Foundation. It can be used in many applications, such as in audio and video media centers, as a desktop computer, in industrial controllers, robotics, and in many domestic and commercial applications. In addition to the well-established features found in other Raspberry Pi computers, the Raspberry Pi 5 offers Wi-Fi and Bluetooth (classic and BLE), which makes it a perfect match for IoT as well as in remote and Internet-based control and monitoring applications. It is now possible to develop many real-time projects such as audio digital signal processing, real-time digital filtering, real-time digital control and monitoring, and many other real-time operations using this tiny powerhouse.
The book starts with an introduction to the Raspberry Pi 5 computer and covers the important topics of accessing the computer locally and remotely. Use of the console language commands as well as accessing and using the desktop GUI are described with working examples. The remaining parts of the book cover many Raspberry Pi 5-based hardware projects using components and devices such as
LEDs and buzzers
LCDs
Ultrasonic sensors
Temperature and atmospheric pressure sensors
The Sense HAT
Camera modules
Example projects are given using Wi-Fi and Bluetooth modules to send and receive data from smartphones and PCs, and sending real-time temperature and atmospheric pressure data to the cloud.
All projects given in the book have been fully tested for correct operation. Only basic programming and electronics experience are required to follow the projects. Brief descriptions, block diagrams, detailed circuit diagrams, and full Python program listings are given for all projects described.
Les moteurs électriques sont présents dans d'innombrables appareils électroniques chez nous. Les contrôleurs moteurs assurent un fonctionnement efficace, sûr et précis pour la vitesse ou la position de l'actionneur des moteurs utilisés. Les moteurs électriques peuvent être classés en moteurs CC ou CA selon le type de tension utilisé pour les contrôler. Les moteurs CC sont les plus anciens et sont largement utilisés dans les laboratoires domestiques, les écoles et les laboratoires. Presque toutes les imprimantes, caméras, robots et machines CNC grand public, commerciales et industrielles utilisent des moteurs CC. Les moteurs CA, quant à eux, sont utilisés dans de nombreux appareils et outils domestiques car ils peuvent être alimentés directement à partir d'une prise secteur. La carte de développement Maker Pi RP2040 de Cytron est un système avancé basé sur le processeur RP2040, spécialement conçu pour les applications de contrôle moteur. Elle est équipée d'un contrôleur moteur CC à double canal, de 4 ports pour servomoteurs et de 7 ports E/S compatibles Grove, ce qui en fait une plateforme idéale pour les applications de robotique mobile, le contrôle de bras robotique ou tout autre type d'application nécessitant un contrôle précis des moteurs et des actionneurs. Le livre de projets, écrit par l'auteur bien connu de l'Elektor, Dogan Ibrahim, comprend plus de 50 projets utilisant des LED, un buzzer, un écran OLED, un convertisseur ADC, un capteur ultrasonique, PWM, ainsi que le contrôle de température et d'humidité. Les principaux chapitres couvrent le contrôle des moteurs CC, des servomoteurs et des moteurs pas à pas à l'aide de la carte de développement Maker Pi RP2040 de manière créative et éducative. Inclus dans le bundle Cytron Maker Pi RP2040 Development Board Composants électroniques Résistances de 1 k-ohm Résistance de 10 k-ohm Résistance de 12 k-ohm Résistance de 470 ohm LED Relais, 3 V/10 A LDR, 10 k-ohm Fils de raccordement (mâle-mâle) Plaque de prototypage (breadboard) Capteurs TMP36 (température) DHT11 (température et humidité) Modules Moteur pas à pas 5 V avec pilote ULN2003 HC-SR04 (ultrasonique) SSD1306 (OLED I²C) KY-021 (interrupteur à lames) Moteur CC (à balais, miniature, 3 V, 12 krpm) SG90 (servomoteur) Livre de projets (191 pages) 52 projets dans le livre Projets simples avec LED LED clignotante Signal SOS clignotant Toutes les LED allumées et éteintes Comptage binaire des LED LED rotatives LED clignotantes aléatoirement LED rotatives avec contrôle par bouton-poussoir Minuteur de réaction Jeu de réaction à deux joueurs Utilisation des LED NeoPixel intégrées – affichage de différentes couleurs Utilisation des LED NeoPixel intégrées – faire clignoter les NeoPixels de manière aléatoire Projets simples avec Buzzer Jouer des tons de Do moyen Utilisation du buzzer comme indicateur sonore Jouer une mélodie - Joyeux anniversaire Balayage de fréquence Utilisation des écrans OLED Affichage de texte sur OLED Affichage de formes courantes Compteur de secondes Dessin de bitmaps Utilisation des convertisseurs analogiques-numériques Voltmètre Mesure de la température Régulateur de température marche/arrêt Régulateur de température marche/arrêt avec affichage OLED Mesure de l'intensité lumineuse ambiante Ohmmètre Modulation de largeur d'impulsion (PWM) Générer une forme d'onde PWM de 1000 Hz avec un rapport cyclique de 50% Changer la luminosité d'une LED Son d'alarme sur le buzzer Orgue électronique Projets avec Capteur Ultrasonique Mesure de distance ultrasonique Mesure de distance ultrasonique avec affichage OLED Mesure du niveau d'eau dans un réservoir Aide au stationnement à ultrasons avec buzzer Température et Humidité Relative Mesure de la température et de l'humidité relative Mesure de la température et de l'humidité relative avec OLED Projets de Contrôle de Moteurs CC Contrôle marche/arrêt du moteur CC Contrôle de la vitesse du moteur CC à deux vitesses Variation de la vitesse du moteur Utilisation de deux moteurs CC Changement de la direction du moteur Contrôle du moteur basé sur LDR Contrôle du moteur basé sur un interrupteur à lames magnétiques Affichage de la vitesse d'un moteur CC – à l'aide d'un codeur rotatif Affichage de la vitesse d'un moteur CC sur OLED – à l'aide d'un codeur rotatif Réponse en temps du moteur avec le codeur Mesure et affichage de la vitesse du moteur à l'aide des interruptions Contrôle de la vitesse du moteur par régulation proportionnelle, intégrale et dérivée (PID) Projets de Contrôle de Moteurs Servo Contrôle du moteur servo – position à 0, 90 et 180 degrés Utilisation de deux moteurs servo – position à 0, 90 et 180 degrés Sonar à ultrasons Projets de Contrôle de Moteurs Pas à Pas Contrôle de base du moteur pas à pas Thermomètre avec cadran
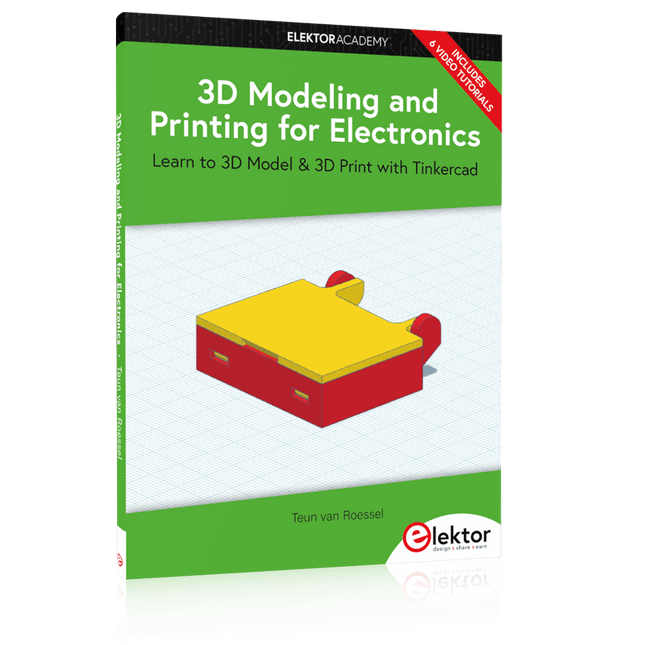
Apprenez à modéliser et à imprimer en 3D avec Tinkercad Avec ce livre et les vidéos complémentaires, vous pourrez imprimer en 3D en un rien de temps. Ce cours est destiné à vous faire réaliser des boîtiers pour composants électroniques mais aborde également l'optimisation de votre technique d'impression ainsi que l'ajout d'un peu de style à vos créations 3D. Le cours est parfait pour vous si vous venez d'acheter votre (première) imprimante 3D et que vous souhaitez imprimer vos propres conceptions le plus rapidement possible tout en pouvant obtenir plus d'informations de base.
Vous apprendrez à connaître le fonctionnement d'une imprimante 3D et quel logiciel utiliser pour modéliser votre objet, sans oublier de le faire imprimer parfaitement. Nous utiliserons même la magie de l'impression 3D pour créer des choses qui semblent impossibles à réaliser (aussi rapidement et simplement) avec n'importe quelle autre technique de prototypage rapide.
À la fin de ce cours, ce sera une seconde nature pour vous de concevoir un objet pour l'impression 3D et d'affiner vos paramètres d'impression pour obtenir l'impression parfaite !
Le livre comprend les 7 didacticiels vidéo suivants :
Introduction
Modélisation 3D de base pour l'impression 3D
Modélisation d'un boîtier
Post-traitement
Pousser les limites
Pièces mobiles
Ajustements instantanés
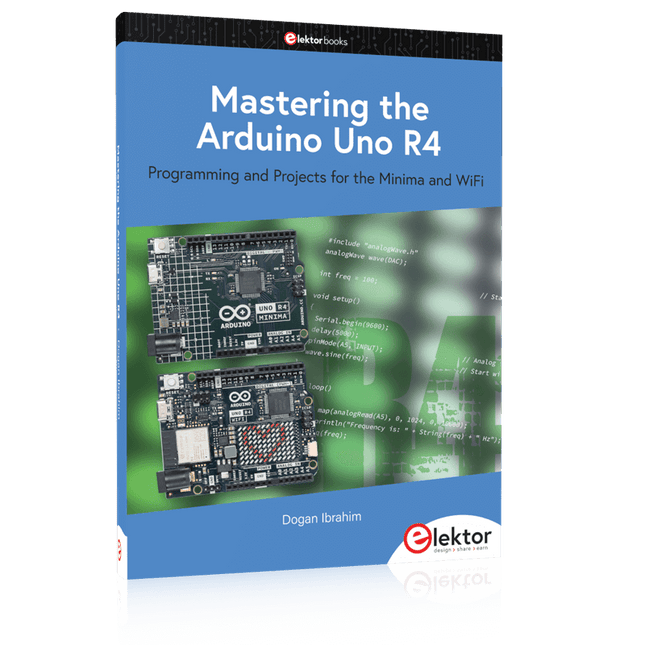
Programming and Projects for the Minima and WiFi
Based on the low-cost 8-bit ATmega328P processor, the Arduino Uno R3 board is likely to score as the most popular Arduino family member so far, and this workhorse has been with us for many years. Recently, the new Arduino Uno R4 was released, based on a 48-MHz, 32-bit Cortex-M4 processor with a huge amount of SRAM and flash memory. Additionally, a higher-precision ADC and a new DAC are added to the design. The new board also supports the CAN Bus with an interface.
Two versions of the board are available: Uno R4 Minima, and Uno R4 WiFi. This book is about using these new boards to develop many different and interesting projects with just a handful of parts and external modules, which are available as a kit from Elektor. All projects described in the book have been fully tested on the Uno R4 Minima or the Uno R4 WiFi board, as appropriate.
The project topics include the reading, control, and driving of many components and modules in the kit as well as on the relevant Uno R4 board, including
LEDs
7-segment displays (using timer interrupts)
LCDs
Sensors
RFID Reader
4×4 Keypad
Real-time clock (RTC)
Joystick
8×8 LED matrix
Motors
DAC (Digital-to-analog converter)
LED matrix
WiFi connectivity
Serial UART
CAN bus
Infrared controller and receiver
Simulators
? all in creative and educational ways with the project operation and associated software explained in great detail.
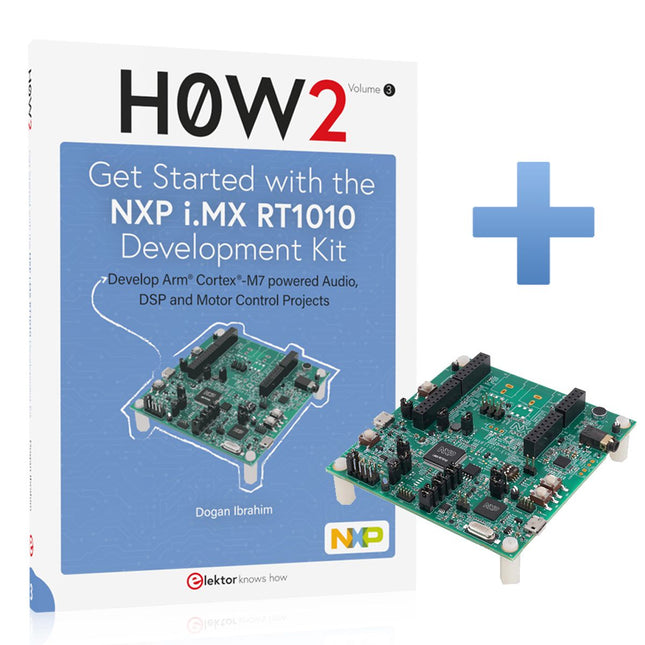
Développez des projets audio, DSP et de contrôle de moteur animés par Arm Cortex-M7Au cœur du kit de développement MIMXRT1010-EVK de NXP Semiconductors se trouve le microcontrôleur i.MX RT1010 Crossover doté d'un cœur Arm Cortex-M7 capable d'exécuter des applications DSP gourmandes en énergie et en mémoire. L'environnement de développement (IDE) populaire et gratuit MCUXpresso permet de créer des logiciels pour la carte, tandis qu'un puissant SDK accélère le développement des applications. Le kit de développement offre une grande connectivité grâce à ses connecteurs d'extension (compatible Arduino UNO), son entrée/sortie audio (prise casque et haut-parleur externe) et son microphone.Le kit offre plusieurs sondes de débogage embarquées, ce qui vous permet de déboguer vos programmes en communiquant directement avec le microcontrôleur. Avec le débogueur, vous pouvez parcourir un programme pas à pas, insérer des points d'arrêt, visualiser et modifier des variables, etc. À l'aide de l'IDE MCUXpresso et le SDK, de nombreux projets (fonctionnels et testés) sont développés dans le livre, mettant en œuvre des périphériques et des composants externes, y compris : LED et LCDsConvertisseur analogique-numériqueProjets I²CProjets SPIProjets UARTContrôle de moteurAudio et traitement de signal numérique (DSP)Cette offre groupée contient :Le livre Get Started with the NXP i.MX RT1010 Development Kit (prix normal : 34,95 €)Le kit de développement NXP MIMXRT1010-EVK (prix normal : 49,95 €)
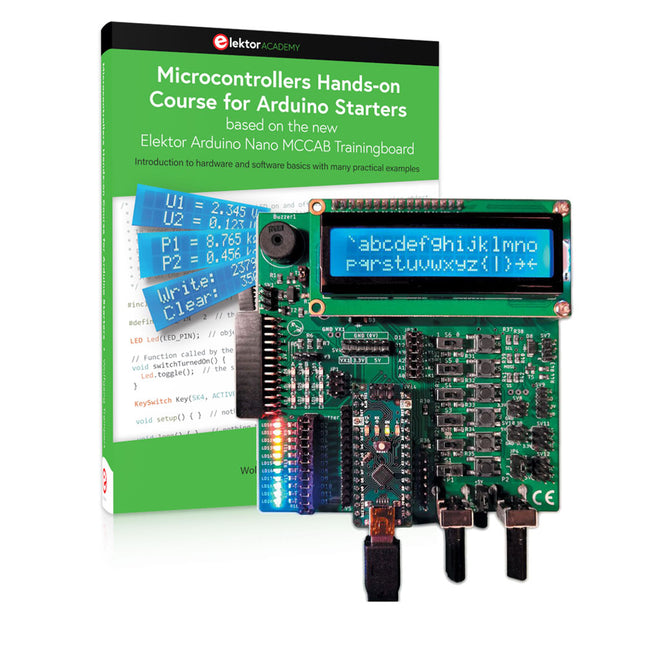
Réalisez vos propres projets avec la carte d'apprentissage Elektor Arduino Nano MCCABLe microcontrôleur est probablement le sous-domaine le plus fascinant de l'électronique. Grâce à la multitude de fonctions qu'il combine sur sa puce, il constitue un outil universel permettant aux développeurs de réaliser leurs projets. Pratiquement tous les appareils d'usage quotidien sont aujourd'hui dotés d'un microcontrôleur. Cependant, pour un débutant en électronique, réaliser ses propres idées avec un microcontrôleur est resté jusqu'à présent une chimère en raison de sa complexité. Le concept Arduino a largement simplifié l'utilisation des microcontrôleurs, de sorte que même les débutant peuvent désormais réaliser leurs propres idées électroniques avec un microcontrôleur.Livre et matériel dans un pack : apprendre par la pratiqueCe livre, qui est inclus dans le pack, montre comment vous pouvez réaliser vos propres projets avec un microcontrôleur, même sans grande expérience en électronique et en langages de programmation. Il s'agit d'un cours pratique sur les microcontrôleurs pour débutants, car après un aperçu des éléments internes du microcontrôleur et une introduction au langage de programmation C, le cours se concentre sur les exercices pratiques. Le lecteur acquiert les connaissances nécessaires en apprenant par la pratique : dans la vaste section pratique comprenant 12 projets et 46 exercices, ce qui est appris dans la première partie du livre est étayé par de nombreux exemples. Les exercices sont structurés de telle sorte que l'utilisateur se voit confier une tâche à résoudre en utilisant les connaissances acquises dans la partie théorique du livre. Chaque exercice est suivi d'un exemple de solution qui est expliqué et commenté en détail, ce qui aide l'utilisateur à résoudre les problèmes et à les comparer avec sa propre solution.Arduino IDEL'Arduino IDE est un environnement de développement logiciel qui peut être téléchargé gratuitement sur votre PC et qui contient l'ensemble des logiciels nécessaires à la réalisation de vos propres projets de microcontrôleurs. Vous écrivez vos programmes (sketch) avec l'éditeur de l'IDE dans le langage de programmation C. Vous les traduisez en bits et octets que le microcontrôleur comprend à l'aide du compilateur intégré à l'IDE Arduino, puis vous les chargez dans la mémoire du microcontrôleur sur la carte d'apprentissage Elektor Arduino MCCAB Nano à l'aide d'un câble USB.Interroger ou contrôler des capteurs, des moteurs ou des ensembles externesOutre un module microcontrôleur Arduino Nano, la carte d'apprentissage Elektor Arduino Nano MCCAB contient tous les composants nécessaires aux exercices, tels que des diodes électroluminescentes, des interrupteurs, des boutons-poussoirs, des émetteurs de signaux acoustiques, etc. Ce système de formation à microcontrôleur permet également d'interroger ou de commander des capteurs, des moteurs ou des assemblages externes.Spécifications (Carte de formation Arduino Nano MCCAB)Alimentation électriqueVia la connexion USB du PC connecté ou un bloc d'alimentation externe (non inclus)Tension de fonctionnement+5 VccTension d'entréeToutes les entrées0 V to +5 VVX1 and VX2+8 V to +12 V (uniquement en cas d'utilisation d'une alimentation externe)Périphérie du matérielLCD2x16 caractèresPotentiomètre P1 & P2JP3 : sélection de la tension de fonctionnement de P1 et P2DistributeurSV4 : Distributeur pour les tensions de fonctionnementSV5, SV6 : Distributeur pour les entrées/sorties du microcontrôleurInterrupteurs et boutonsBouton RESET sur le module Arduino Nano 6x interrupteurs à bouton poussoir K1 ... K6 6x interrupteurs à glissière S1 ... S6 JP2 : Connexion des interrupteurs avec les entrées du microcontrôleurBuzzerBuzzer piézo Buzzer1 avec cavalier sur JP6Voyants lumineux11 x LED : Indicateur d'état des entrées/sorties LED L sur le module Arduino Nano, connectée au GPIO D13 JP6 : Connexion des LED LD10 ... LD20 avec les GPIO D2 ... D12Interfaces sérieSPI ET I²CJP4 : Sélection du signal à la broche X du connecteur SPI SV12 SV9 à SV12 : interface SPI (3,3 V/5 V) ou interface I²CSortie de commutation pour les appareils externesSV1, SV7 : sortie de commutation (maximum +24 V/160 mA, alimentation externe) SV2 : 2x13 connecteurs pour la connexion de modules externesMatrice de 3x3 LED(9 LED rouges)SV3 : Colonnes de la matrice LED 3x3 (sorties D6 ... D8) JP1 : Connexion des lignes avec les GPIOs D3 ... D5LogicielBibliothèque MCCABLibContrôle des composants matériels (interrupteurs, boutons, DEL, matrice de DEL 3x3, buzzer) sur la carte de formation MCCAB.Température de fonctionnementJusqu'à +40 °CDimensions100 x 100 x 20 mmSpécifications (Arduino Nano)MicrocontrôleurATmega328PArchitectureAVRTension de fonctionnement5 VMémoire flash32 Ko, dont 2 Ko utilisés par le chargeur de démarrageSRAM2 KBVitesse d'horloge16 MHzConnecteurs d'entrée analogique8EEPROM1 KBCourant continu par connecteur d'E/S40 mA sur un connecteur d'E/S, maximum total de 200 mA sur l'ensemble des connecteursTension d'entrée7-12 VConnecteurs E/S numériques22 (dont 6 PWM)Sortie PWMt6Consommation électrique19 mADimensions18 x 45 mmPoids7 gInclus1x Elektor Arduino Nano Training Board MCCAB1x Livre 'Microcontrollers Hands-on Course for Arduino Starters'1x Arduino Nano
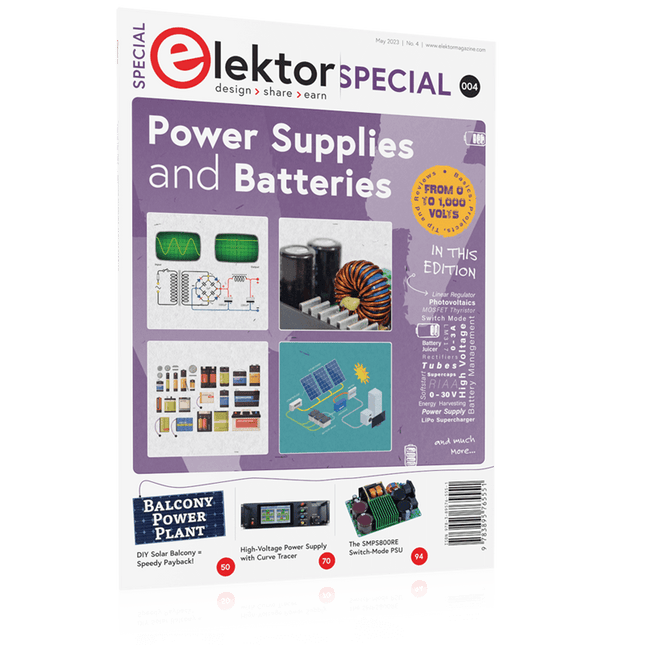
Quelles que soient les méthodes ou même les moyens financiers dont vous disposez pour faire fonctionner vos circuits, l'alimentation électrique doit figurer en bonne place, voire numéro un, dans vos considérations. Le bloc de conception simplement appelé « alimentation » est extrêmement sous-estimé, tant dans la création que dans la réparation de produits électroniques. Pourtant, le « PSU » présente une énorme diversité et se présente sous des formes très différentes comme AC/DC, générateur, batterie (rechargeable ou non), panneau photovoltaïque, de table, linéaire ou à découpage, pour n'en citer que quelques-uns. Les plages de sortie sont également stupéfiantes, du nano-ampère au kiloampère et il en va de même pour les tensions.
Ce spécial couvre les caractéristiques et les aspects de conception des alimentations.
Contenu
Les bases
Gestion de la batterie Ce qu'il faut savoir lors de l'utilisation de piles (au lithium).
Alimentation à tension fixe utilisant des régulateurs linéaires Le meilleur résultat juste après les piles.
Récupération d'énergie lumineuse Un petit panneau solaire est utilisé dans un projet de récupération d'énergie pour gérer et charger quatre cellules AAA.
Conception de l'adaptateur alimenté par secteur Circuits de base et conseils pour transformateurs, redressement, filtrage et stabilisation.
Démarrage progressif LM317 L'impulsion de courant d'appel élevée doit être évitée.
Redresseurs contrôlables Quelques suggestions pour maintenir la perte de puissance dans le régulateur linéaire aussi faible que possible.
Composants
Feuille de travail : Les régulateurs de tension LM117 / LM217 / LM317
Supercapsules Basse tension mais beaucoup de courant… ou pas ?
Commentaires
Kit d'alimentation de table JOY-iT RD6006
Charge électronique CC programmable Siglent SDL1020X
Projets
Centrale électrique du balcon Balcon solaire DIY = retour sur investissement rapide !
Kit de compresseur LiPo DIY De l'artisanat au marché de masse
Thyristor MOSFET à double anode Plus rapide et moins coûteux que l'ancien SCR
Presse-agrumes à batterie Ne jetez pas, pressez !
Alimentation haute tension avec traceur de courbe Générez des tensions jusqu'à 400 V et tracez des courbes caractéristiques pour les vannes et les transistors
Alimentation haute tension pour RIAA Pour préamplis à lampes RIAA et autres applications.
MicroApprovisionnement Une alimentation de laboratoire pour les appareils connectés
Alimentation fantôme utilisant des condensateurs commutés Tripleur de tension utilisant trois circuits intégrés
L'alimentation à découpage SMPS800RE pour l'Elektor Fortissimo-100 Fiable, léger et abordable
Démarrage progressif pour bloc d'alimentation Soyez gentil avec votre alimentation – et sa charge
UniLab 2 Alimentation de laboratoire compacte à découpage 0-30 V, 3 A
Conseils
Démarrage progressif pour les régulateurs à découpage abaisseurs
Limite de courant de perte faible
Batterie externe Surprise
Un terrain virtuel
Mainteneur de batterie
Déchargeur de batterie
Connexion des régulateurs de tension en parallèle
Un trajet rapide du concept au projet
Le cœur du livre explique l'utilisation du Raspberry Pi Zero 2 W exécutant le langage de programmation Python, toujours en termes simples et soutenu par de nombreux exemples de projets testés et fonctionnels. De la part du lecteur, une connaissance du langage de programmation Python et une certaine expérience avec l'un des ordinateurs Raspberry Pi s'avéreront utiles. Bien qu'une expérience préalable en électronique ne soit pas requise, une certaine connaissance de l'électronique de base est bénéfique, en particulier lorsque vous vous aventurez à modifier les projets pour vos propres applications. Plus de 30 projets matériels testés et fonctionnels sont présentés dans le livre, couvrant l'utilisation du Wi-Fi, la communication avec les smartphones et avec un ordinateur Raspberry Pi Pico W. De plus, il existe des projets Bluetooth incluant une communication élémentaire avec les smartphones et avec le populaire Arduino Uno. Le Wi-Fi et le Bluetooth sont des fonctionnalités clés du Raspberry Pi Zero 2 W.
Certains des sujets abordés dans le livre sont :
Installation du système d'exploitation Raspberry Pi sur une carte SD
Création et exécution de programme Python sur le Raspberry Pi Zero 2 W
Exemples logiciels uniquement de Python exécutés sur le Raspberry Pi Zero 2 W
Projets basés sur le matériel, notamment l'interface LCD et Sense HAT
Projets basés sur UDP et TCP Wi-Fi pour la communication avec les smartphones
Projet basé sur UDP pour la communication Raspberry Pi Pico W
Projet de serveur Web basé sur Flask
Stockage dans le cloud des données capturées sur la température, l'humidité et la pression
Projets TFT
Projets Node-RED
Interface avec Alexa
Projets MQTT
Projets basés sur Bluetooth pour les communications smartphone et Arduino Uno
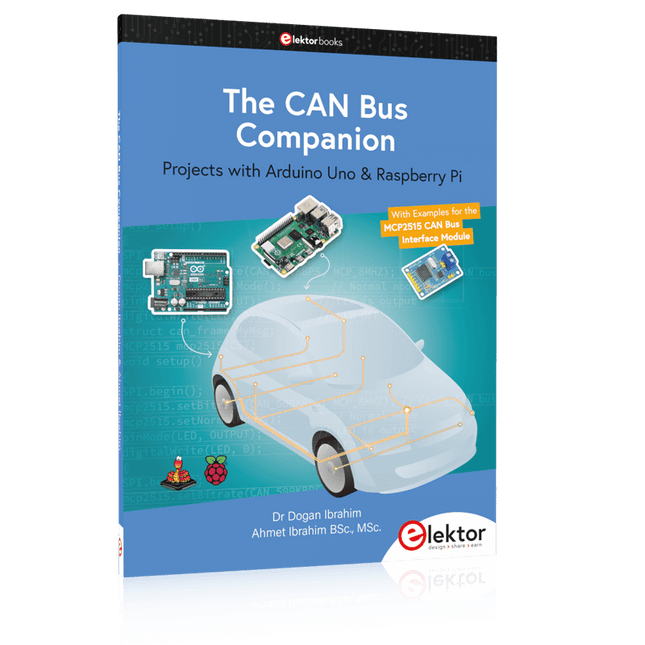
Projets avec Arduino Uno et Raspberry Pi avec exemples pour le module d'interface de bus CAN MCP2515
Ce livre détaille l'utilisation de l'Arduino Uno et du Raspberry Pi 4 dans des projets pratiques basés sur le bus CAN. L'utilisation de l'Arduino Uno ou du Raspberry Pi avec des modules d'interface de bus CAN disponibles dans le commerce facilite considérablement le développement, le débogage et le test de projets basés sur le bus CAN.
Ce livre est écrit pour les étudiants, les ingénieurs en exercice, les passionnés et pour tous ceux qui souhaitent en savoir plus sur le bus CAN et ses applications. Le livre suppose que le lecteur possède des connaissances de base en électronique. La connaissance des langages de programmation C et Python et la programmation de l'Arduino Uno à l'aide de son IDE et du Raspberry Pi seront utiles, surtout si le lecteur a l'intention de développer des projets basés sur un microcontrôleur utilisant le bus CAN. Le livre devrait être une source utile de matériel de référence pour toute personne souhaitant trouver des réponses à des questions telles que :
Quels systèmes de bus sont disponibles pour l’industrie automobile ?
Quel est le principe du bus CAN ?
Comment puis-je créer un bus CAN physique ?
Quels types de trames (ou paquets de données) sont disponibles dans un système de bus CAN ?
Comment détecter les erreurs dans un système de bus CAN et quelle est la dépendance d'un système de bus CAN ?
Quels types de contrôleurs de bus CAN existe-t-il ?
Comment utiliser le contrôleur de bus CAN MCP2515 ?
Comment créer des projets de bus CAN basés sur Arduino Uno à 2 nœuds ?
Comment créer des projets de bus CAN basés sur Arduino Uno à 3 nœuds ?
Comment définir les masques d'acceptation et les filtres d'acceptation ?
Comment analyser les données sur le bus CAN ?
Comment créer des projets de bus CAN basés sur Raspberry Pi à 2 nœuds ?
Comment créer des projets de bus CAN basés sur Raspberry Pi à 3 nœuds ?
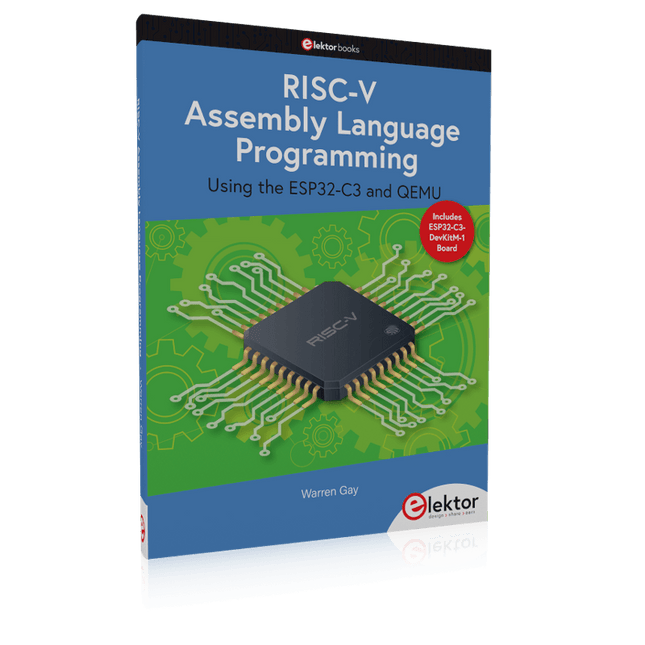
With the availability of free and open source C/C++ compilers today, you might wonder why someone would be interested in assembler language. What is so compelling about the RISC-V Instruction Set Architecture (ISA)? How does RISC-V differ from existing architectures? And most importantly, how do we gain experience with the RISC-V without a major investment? Is there affordable hardware available?
The availability of the Espressif ESP32-C3 chip provides a way to get hands-on experience with RISC-V. The open sourced QEMU emulator adds a 64-bit experience in RISC-V under Linux. These are just two ways for the student and enthusiast alike to explore RISC-V in this book.
The projects in this book are boiled down to the barest essentials to keep the assembly language concepts clear and simple. In this manner you will have “aha!” moments rather than puzzling about something difficult. The focus in this book is about learning how to write RISC-V assembly language code without getting bogged down. As you work your way through this tutorial, you’ll build up small demonstration programs to be run and tested. Often the result is some simple printed messages to prove a concept. Once you’ve mastered these basic concepts, you will be well equipped to apply assembly language in larger projects.
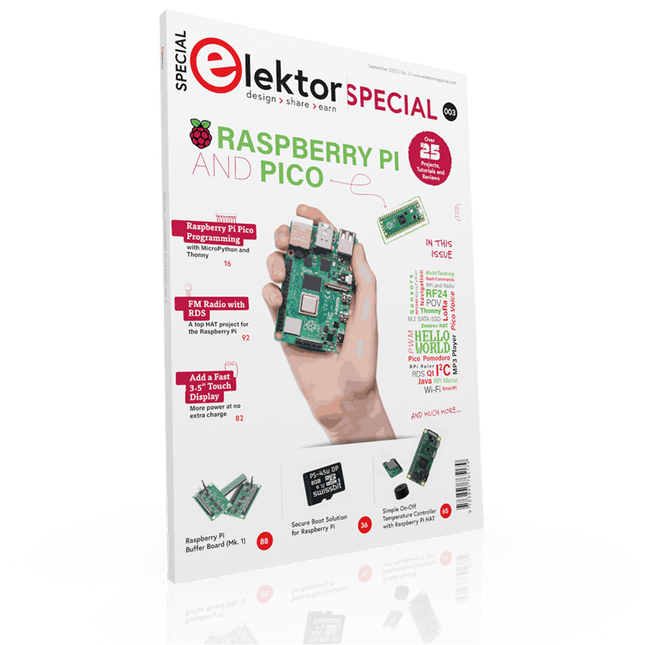
Contenu
Projets
PicoVoix Aliénation vocale et effets sonores avec le Raspberry Pi Pico
Navigation avec retour de vibrations
Affichage du point de vue
Modulation de largeur d'impulsion (PWM) avec le Raspberry Pi Pico
Wi-Fi avec le Raspberry Pi Pico
« Hello World » du Raspberry Pi Pico et du RP2040 Un aperçu du premier microcontrôleur de la Raspberry Pi Foundation
Contrôleur de température marche-arrêt simple avec Raspberry Pi HAT
Multitâche avec le Raspberry Pi Vitrine : un contrôleur de feux tricolores
Le gadget règle Raspberry Pi Amusez-vous avec un capteur de temps de vol
Carte tampon Raspberry Pi (Mk. 1) Ne faites plus jamais exploser les E/S
Radio FM avec RDS Un projet top HAT pour le Raspberry Pi
LoRa avec le Raspberry Pi Pico Amusez-vous avec MicroPython !
Tutoriels
Qt pour le Raspberry Pi
Programmation Raspberry Pi Pico avec MicroPython et Thonny
Pile complète Raspberry Pi RPi et RF24 au cœur d'un réseau de capteurs
Aide-mémoire pour la commande Bash du Raspberry Pi
Communauté
Java sur le Raspberry Pi Un entretien avec Frank Delporte
Commentaires
Présentation des nouveaux Raspberry Pi Pico W, H et WH
Solution de démarrage sécurisé pour Raspberry Pi Sécurité de rénovation à un prix raisonnable
Critique : SmartPi – Extension de compteur intelligent pour Raspberry Pi
Test : Le chapeau Enviro+ Raspberry Pi Mesurer les données environnementales avec Raspberry Pi et HAT Enviro+
Test : Découvrez le Raspberry Pi 4 Tout nouveau mais toujours bon ?
Raspberry Pi obtient un écran tactile rapide de 3,5 pouces Plus de puissance sans frais supplémentaires
Lancement du livre : Raspberry Pi pour les radioamateurs
Caractéristiques
Carnet à spirales A4 (210 x 297 mm) à grille carrée avec planches à pain en filigrane
158 pages, couvertures de cartes.
Le livre comprend également
Aide-mémoire pour la programmation des microcontrôleurs
Circuits et calculs courants
Brochages
Codes couleurs des résistances
Tableau ASCII