Produits
-

Raspberry Pi Foundation Kit de démarrage officiel Raspberry Pi 4 (4 Go)
Économisez 10 €, en achetant ce kit de démarrage, par rapport à l'achat de ces produits séparément ! Ce kit de démarrage spécial Raspberry Pi 4, composé de produits de qualité, contient tout ce dont vous avez besoin pour utiliser immédiatement le nano-ordinateur le plus populaire au monde comme outil multimédia et pour la programmation et l‘automatisation. Contenu du kit Raspberry Pi 4 B (4 Go de RAM)Le Raspberry Pi 4 est un système informatique complet dans un petit boîtier qui offre des performances multimédia et de bureau comparables à celles d'un système PC x86 d'entrée de gamme. Broadcom BCM2711 SoC 64-bit quad-core ARM Cortex-A72 (1,5 GHz) VideoCore VI @ 500 MHz 4 Go LPDDR4 SDRAM Gigabit Ethernet 802.11ac Wi-Fi Bluetooth 5.0 2x USB 3.0, 2x USB 2.0 and 1x USB-C (pour l'alimentation) 2x micro-HDMI (up to 4Kp60) 1x MicroSD (stockage) Alimentation électrique officielle de l'UE (5,1 V, 3 A) pour Raspberry Pi 4 (blanc)L'alimentation officielle Raspberry Pi USB-C (15,3 W) est conçue spécifiquement pour alimenter le Raspberry Pi 4. Carte microSD (32 GB, Class 10) avec adaptateur SD (pré-installé avec NOOBS)Cette carte microSD avec NOOBS (New Out Of Box Software) préinstallé constitue un gestionnaire d'installation de système d'exploitation facile à utiliser pour le Raspberry Pi. Boîtier officiel pour Raspberry Pi 4 (blanc/rouge)This well-designed case protects the Raspberry Pi 4. Câble HDMI officiel pour Raspberry Pi 4 (blanc, 1 m)Le câble officiel Raspberry Pi micro-HDMI à HDMI (A/M) (blanc, 1 m) est conçu pour le Raspberry Pi 4. Set de Heatsink pour Raspberry PiThese aluminum heatsinks cool the board and prevent the Raspberry Pi from overheating.
-

Raspberry Pi Foundation Kit de démarrage officiel Raspberry Pi 4 (8 Go)
Économisez 10 €, en achetant ce kit de démarrage, par rapport à l'achat de ces produits séparément ! Ce kit de démarrage spécial Raspberry Pi 4, composé de produits de qualité, contient tout ce dont vous avez besoin pour utiliser immédiatement le nano-ordinateur le plus populaire au monde comme outil multimédia et pour la programmation et l‘automatisation. Contenu du kit Raspberry Pi 4 B (8 Go de RAM)Le Raspberry Pi 4 est un système informatique complet dans un petit boîtier qui offre des performances multimédia et de bureau comparables à celles d'un système PC x86 d'entrée de gamme. Broadcom BCM2711 SoC 64-bit quad-core ARM Cortex-A72 (1,5 GHz) VideoCore VI @ 500 MHz 8 Go LPDDR4 SDRAM Gigabit Ethernet 802.11ac Wi-Fi Bluetooth 5.0 2x USB 3.0, 2x USB 2.0 and 1x USB-C (pour l'alimentation) 2x micro-HDMI (up to 4Kp60) 1x MicroSD (stockage) Alimentation électrique officielle de l'UE (5,1 V, 3 A) pour Raspberry Pi 4 (blanc)L'alimentation officielle Raspberry Pi USB-C (15,3 W) est conçue spécifiquement pour alimenter le Raspberry Pi 4. Carte microSD (32 GB, Class 10) avec adaptateur SD (pré-installé avec NOOBS)Cette carte microSD avec NOOBS (New Out Of Box Software) préinstallé constitue un gestionnaire d'installation de système d'exploitation facile à utiliser pour le Raspberry Pi. Boîtier officiel pour Raspberry Pi 4 (blanc/rouge)This well-designed case protects the Raspberry Pi 4. Câble HDMI officiel pour Raspberry Pi 4 (blanc, 1 m)Le câble officiel Raspberry Pi micro-HDMI à HDMI (A/M) (blanc, 1 m) est conçu pour le Raspberry Pi 4. Set de Heatsink pour Raspberry PiThese aluminum heatsinks cool the board and prevent the Raspberry Pi from overheating.
-

Raspberry Pi Foundation Raspberry Pi 4 B (1 Go de RAM)
Le Raspberry Pi 4 B est trois fois plus rapide que le modèle 3 B+ précédent, et il offre des vitesses d’affichage quatre fois plus rapides que celles d’un PC à microprocesseur x86 d’entrée de gamme. Caractéristiques Processeur quadricœur 64bits à haute performance Prise en charge de deux écrans 4K reliés aux ports micro-HDMI Décodage vidéo matériel jusqu’à H.265 (4K @60 i/s) 1 Go de RAM Wi-Fi bibande 2,4/5 GHz Bluetooth 5.0 Gigabit Ethernet USB 3.0 Capacité PoE (par carte d’extension HAT PoE) Caractéristiques techniques SoC Broadcom BCM2711 CPU 64-bit ARM Cortex-A72 (4x 1.5 GHz) GPU Broadcom VideoCore VI RAM 1 GB LPDDR4 Wireless LAN 2.4 GHz and 5 GHz IEEE 802.11b/g/n/ac wireless LAN Bluetooth Bluetooth 5.0, BLE Ethernet Gigabit Ethernet USB 2x USB-A 3.02x USB-A 2.0 GPIO Standard 40-pin GPIO header (fully backwards-compatible with previous boards) Video 2x micro-HDMI ports (up to 4Kp60 supported)2-lane MIPI DSI port (display)2-lane MIPI CSI port (camera) Audio 4-pole stereo audio and composite video port Multimedia H.265 (4Kp60 decode)H.264 (1080p60 decode, 1080p30 encode)OpenGL ES, 3.0 graphics SD card microSD (for operating system and storage) Power 5 V | 3 A (via USB-C)5 V | 3 A (via GPIO)Power over Ethernet (PoE) enabled – (requires separate PoE HAT) Raspberry Pi 4 B 1 Go de RAM 4 Go de RAM 8 Go de RAM
-

Raspberry Pi Foundation Raspberry Pi 4 B (2 Go de RAM)
Le Raspberry Pi 4 B est trois fois plus rapide que le modèle 3 B+ précédent, et il offre des vitesses d’affichage quatre fois plus rapides que celles d’un PC à microprocesseur x86 d’entrée de gamme. Caractéristiques Processeur quadricœur 64bits à haute performance Prise en charge de deux écrans 4K reliés aux ports micro-HDMI Décodage vidéo matériel jusqu’à H.265 (4K @60 i/s) 2 Go de RAM Wi-Fi bibande 2,4/5 GHz Bluetooth 5.0 Gigabit Ethernet USB 3.0 Capacité PoE (par carte d’extension HAT PoE) Caractéristiques techniques SoC Broadcom BCM2711 CPU 64-bit ARM Cortex-A72 (4x 1.5 GHz) GPU Broadcom VideoCore VI RAM 2 GB LPDDR4 Wireless LAN 2.4 GHz and 5 GHz IEEE 802.11b/g/n/ac wireless LAN Bluetooth Bluetooth 5.0, BLE Ethernet Gigabit Ethernet USB 2x USB-A 3.02x USB-A 2.0 GPIO Standard 40-pin GPIO header (fully backwards-compatible with previous boards) Video 2x micro-HDMI ports (up to 4Kp60 supported)2-lane MIPI DSI port (display)2-lane MIPI CSI port (camera) Audio 4-pole stereo audio and composite video port Multimedia H.265 (4Kp60 decode)H.264 (1080p60 decode, 1080p30 encode)OpenGL ES, 3.0 graphics SD card microSD (for operating system and storage) Power 5 V | 3 A (via USB-C)5 V | 3 A (via GPIO)Power over Ethernet (PoE) enabled – (requires separate PoE HAT) Raspberry Pi 4 B 1 Go de RAM 4 Go de RAM 8 Go de RAM
-

Raspberry Pi Foundation Raspberry Pi 4 B (4 Go de RAM)
Le Raspberry Pi 4 B est trois fois plus rapide que le modèle 3 B+ précédent, et il offre des vitesses d’affichage quatre fois plus rapides que celles d’un PC à microprocesseur x86 d’entrée de gamme. Caractéristiques Processeur quadricœur 64bits à haute performance Prise en charge de deux écrans 4K reliés aux ports micro-HDMI Décodage vidéo matériel jusqu’à H.265 (4K @60 i/s) 4 Go de RAM Wi-Fi bibande 2,4/5 GHz Bluetooth 5.0 Gigabit Ethernet USB 3.0 Capacité PoE (par carte d’extension HAT PoE) Caractéristiques techniques SoC Broadcom BCM2711 CPU 64-bit ARM Cortex-A72 (4x 1.5 GHz) GPU Broadcom VideoCore VI RAM 4 GB LPDDR4 Wireless LAN 2.4 GHz and 5 GHz IEEE 802.11b/g/n/ac wireless LAN Bluetooth Bluetooth 5.0, BLE Ethernet Gigabit Ethernet USB 2x USB-A 3.02x USB-A 2.0 GPIO Standard 40-pin GPIO header (fully backwards-compatible with previous boards) Video 2x micro-HDMI ports (up to 4Kp60 supported)2-lane MIPI DSI port (display)2-lane MIPI CSI port (camera) Audio 4-pole stereo audio and composite video port Multimedia H.265 (4Kp60 decode)H.264 (1080p60 decode, 1080p30 encode)OpenGL ES, 3.0 graphics SD card microSD (for operating system and storage) Power 5 V | 3 A (via USB-C)5 V | 3 A (via GPIO)Power over Ethernet (PoE) enabled – (requires separate PoE HAT) Raspberry Pi 4 B 1 Go de RAM 4 Go de RAM 8 Go de RAM
-
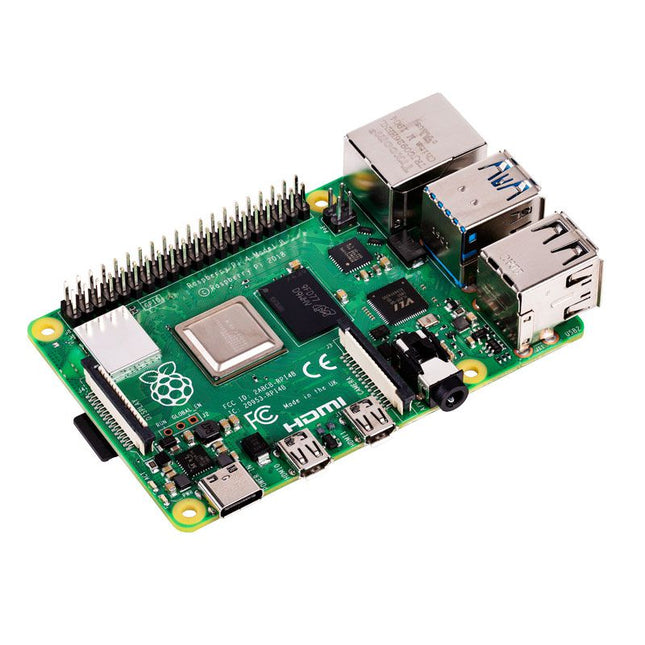
Raspberry Pi Foundation Raspberry Pi 4 B (8 Go de RAM)
Le Raspberry Pi 4 B est trois fois plus rapide que le modèle 3B+ précédent, et il offre des vitesses d’affichage quatre fois plus rapides que celles d’un PC à microprocesseur x86 d’entrée de gamme. Caractéristiques Processeur quadricœur 64bits à haute performance Prise en charge de deux écrans 4K reliés aux ports micro-HDMI Décodage vidéo matériel jusqu’à H.265 (4K @60 i/s) 2, 4 ou 8 Go de RAM Wi-Fi bibande 2,4/5 GHz Bluetooth 5.0 Gigabit Ethernet USB 3.0 Capacité PoE (par carte d’extension HAT PoE) Caractéristiques techniques SoC Broadcom BCM2711 CPU 64-bit ARM Cortex-A72 (4x 1.5 GHz) GPU Broadcom VideoCore VI RAM Up to 8 GB LPDDR4 Wireless LAN 2.4 GHz and 5 GHz IEEE 802.11b/g/n/ac wireless LAN Bluetooth Bluetooth 5.0, BLE Ethernet Gigabit Ethernet USB 2x USB-A 3.02x USB-A 2.0 GPIO Standard 40-pin GPIO header (fully backwards-compatible with previous boards) Video 2x micro-HDMI ports (up to 4Kp60 supported)2-lane MIPI DSI port (display)2-lane MIPI CSI port (camera) Audio 4-pole stereo audio and composite video port Multimedia H.265 (4Kp60 decode)H.264 (1080p60 decode, 1080p30 encode)OpenGL ES, 3.0 graphics SD card microSD (for operating system and storage) Power 5 V | 3 A (via USB-C)5 V | 3 A (via GPIO)Power over Ethernet (PoE) enabled – (requires separate PoE HAT) Raspberry Pi 4 B 1 Go de RAM 2 Go de RAM 4 Go de RAM
-
Elektor Digital Raspberry Pi 4 OR 5 AND Pico (E-book)
Cool Projects for Test, Measurement, and Control The Raspberry Pi has dominated the maker scene for many years. Freely accessible I/O pins have made it one of the most popular processor boards of all time. However, the classic Raspberry Pi has no analog inputs. Direct measurement of analog values is therefore not possible. Consequently, photodiodes, NTCs, Hall sensors, etc. cannot be read directly. In addition, the pins are connected directly to the exposed contacts, i.e. without a driver or protection circuit. This can quickly destroy the central controller and thus the entire Raspberry Pi. These problems can be elegantly solved with the Pico. As a front-end, it can easily handle a wide range of measurement tasks. In addition, the Pico is much cheaper than a classic Raspberry Pi 4 or 5. If a faulty circuit leads to the destruction of the Pico, this is relatively easy to handle. This makes the combination of a classic Raspberry Pi 4 or 5 and the Pico an ideal pair. The book introduces the broad and highly topical field of modern controller technology using the combined force of a Raspberry Pi 4 or 5 and a Raspberry Pi Pico. In addition to a detailed introduction to the operation and functionality of the controller boards themselves, the book also focuses on data acquisition and processing with digital processors. Especially the combination of both systems offers a wide range of interesting possibilities. Some practical projects from the contents: USB between Raspberry Pi 4 or 5 and Pico I²C Communication and Pico as an I²C device Voltmeter and Computer Thermometer Pico W as a Web Server and WLAN Scanner Frequency Meters and Generators OLED Displays on Raspberry Pi 4 or 5 and Pico Energy Saving Monitor Which Astronauts are in Orbit? Mini Monitor for Current Bitcoin Exchange Rate
€ 32,95
Membres : € 29,66
-

Raspberry Pi Foundation Raspberry Pi 400 (FR)
Le Raspberry Pi 400 offre un processeur quad-core 64 bits, 4 Go de RAM, un réseau sans fil, une sortie double écran, une lecture vidéo 4K et un connecteur GPIO à 40 broches. Il s'agit d'un ordinateur puissant et compact intégré à un clavier portable. Caractéristiques Processor Broadcom BCM2711 quad-core Cortex-A72 (ARM v8) 64-bit SoC @ 1.8 GHz RAM 4 GB LPDDR4-3200 Connectivity Dual-band (2.4 GHz and 5.0 GHz) IEEE 802.11b/g/n/ac wireless LANBluetooth 5.0, BLEGigabit Ethernet2 × USB 3.0 and 1 × USB 2.0 ports GPIO Horizontal 40-pin GPIO header Video & Sound 2 × micro HDMI ports (supports up to 4Kp60) Multimedia H.265 (4Kp60 decode)H.264 (1080p60 decode, 1080p30 encode)OpenGL ES 3.0 graphics SD card support MicroSD card slot for operating system and data storage Keyboard FR keyboard (AZERTY) Power 5 V DC via USB connector Operating temperature 0°C to +40°C Dimensions 286 × 122 × 23 mm (maximum)
-

Raspberry Pi Foundation Raspberry Pi 45 W USB-C Alimentation
L'alimentation USB-C 45 W pour Raspberry Pi est idéale pour alimenter les produits Raspberry Pi compatibles USB-C. Elle est particulièrement adaptée aux utilisateurs de Raspberry Pi 5 souhaitant alimenter des périphériques haute puissance tels que des disques durs et des SSD. Offrant jusqu'à 5,1 V/5 A, elle prend en charge la négociation USB PD (Power Delivery), permettant au Raspberry Pi 5 de sélectionner automatiquement le profil d'alimentation optimal. Cette fonctionnalité permet au Raspberry Pi 5 d'augmenter la limite de courant USB de 600 mA par défaut à 1,6 A, fournissant ainsi une alimentation supplémentaire aux périphériques connectés via ses quatre ports USB-A. Grâce à sa gamme complète de profils d'alimentation intégrés, l'alimentation USB-C 45 W du Raspberry Pi est également une excellente option pour alimenter des appareils tiers compatibles PD, tels que les smartphones, les tablettes et les ordinateurs portables. Les profils disponibles incluent 9,0 V/5,0 A, 12,0 V/3,75 A, 15,0 V/3,0 A et 20,0 V/2,25 A, tous délivrant une puissance maximale de 45 W. Spécifications Entrée 100-240 V CA Sortie 5,1 V/5,0 A, 9,0 V/5,0 A, 12,0 V/3,75 A, 15,0 V/3,0 A, 20,0 V/2,25 A (Power Delivery) Connecteur USB-C Câble 1,5 m, 17 AWG (blanc) Région UE Téléchargements Datasheet
-

Raspberry Pi Foundation Raspberry Pi 5 (16 Go de RAM)
Le Raspberry Pi 5 offre plus de performances que jamais. Grâce à un CPU, un GPU et une RAM plus rapides, le Raspberry Pi 5 est jusqu'à 3 fois plus rapide que son prédécesseur déjà rapide. En plus de l'augmentation de la vitesse, le Raspberry Pi 5 (qui intègre la nouvelle puce Raspberry Pi RP1 pour des capacités d'E/S avancées) offre également pour la première fois les fonctionnalités suivantes : RTC, un bouton marche/arrêt et une interface PCIe. Caractéristiques Processeur ARM Cortex-A76 quadricœur 64 bits (2,4 GHz) GPU VideoCore VII (800 MHz) 16 Go de RAM LPDDR4X (4267 MHz) Contrôleur d'E/S Raspberry Pi RP1 Horloge temps réel (RTC) Bouton marche/arrêt PCIe 2.0 Connecteur UART Connecteur de ventilateur Spécifications SoC Broadcom BCM2712 CPU ARM Cortex-A76 (ARM v8) 64 bits Fréquence d'horloge 4x 2,4 GHz GPU VideoCore VII (800 MHz) RAM 16 Go de RAM LPDDR4X (4267 MHz) WiFi IEEE 802.11b/g/n/ac (2,4 GHz/5 GHz) Bluetooth Bluetooth 5.0, BLE Ethernet Gigabit Ethernet (avec support PoE+) USB 2x USB-A 3.0 (5 GBit/s)2x USB-A 2.0 PCI Express 1x PCIe 2.0 GPIO Embase GPIO standard à 40 broches Vidéo 2x ports micro-HDMI (4K60)2x MIPI à 4 voies (DSI/CSI) Multimédia H.265 (décodage 4K60)OpenGL ES 3.1, Vulkan 1.2 Carte SD microSD Alimentation 5 V/5 A (via USB-C)Power over Ethernet (PoE+) Raspberry Pi 5 2 Go de RAM 4 Go de RAM 8 Go de RAM Téléchargements Datasheet Unboxing the Raspberry Pi 5 First Insights
-

Raspberry Pi Foundation Raspberry Pi 5 (2 Go de RAM)
Le Raspberry Pi 5 offre plus de performances que jamais. Grâce à un CPU, un GPU et une RAM plus rapides, le Raspberry Pi 5 est jusqu'à 3 fois plus rapide que son prédécesseur déjà rapide. En plus de l'augmentation de la vitesse, le Raspberry Pi 5 (qui intègre la nouvelle puce Raspberry Pi RP1 pour des capacités d'E/S avancées) offre également pour la première fois les fonctionnalités suivantes : RTC, un bouton marche/arrêt et une interface PCIe. Caractéristiques Processeur ARM Cortex-A76 quadricœur 64 bits (2,4 GHz) GPU VideoCore VII (800 MHz) 2 Go de RAM LPDDR4X (4267 MHz) Contrôleur d'E/S Raspberry Pi RP1 Horloge temps réel (RTC) Bouton marche/arrêt PCIe 2.0 Connecteur UART Connecteur de ventilateur Spécifications SoC Broadcom BCM2712 CPU ARM Cortex-A76 (ARM v8) 64 bits Fréquence d'horloge 4x 2,4 GHz GPU VideoCore VII (800 MHz) RAM 2 Go de RAM LPDDR4X (4267 MHz) WiFi IEEE 802.11b/g/n/ac (2,4 GHz/5 GHz) Bluetooth Bluetooth 5.0, BLE Ethernet Gigabit Ethernet (avec support PoE+) USB 2x USB-A 3.0 (5 GBit/s)2x USB-A 2.0 PCI Express 1x PCIe 2.0 GPIO Embase GPIO standard à 40 broches Vidéo 2x ports micro-HDMI (4K60)2x MIPI à 4 voies (DSI/CSI) Multimédia H.265 (décodage 4K60)OpenGL ES 3.1, Vulkan 1.2 Carte SD microSD Alimentation 5 V/5 A (via USB-C)Power over Ethernet (PoE+) Raspberry Pi 4 vs Raspberry Pi 5 Raspberry Pi 4 Raspberry Pi 5 SoC Broadcom BCM2711 Broadcom BCM2712 CPU ARM Cortex-A72 (ARM v8) 64 bit ARM Cortex-A76 (ARM v8) 64 bit Fréquence d'horloge 4x 1,5 GHz 4x 2,4 GHz Cache L2 1 Mo partagé 4x 512 Ko Cache L3 N/A 2 Mo partagés GPU VideoCore VI (500 MHz) VideoCore VII (800 MHz) RAM 2 Go LPDDR4 (3200 MHz) 2 Go LPDDR4X (4267 MHz) WiFi IEEE 802.11b/g/n/ac (2,4 GHz/5 GHz) IEEE 802.11b/g/n/ac (2,4 GHz/5 GHz) Bluetooth Bluetooth 5.0, BLE Bluetooth 5.0, BLE Ethernet Gigabit Ethernet (avec support PoE) Gigabit Ethernet (avec support PoE+) USB 2x USB-A 3.02x USB-A 2.0 2x USB-A 3.0 (5 GBit/s)2x USB-A 2.0 Contrôleur d'E/S N/A Silicium Raspberry Pi RP1 PCI Express N/A 1x PCIe 2.0 Horloge temps réel (RTC) N/A RTC embarquée avec connecteur pour batterie Bouton marche/arrêt N/A Bouton d'alimentation intégré Refroidissement N/A Connecteur de ventilateur GPIO Embase GPIO standard à 40 broches Embase GPIO standard à 40 broches UART via GPIO 1x connecteur UART Carte SD Emplacement microSD (DDR50) Emplacement microSD (SDR104) Vidéo 2 ports micro-HDMI (4K60)1x port MIPI DSI à 2 voies (écran)1x port MIPI CSI à 2 voies (caméra) 2x ports micro-HDMI (4K60)2x MIPI à 4 voies (DSI/CSI) Audio Prise audio à 4 pôles de 3,5 mm (audio stéréo et vidéo composite) N/A Multimédia H.265 (décodage 4K60)H.264 (décodage 1080p60, codage 1080p30)Graphiques OpenGL ES 3.0 H.265 (décodage 4K60)OpenGL ES 3.1, Vulkan 1.2 Alimentation 5 V/3 A (15 W)Power over Ethernet (PoE+) 5 V/5 A (25 W), USB PDPower over Ethernet (PoE+) Raspberry Pi 5 4 Go de RAM 8 Go de RAM 16 Go de RAM Téléchargements Datasheet Unboxing the Raspberry Pi 5 First Insights
-

Raspberry Pi Foundation Raspberry Pi 5 (4 Go de RAM)
Le Raspberry Pi 5 offre plus de performances que jamais. Grâce à un CPU, un GPU et une RAM plus rapides, le Raspberry Pi 5 est jusqu'à 3 fois plus rapide que son prédécesseur déjà rapide. En plus de l'augmentation de la vitesse, le Raspberry Pi 5 (qui intègre la nouvelle puce Raspberry Pi RP1 pour des capacités d'E/S avancées) offre également pour la première fois les fonctionnalités suivantes : RTC, un bouton marche/arrêt et une interface PCIe. Caractéristiques Processeur ARM Cortex-A76 quadricœur 64 bits (2,4 GHz) GPU VideoCore VII (800 MHz) 4 Go de RAM LPDDR4X (4267 MHz) Contrôleur d'E/S Raspberry Pi RP1 Horloge temps réel (RTC) Bouton marche/arrêt PCIe 2.0 Connecteur UART Connecteur de ventilateur Spécifications SoC Broadcom BCM2712 CPU ARM Cortex-A76 (ARM v8) 64 bits Fréquence d'horloge 4x 2,4 GHz GPU VideoCore VII (800 MHz) RAM 4 Go de RAM LPDDR4X (4267 MHz) WiFi IEEE 802.11b/g/n/ac (2,4 GHz/5 GHz) Bluetooth Bluetooth 5.0, BLE Ethernet Gigabit Ethernet (avec support PoE+) USB 2x USB-A 3.0 (5 GBit/s)2x USB-A 2.0 PCI Express 1x PCIe 2.0 GPIO Embase GPIO standard à 40 broches Vidéo 2x ports micro-HDMI (4K60)2x MIPI à 4 voies (DSI/CSI) Multimédia H.265 (décodage 4K60)OpenGL ES 3.1, Vulkan 1.2 Carte SD microSD Alimentation 5 V/5 A (via USB-C)Power over Ethernet (PoE+) Raspberry Pi 4 vs Raspberry Pi 5 Raspberry Pi 4 Raspberry Pi 5 SoC Broadcom BCM2711 Broadcom BCM2712 CPU ARM Cortex-A72 (ARM v8) 64 bit ARM Cortex-A76 (ARM v8) 64 bit Fréquence d'horloge 4x 1,5 GHz 4x 2,4 GHz Cache L2 1 Mo partagé 4x 512 Ko Cache L3 N/A 2 Mo partagés GPU VideoCore VI (500 MHz) VideoCore VII (800 MHz) RAM 4 Go LPDDR4 (3200 MHz) 4 Go LPDDR4X (4267 MHz) WiFi IEEE 802.11b/g/n/ac (2,4 GHz/5 GHz) IEEE 802.11b/g/n/ac (2,4 GHz/5 GHz) Bluetooth Bluetooth 5.0, BLE Bluetooth 5.0, BLE Ethernet Gigabit Ethernet (avec support PoE) Gigabit Ethernet (avec support PoE+) USB 2x USB-A 3.02x USB-A 2.0 2x USB-A 3.0 (5 GBit/s)2x USB-A 2.0 Contrôleur d'E/S N/A Silicium Raspberry Pi RP1 PCI Express N/A 1x PCIe 2.0 Horloge temps réel (RTC) N/A RTC embarquée avec connecteur pour batterie Bouton marche/arrêt N/A Bouton d'alimentation intégré Refroidissement N/A Connecteur de ventilateur GPIO Embase GPIO standard à 40 broches Embase GPIO standard à 40 broches UART via GPIO 1x connecteur UART Carte SD Emplacement microSD (DDR50) Emplacement microSD (SDR104) Vidéo 2 ports micro-HDMI (4K60)1x port MIPI DSI à 2 voies (écran)1x port MIPI CSI à 2 voies (caméra) 2x ports micro-HDMI (4K60)2x MIPI à 4 voies (DSI/CSI) Audio Prise audio à 4 pôles de 3,5 mm (audio stéréo et vidéo composite) N/A Multimédia H.265 (décodage 4K60)H.264 (décodage 1080p60, codage 1080p30)Graphiques OpenGL ES 3.0 H.265 (décodage 4K60)OpenGL ES 3.1, Vulkan 1.2 Alimentation 5 V/3 A (15 W)Power over Ethernet (PoE+) 5 V/5 A (25 W), USB PDPower over Ethernet (PoE+) Raspberry Pi 5 2 Go de RAM 8 Go de RAM 16 Go de RAM Téléchargements Datasheet Unboxing the Raspberry Pi 5 First Insights
-
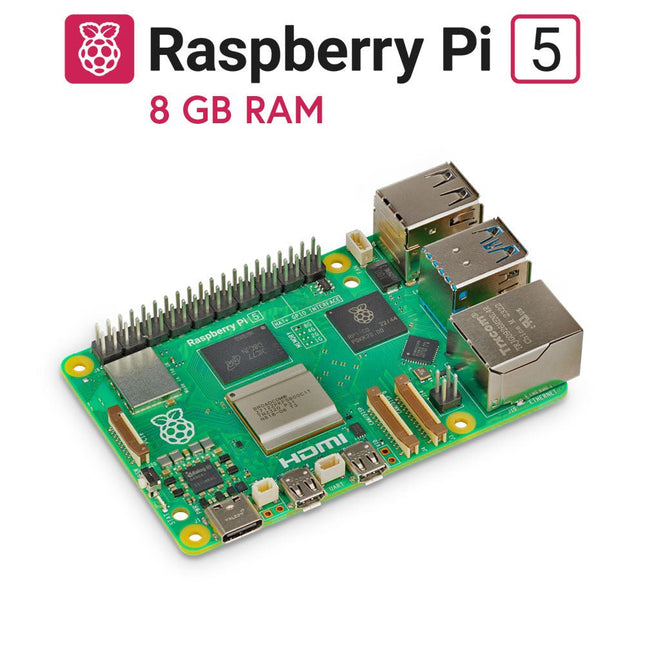
Raspberry Pi Foundation Raspberry Pi 5 (8 Go de RAM)
Le Raspberry Pi 5 offre plus de performances que jamais. Grâce à un CPU, un GPU et une RAM plus rapides, le Raspberry Pi 5 est jusqu'à 3 fois plus rapide que son prédécesseur déjà rapide. En plus de l'augmentation de la vitesse, le Raspberry Pi 5 (qui intègre la nouvelle puce Raspberry Pi RP1 pour des capacités d'E/S avancées) offre également pour la première fois les fonctionnalités suivantes : RTC, un bouton marche/arrêt et une interface PCIe. Caractéristiques Processeur ARM Cortex-A76 quadricœur 64 bits (2,4 GHz) GPU VideoCore VII (800 MHz) 8 Go de RAM LPDDR4X (4267 MHz) Contrôleur d'E/S Raspberry Pi RP1 Horloge temps réel (RTC) Bouton marche/arrêt PCIe 2.0 Connecteur UART Connecteur de ventilateur Spécifications SoC Broadcom BCM2712 CPU ARM Cortex-A76 (ARM v8) 64 bits Fréquence d'horloge 4x 2,4 GHz GPU VideoCore VII (800 MHz) RAM 8 Go de RAM LPDDR4X (4267 MHz) WiFi IEEE 802.11b/g/n/ac (2,4 GHz/5 GHz) Bluetooth Bluetooth 5.0, BLE Ethernet Gigabit Ethernet (avec support PoE+) USB 2x USB-A 3.0 (5 GBit/s)2x USB-A 2.0 PCI Express 1x PCIe 2.0 GPIO Embase GPIO standard à 40 broches Vidéo 2x ports micro-HDMI (4K60)2x MIPI à 4 voies (DSI/CSI) Multimédia H.265 (décodage 4K60)OpenGL ES 3.1, Vulkan 1.2 Carte SD microSD Alimentation 5 V/5 A (via USB-C)Power over Ethernet (PoE+) Raspberry Pi 4 vs Raspberry Pi 5 Raspberry Pi 4 Raspberry Pi 5 SoC Broadcom BCM2711 Broadcom BCM2712 CPU ARM Cortex-A72 (ARM v8) 64 bit ARM Cortex-A76 (ARM v8) 64 bit Fréquence d'horloge 4x 1,5 GHz 4x 2,4 GHz Cache L2 1 Mo partagé 4x 512 Ko Cache L3 N/A 2 Mo partagés GPU VideoCore VI (500 MHz) VideoCore VII (800 MHz) RAM 8 Go LPDDR4 (3200 MHz) 8 Go LPDDR4X (4267 MHz) WiFi IEEE 802.11b/g/n/ac (2,4 GHz/5 GHz) IEEE 802.11b/g/n/ac (2,4 GHz/5 GHz) Bluetooth Bluetooth 5.0, BLE Bluetooth 5.0, BLE Ethernet Gigabit Ethernet (avec support PoE) Gigabit Ethernet (avec support PoE+) USB 2x USB-A 3.02x USB-A 2.0 2x USB-A 3.0 (5 GBit/s)2x USB-A 2.0 Contrôleur d'E/S N/A Silicium Raspberry Pi RP1 PCI Express N/A 1x PCIe 2.0 Horloge temps réel (RTC) N/A RTC embarquée avec connecteur pour batterie Bouton marche/arrêt N/A Bouton d'alimentation intégré Refroidissement N/A Connecteur de ventilateur GPIO Embase GPIO standard à 40 broches Embase GPIO standard à 40 broches UART via GPIO 1x connecteur UART Carte SD Emplacement microSD (DDR50) Emplacement microSD (SDR104) Vidéo 2 ports micro-HDMI (4K60)1x port MIPI DSI à 2 voies (écran)1x port MIPI CSI à 2 voies (caméra) 2x ports micro-HDMI (4K60)2x MIPI à 4 voies (DSI/CSI) Audio Prise audio à 4 pôles de 3,5 mm (audio stéréo et vidéo composite) N/A Multimédia H.265 (décodage 4K60)H.264 (décodage 1080p60, codage 1080p30)Graphiques OpenGL ES 3.0 H.265 (décodage 4K60)OpenGL ES 3.1, Vulkan 1.2 Alimentation 5 V/3 A (15 W)Power over Ethernet (PoE+) 5 V/5 A (25 W), USB PDPower over Ethernet (PoE+) Raspberry Pi 5 2 Go de RAM 4 Go de RAM 16 Go de RAM Téléchargements Datasheet Unboxing the Raspberry Pi 5 First Insights
-
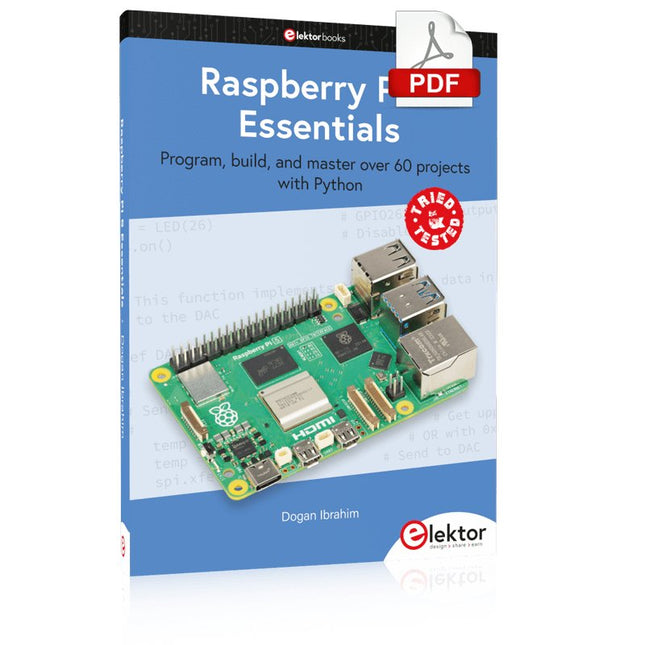
Elektor Publishing Raspberry Pi 5 Essentials
Program, build, and master over 60 projects with Python The Raspberry Pi 5 is the latest single-board computer from the Raspberry Pi Foundation. It can be used in many applications, such as in audio and video media centers, as a desktop computer, in industrial controllers, robotics, and in many domestic and commercial applications. In addition to the well-established features found in other Raspberry Pi computers, the Raspberry Pi 5 offers Wi-Fi and Bluetooth (classic and BLE), which makes it a perfect match for IoT as well as in remote and Internet-based control and monitoring applications. It is now possible to develop many real-time projects such as audio digital signal processing, real-time digital filtering, real-time digital control and monitoring, and many other real-time operations using this tiny powerhouse. The book starts with an introduction to the Raspberry Pi 5 computer and covers the important topics of accessing the computer locally and remotely. Use of the console language commands as well as accessing and using the desktop GUI are described with working examples. The remaining parts of the book cover many Raspberry Pi 5-based hardware projects using components and devices such as LEDs and buzzers LCDs Ultrasonic sensors Temperature and atmospheric pressure sensors The Sense HAT Camera modules Example projects are given using Wi-Fi and Bluetooth modules to send and receive data from smartphones and PCs, and sending real-time temperature and atmospheric pressure data to the cloud. All projects given in the book have been fully tested for correct operation. Only basic programming and electronics experience are required to follow the projects. Brief descriptions, block diagrams, detailed circuit diagrams, and full Python program listings are given for all projects described.
€ 39,95
Membres : € 35,96
-
Elektor Digital Raspberry Pi 5 Essentials (E-book)
Program, build, and master over 60 projects with Python The Raspberry Pi 5 is the latest single-board computer from the Raspberry Pi Foundation. It can be used in many applications, such as in audio and video media centers, as a desktop computer, in industrial controllers, robotics, and in many domestic and commercial applications. In addition to the well-established features found in other Raspberry Pi computers, the Raspberry Pi 5 offers Wi-Fi and Bluetooth (classic and BLE), which makes it a perfect match for IoT as well as in remote and Internet-based control and monitoring applications. It is now possible to develop many real-time projects such as audio digital signal processing, real-time digital filtering, real-time digital control and monitoring, and many other real-time operations using this tiny powerhouse. The book starts with an introduction to the Raspberry Pi 5 computer and covers the important topics of accessing the computer locally and remotely. Use of the console language commands as well as accessing and using the desktop GUI are described with working examples. The remaining parts of the book cover many Raspberry Pi 5-based hardware projects using components and devices such as LEDs and buzzers LCDs Ultrasonic sensors Temperature and atmospheric pressure sensors The Sense HAT Camera modules Example projects are given using Wi-Fi and Bluetooth modules to send and receive data from smartphones and PCs, and sending real-time temperature and atmospheric pressure data to the cloud. All projects given in the book have been fully tested for correct operation. Only basic programming and electronics experience are required to follow the projects. Brief descriptions, block diagrams, detailed circuit diagrams, and full Python program listings are given for all projects described.
€ 32,95
Membres : € 29,66
-

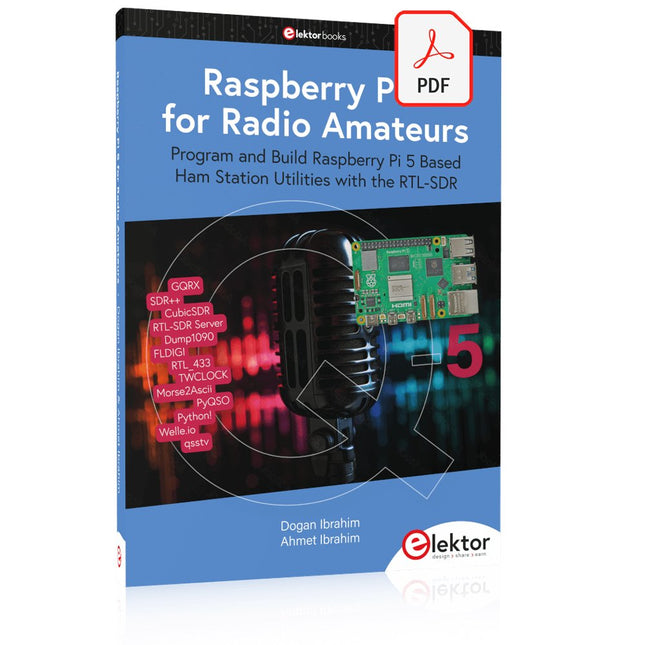
Elektor Publishing Raspberry Pi 5 for Radio Amateurs
Program and Build Raspberry Pi 5 Based Ham Station Utilities with the RTL-SDR The RTL-SDR devices (V3 and V4) have gained popularity among radio amateurs because of their very low cost and rich features. A basic system may consist of a USB based RTL-SDR device (dongle) with a suitable antenna, a Raspberry Pi 5 computer, a USB based external audio input-output adapter, and software installed on the Raspberry Pi 5 computer. With such a modest setup, it is possible to receive signals from around 24 MHz to over 1.7 GHz. This book is aimed at amateur radio enthusiasts and electronic engineering students, as well as at anyone interested in learning to use the Raspberry Pi 5 to build electronic projects. The book is suitable for both beginners through experienced readers. Some knowledge of the Python programming language is required to understand and eventually modify the projects given in the book. A block diagram, a circuit diagram, and a complete Python program listing is given for each project, alongside a comprehensive description. The following popular RTL-SDR programs are discussed in detail, aided by step-by-step installation guides for practical use on a Raspberry Pi 5: SimpleFM GQRX SDR++ CubicSDR RTL-SDR Server Dump1090 FLDIGI Quick RTL_433 aldo xcwcp GPredict TWCLOCK CQRLOG klog Morse2Ascii PyQSO Welle.io Ham Clock CHIRP xastir qsstv flrig XyGrib FreeDV Qtel (EchoLink) XDX (DX-Cluster) WSJT-X The application of the Python programming language on the latest Raspberry Pi 5 platform precludes the use of the programs in the book from working on older versions of Raspberry Pi computers.
€ 39,95
Membres : € 35,96
-
Elektor Digital Raspberry Pi 5 for Radio Amateurs (E-book)
Program and Build Raspberry Pi 5 Based Ham Station Utilities with the RTL-SDR The RTL-SDR devices (V3 and V4) have gained popularity among radio amateurs because of their very low cost and rich features. A basic system may consist of a USB based RTL-SDR device (dongle) with a suitable antenna, a Raspberry Pi 5 computer, a USB based external audio input-output adapter, and software installed on the Raspberry Pi 5 computer. With such a modest setup, it is possible to receive signals from around 24 MHz to over 1.7 GHz. This book is aimed at amateur radio enthusiasts and electronic engineering students, as well as at anyone interested in learning to use the Raspberry Pi 5 to build electronic projects. The book is suitable for both beginners through experienced readers. Some knowledge of the Python programming language is required to understand and eventually modify the projects given in the book. A block diagram, a circuit diagram, and a complete Python program listing is given for each project, alongside a comprehensive description. The following popular RTL-SDR programs are discussed in detail, aided by step-by-step installation guides for practical use on a Raspberry Pi 5: SimpleFM GQRX SDR++ CubicSDR RTL-SDR Server Dump1090 FLDIGI Quick RTL_433 aldo xcwcp GPredict TWCLOCK CQRLOG klog Morse2Ascii PyQSO Welle.io Ham Clock CHIRP xastir qsstv flrig XyGrib FreeDV Qtel (EchoLink) XDX (DX-Cluster) WSJT-X The application of the Python programming language on the latest Raspberry Pi 5 platform precludes the use of the programs in the book from working on older versions of Raspberry Pi computers.
€ 32,95
Membres : € 29,66
-
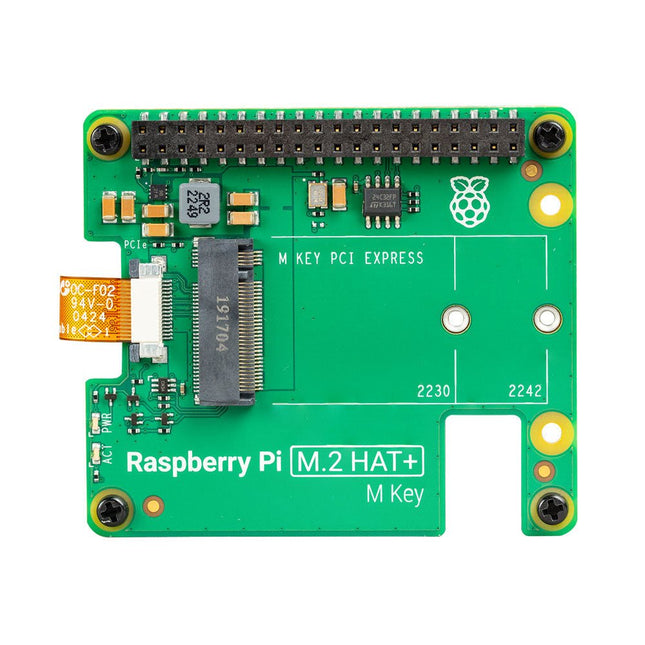
Raspberry Pi Foundation Raspberry Pi 5 M.2 HAT+
Le Raspberry Pi M.2 HAT+ vous permet de connecter des périphériques M.2 tels que des disques NVMe et des accélérateurs AI à l'interface PCIe 2.0 du Raspberry Pi 5, prenant en charge un transfert de données rapide (jusqu'à 500 Mo/s) vers et des disques NVMe et autres accessoires PCIe. Raspberry Pi M.2 HAT+ prend en charge les appareils dotés du connecteur M.2 M key edge, dans les formats 2230 et 2242. Il est capable de fournir jusqu'à 3 A aux appareils M.2 connectés. Caractéristiques Prend en charge l'interface PCIe 2.0 à voie unique (taux de transfert maximal de 500 Mo/s) Prend en charge les appareils qui utilisent le connecteur Key Edge M.2 M Prend en charge les appareils au format 2230 ou 2242 Capable de fournir jusqu'à 3 A aux appareils M.2 connectés Comprend des voyants d'alimentation et d'activité Inclus 1x Raspberry Pi 5 M.2 HAT+ 1x câble ruban 1x en-tête d'empilage GPIO 4x entretoises 8x vis Téléchargements Datasheet Schematics Assembly instructions
-
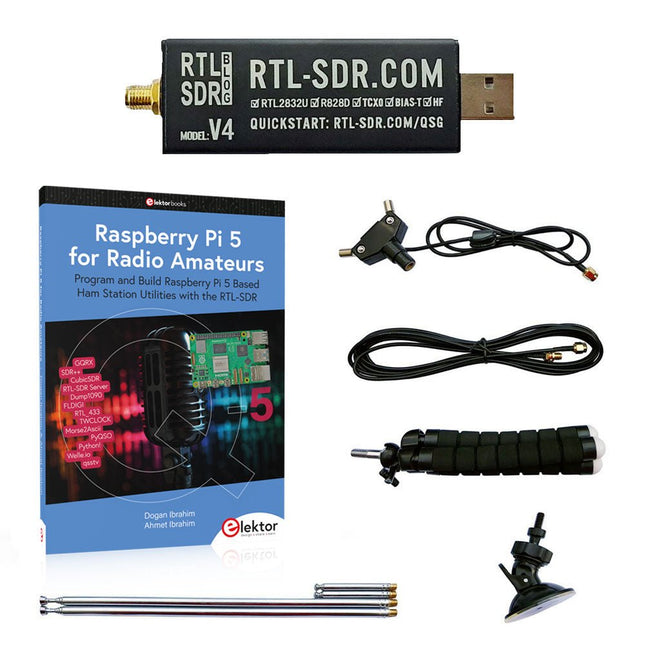
Elektor Bundles Raspberry Pi 5 RTL-SDR V4 (offre groupée)
Programmez et construisez des utilitaires, des outils et des instruments de station radio amateur basés sur Raspberry Pi ! La version améliorée du RTL-SDR V4 permet de recevoir des signaux radio entre 500 kHz et 1,75 GHz provenant de stations utilisant différentes bandes (notamment la diffusion en ondes courtes (SW), moyennes (MW) et longues (LW)), de services de radiodiffusions, de services publics de contrôle du trafic aérien, de PMR, de SRD, d'ISM, de CB, de satellites météorologiques et de radioastronomie. Le livre Raspberry Pi 5 for Radio Amateurs présente en détail l'utilisation du kit RTL-SDR avec un Raspberry Pi. Cette offre groupée contient : RTL-SDR V4 (avec kit d'antenne dipôle) (prix normal : 75 €) Raspberry Pi 5 for Radio Amateurs (prix normal : 40 €) RTL-SDR V4 (Software Defined Radio) avec kit antenne dipôle La clé RTL-SDR est un appareil au coût abordable qui peut être utilisé comme scanner radio associé à un ordinateur, pour recevoir les signaux radio locaux entre 500 kHz et 1,75 GHz. La version RTL-SDR V4 apporte plusieurs améliorations par rapport aux appareils de marques génériques, en particulier l’utilisation d’un chip tuner R828D, la présence d’un filtre d’entrée triplexé, d’un filtre coupe-bande, de composants aux tolérances améliorées, d’un oscillateur compensé en température à stabilité de 1 PPM (TCXO), d’un connecteur SMA F, d’un boitier en aluminium avec refroidissement passif, d’un circuit d’injection de tension continue en T, d’une alimentation améliorée, et d’un convertisseur HF élévateur. RTL-SDR V4 est fourni avec un kit antenne dipôle portable. C’est un atout pour débuter, car elle permet la réception des stations terrestres et des satellites. Son installation à l’extérieur est facile, elle est conçue pour un usage portable temporaire à l’extérieur. Caractéristiques Réception HF améliorée : V4 utilise maintenant un convertisseur élévateur au lieu d’un circuit échantillonneur direct. Cela évite le phénomène de fréquence de repli de Nyquist se situant vers 14,4 MHz, une meilleure sensibilité et un gain HF ajustable. Tout comme pour V3, la fréquence limite basse de réception est de 500 kHz, et un signal reçu très fort nécessite l’utilisation d’un filtre atténuateur en entrée. Filtrage amélioré : La V4 utilise le circuit de réception R828D qui possède trois entrées. L’entrée munie d’un connecteur SMA a été triplexée en 3 bandes : HF, VHF et UHF. Les trois bandes sont ainsi isolées, ce qui minimise la diminution de la sensibilité et la présence de fréquences images, provoquées par les interférences dues aux stations de radiodiffusions puissantes en dehors de la bande reçue. Filtrage x2 amélioré : En plus du triplexage, une broche d’entrée aboutissant à un drain ouvert peut être utilisée, permettant l’ajout d’un filtre coupe-bande pour éliminer les interférences sur les bandes de radiodiffusion AM, FM ou DAB. Un tel filtre permet d’obtenir une atténuation limitée à quelques décibels, mais demeure efficace. Amélioration du bruit de phase sur les signaux puissants : La conception améliorée de l’alimentation permet de réduire le bruit de phase provenant de celle-ci. Dissipation calorifique réduite : Autre avantage résultant de l’amélioration du circuit d’alimentation, la consommation électrique est réduite, minimisant de fait la génération de chaleur, par rapport à la V3. Inclus 1x Clé RTL-SDR V4 (R828D RTL2832U 1PPM TCXO SMA) 2x Antennes télescopiques de 23 cm à 1 m 2x Antennes télescopiques de 5 cm à 13 cm 1x Embase d’antenne équipée d’un câble RG174 de 60 cm 1x Câble prolongateur RG174 de 3 m 1x Trépied de montage flexible 1x Ventouse de fixation Téléchargements Datasheet User Guide Quick Start Guide SDR# User Guide Dipole Antenna Guide Livre : Raspberry Pi 5 for Radio Amateurs Les dispositifs RTL-SDR (V3 et V4) ont gagné en popularité parmi les radioamateurs en raison de leur faible coût et de leurs nombreuses fonctionnalités. Un système de base peut consister en un dispositif RTL-SDR USB (dongle) avec une antenne appropriée, un ordinateur Raspberry Pi 5, un adaptateur d'entrée-sortie audio externe USB et un logiciel installé sur l'ordinateur Raspberry Pi 5. Avec une installation aussi modeste, il est possible de recevoir des signaux allant d'environ 24 MHz à plus de 1,7 GHz. Ce livre s'adresse aux radioamateurs et aux étudiants en ingénierie électronique, ainsi qu'à toute personne souhaitant apprendre à utiliser le Raspberry Pi 5 pour construire des projets électroniques. Le livre convient aussi bien aux débutants qu'aux lecteurs expérimentés. Une certaine connaissance du langage de programmation Python est nécessaire pour comprendre et éventuellement modifier les projets présentés dans le livre. Chaque projet est accompagné d'un schéma fonctionnel, d'un schéma de circuit et d'une liste complète de programmes Python, ainsi que d'une description détaillée. Les programmes RTL-SDR populaires suivants sont examinés en détail et accompagnés de guides d'installation étape par étape pour une utilisation pratique sur un Raspberry Pi 5: SimpleFM GQRX SDR++ CubicSDR RTL-SDR Server Dump1090 FLDIGI Quick RTL_433 aldo xcwcp GPredict TWCLOCK CQRLOG klog Morse2Ascii PyQSO Welle.io Ham Clock CHIRP xastir qsstv flrig XyGrib FreeDV Qtel (EchoLink) XDX (DX-Cluster) WSJT-X L'application du langage de programmation Python sur la dernière plateforme Raspberry Pi 5 empêche l'utilisation des programmes du livre sur les versions plus anciennes des ordinateurs Raspberry Pi.
€ 114,95€ 94,95
Meilleur prix
-

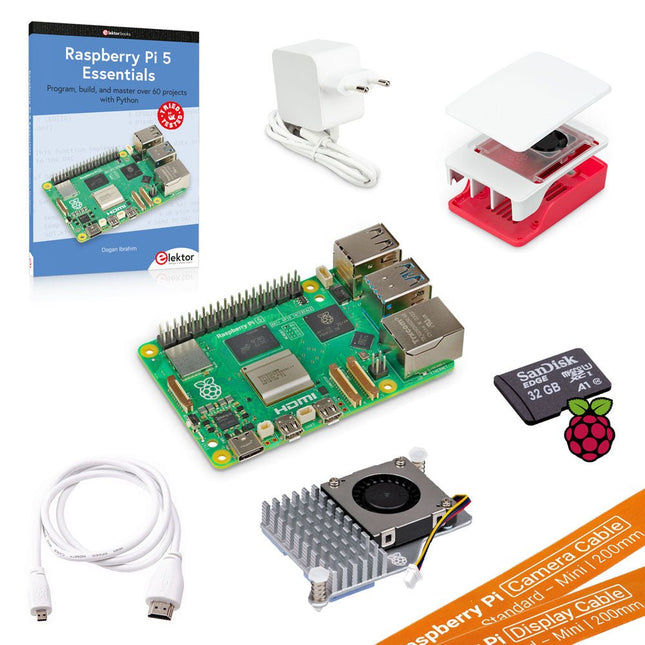
Elektor Bundles Kit de démarrage ultime Raspberry Pi 5 (4 Go)
Économisez plus de 30 €, en achetant ce kit de démarrage, par rapport à l'achat de ces produits séparément ! Ce kit de démarrage ultime Raspberry Pi 5, composé de produits de qualité, contient tout ce dont vous avez besoin pour utiliser immédiatement le nano-ordinateur le plus populaire au monde comme outil multimédia et pour la programmation et l‘automatisation. Contenu du kit Raspberry Pi 5 (4 Go de RAM)Le nouveau Raspberry Pi 5 offre plus de performances que jamais. Grâce à un CPU, un GPU et une RAM plus rapides, le Raspberry Pi 5 est jusqu'à 3 fois plus rapide que son prédécesseur déjà rapide. Processeur ARM Cortex-A76 quadricœur 64 bits (2,4 GHz) GPU VideoCore VII (800 MHz) 4 Go de RAM LPDDR4X (4267 MHz) Contrôleur d'E/S Raspberry Pi RP1 Horloge temps réel (RTC) Bouton marche/arrêt PCIe 2.0 Connecteur UART Connecteur de ventilateur Alimentation officielle 27 W pour Raspberry Pi 5 (UE, blanc)The official Raspberry Pi 27 W PD USB-C power supply is designed specifically to power the Raspberry Pi 5. Carte microSD avec Raspberry Pi OS préinstallé (32 Go)With this microSD (32 Go, Class 10) with pre-installed Raspberry Pi OS you can start using your Raspberry Pi right away. Boîtier officiel pour Raspberry Pi 5 (blanc/rouge)The Raspberry Pi 5 case offers improved thermal features to support the higher peak power consumption of the Raspberry Pi 5. Refroidisseur actif pour Raspberry Pi 5The active cooler provides an alternative cooling solution for users who wish to use their Raspberry Pi 5 under sustained heavy load without a case. Câble HDMI officiel pour Raspberry Pi (blanc, 1 m)The official Raspberry Pi micro-HDMI to HDMI (A/M) cable (white, 1 m) is designed for the Raspberry Pi. Câble caméra FPC pour Raspberry Pi 5 (200 mm)With this cable you can connect your current Raspberry Pi camera products to the Raspberry Pi 5. Câble d'affichage FPC pour Raspberry Pi 5 (200 mm)With this cable you can connect your current Raspberry Pi display products to the Raspberry Pi 5. Livre : Raspberry Pi 5 Essentials – Program, build, and master over 60 projects with Python This English book (written by the best-selling author Dogan Ibrahim) starts with an introduction to the Raspberry Pi 5 computer and covers the important topics of accessing the computer locally and remotely. Use of the console language commands as well as accessing and using the desktop GUI are described with working examples. The remaining parts of the book cover many Raspberry Pi 5-based hardware projects using components and devices such as LEDs and buzzers, LCDs, Ultrasonic sensors, Temperature and atmospheric pressure sensors, The Sense HAT, Camera modules.
-
Elektor Bundles Kit de démarrage ultime Raspberry Pi 5 (8 Go)
Économisez plus de 30 €, en achetant ce kit de démarrage, par rapport à l'achat de ces produits séparément ! Ce kit de démarrage ultime Raspberry Pi 5, composé de produits de qualité, contient tout ce dont vous avez besoin pour utiliser immédiatement le nano-ordinateur le plus populaire au monde comme outil multimédia et pour la programmation et l‘automatisation. Contenu du kit Raspberry Pi 5 (8 Go de RAM)Le nouveau Raspberry Pi 5 offre plus de performances que jamais. Grâce à un CPU, un GPU et une RAM plus rapides, le Raspberry Pi 5 est jusqu'à 3 fois plus rapide que son prédécesseur déjà rapide. Processeur ARM Cortex-A76 quadricœur 64 bits (2,4 GHz) GPU VideoCore VII (800 MHz) 8 Go de RAM LPDDR4X (4267 MHz) Contrôleur d'E/S Raspberry Pi RP1 Horloge temps réel (RTC) Bouton marche/arrêt PCIe 2.0 Connecteur UART Connecteur de ventilateur Alimentation officielle 27 W pour Raspberry Pi 5 (UE, blanc)The official Raspberry Pi 27 W PD USB-C power supply is designed specifically to power the Raspberry Pi 5. Carte microSD avec Raspberry Pi OS préinstallé (32 Go)With this microSD (32 Go, Class 10) with pre-installed Raspberry Pi OS you can start using your Raspberry Pi right away. Boîtier officiel pour Raspberry Pi 5 (blanc/rouge)The Raspberry Pi 5 case offers improved thermal features to support the higher peak power consumption of the Raspberry Pi 5. Refroidisseur actif pour Raspberry Pi 5The active cooler provides an alternative cooling solution for users who wish to use their Raspberry Pi 5 under sustained heavy load without a case. Câble HDMI officiel pour Raspberry Pi (blanc, 1 m)The official Raspberry Pi micro-HDMI to HDMI (A/M) cable (white, 1 m) is designed for the Raspberry Pi. Câble caméra FPC pour Raspberry Pi 5 (200 mm)With this cable you can connect your current Raspberry Pi camera products to the Raspberry Pi 5. Câble d'affichage FPC pour Raspberry Pi 5 (200 mm)With this cable you can connect your current Raspberry Pi display products to the Raspberry Pi 5. Livre : Raspberry Pi 5 Essentials – Program, build, and master over 60 projects with Python This English book (written by the best-selling author Dogan Ibrahim) starts with an introduction to the Raspberry Pi 5 computer and covers the important topics of accessing the computer locally and remotely. Use of the console language commands as well as accessing and using the desktop GUI are described with working examples. The remaining parts of the book cover many Raspberry Pi 5-based hardware projects using components and devices such as LEDs and buzzers, LCDs, Ultrasonic sensors, Temperature and atmospheric pressure sensors, The Sense HAT, Camera modules.
-
Raspberry Pi Foundation Raspberry Pi 500 (FR)
Le Raspberry Pi 500 (basé sur le Raspberry Pi 5) est doté d'un processeur Arm 64 bits quadricœur, d'un contrôleur d'I/O RP1, de 8 Go de RAM, d'un réseau sans fil, d'une sortie double affichage, d'une lecture vidéo 4K et un connecteur GPIO à 40 broches. C'est un ordinateur tout-en-un puissant et compact intégré dans un clavier portable. Le dissipateur thermique en aluminium intégré offre des performances thermiques améliorées, permettant au Raspberry Pi 500 de fonctionner rapidement et en douceur, même sous une charge importante. Spécifications SoC Broadcom BCM2712 Processeur ARM Cortex-A76 (ARM v8) 64 bits Taux d'horloge 4x 2,4 GHz GPU VideoCore VII (800 MHz) RAM 8 Go LPDDR4X (4267 MHz) Wi-Fi IEEE 802.11b/g/n/ac (2,4 GHz/5 GHz) Bluetooth Bluetooth 5.0, BLE Ethernet Gigabit Ethernet (avec prise en charge PoE+) USB 2x USB-A 3.0 (5 GBit/s)1x USB-A 2.01x USB-C (pour l'alimentation) PCI Express 1x PCIe 2.0 GPIO Connecteur GPIO standard à 40 broches Vidéo 2x ports micro-HDMI (4K60) Multimédia H.265 (décodage 4K60)OpenGL ES 3.1, Vulkan 1.2 Carte SD microSD Alimentation 5 V CC (via USB-C) Disposition du clavier Français (AZERTY) Dimensions 286 x 122 x 23 mm Téléchargements Datasheet
-
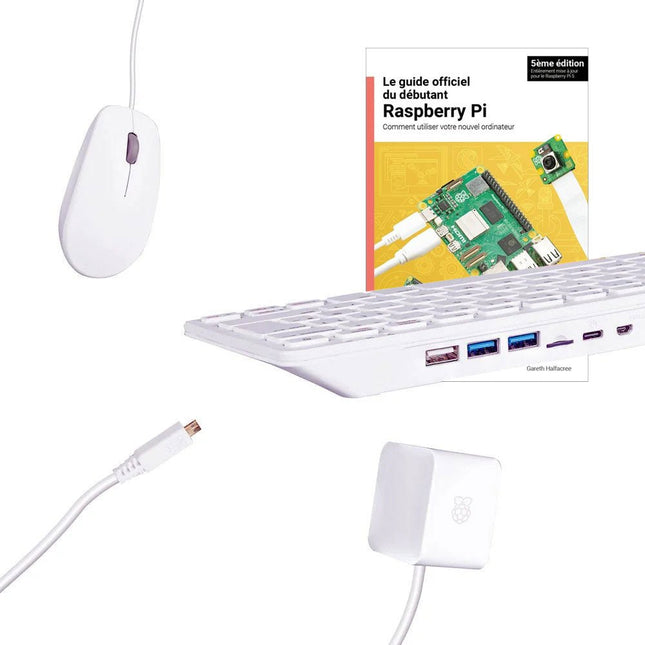
Raspberry Pi Foundation Kit Raspberry Pi 500 (FR)
Le Raspberry Pi 500 (basé sur le Raspberry Pi 5) est doté d'un processeur Arm 64 bits quadricœur, d'un contrôleur d'I/O RP1, de 8 Go de RAM, d'un réseau sans fil, d'une sortie double affichage, d'une lecture vidéo 4K et un connecteur GPIO à 40 broches. C'est un ordinateur tout-en-un puissant et compact intégré dans un clavier portable. Le dissipateur thermique en aluminium intégré offre des performances thermiques améliorées, permettant au Raspberry Pi 500 de fonctionner rapidement et en douceur, même sous une charge importante. Spécifications SoC Broadcom BCM2712 Processeur ARM Cortex-A76 (ARM v8) 64 bits Taux d'horloge 4x 2,4 GHz GPU VideoCore VII (800 MHz) RAM 8 Go LPDDR4X (4267 MHz) Wi-Fi IEEE 802.11b/g/n/ac (2,4 GHz/5 GHz) Bluetooth Bluetooth 5.0, BLE Ethernet Gigabit Ethernet (avec prise en charge PoE+) USB 2x USB-A 3.0 (5 GBit/s)1x USB-A 2.01x USB-C (pour l'alimentation) PCI Express 1x PCIe 2.0 GPIO Connecteur GPIO standard à 40 broches Vidéo 2x ports micro-HDMI (4K60) Multimédia H.265 (décodage 4K60)OpenGL ES 3.1, Vulkan 1.2 Carte SD microSD Alimentation 5 V CC (via USB-C) Disposition du clavier Français (AZERTY) Dimensions 286 x 122 x 23 mm Inclus Raspberry Pi 500 (clavier FR, AZERTY) Alimentation officielle 27 W pour Raspberry Pi (UE, blanc) Souris officielle Raspberry Pi (blanc) Câble HDMI officiel Raspberry Pi (blanc, 2 m) Carte microSD de 32 Go avec Raspberry Pi OS préinstallé Le guide officiel du débutant Raspberry Pi (5ème édition) Téléchargements Datasheet
-
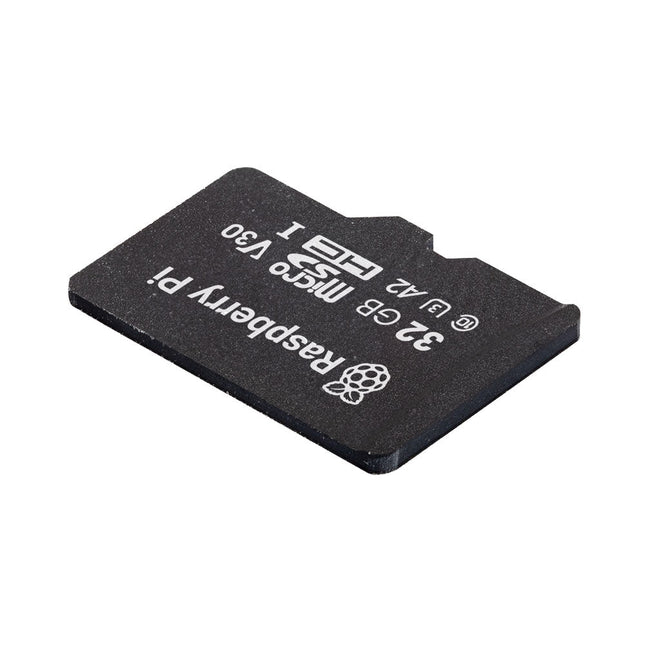
Raspberry Pi Foundation Raspberry Pi carte SD A2 préinstallée avec Raspberry Pi OS (32 Go)
SD card quality is crucial for a good Raspberry Pi experience. Raspberry Pi's A2 microSD cards support higher bus speeds and command queuing, improving random read performance and narrowing the gap with NVMe SSDs. These cards are rigorously tested for optimal performance with Raspberry Pi models. Caractéristiques Capacity: 32 GB Support for DDR50 and SDR104 bus speeds and command queueing (CQ) extension Speed Class: C10, U3, V30, A2 Random 4 KB read performance: 3,200 IOPS (Raspberry Pi 4, DDR50) 5,000 IOPS (Raspberry Pi 5, SDR104) Random 4 K write performance: 1,200 IOPS (Raspberry Pi 4, DDR50) 2,000 IOPS (Raspberry Pi 5, SDR104) Shock-proof, X-ray–proof, and magnet-proof microSDHC/microSDXC formats Téléchargements Datasheets


