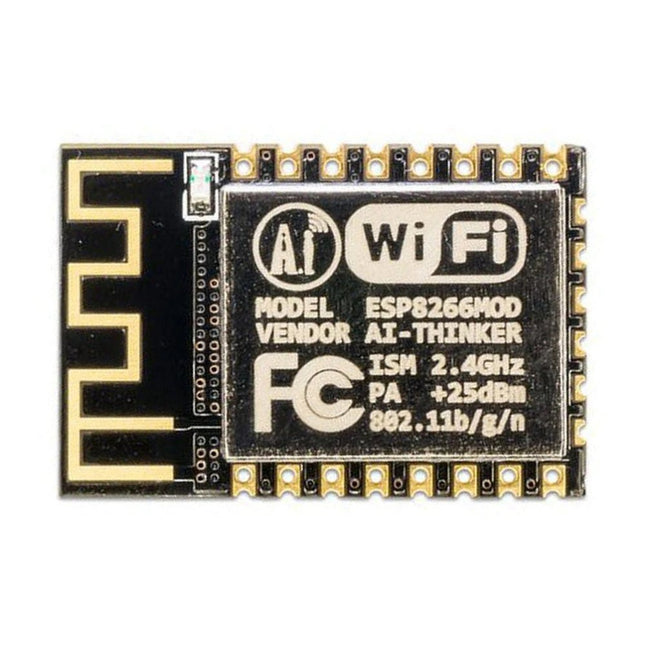
Recently, the development of a tiny chip called the ESP8266 has made it possible to interface any type of microcontroller to a Wi-Fi AP. The ESP8266 is a low-cost tiny Wi-Fi chip having fully built-in TCP/IP stack and a 32-bit microcontroller unit. This chip, produced by Shanghai based Chinese manufacturer Espressif System, is IEEE 802.11 b/g/n Wi-Fi compatible with on-chip program and data memory, and general purpose input-output ports. Several manufacturers have incorporated the ESP8266 chip in their hardware products (e.g. ESP-xx, NodeMCU etc) and offer these products as a means of connecting a microcontroller system such as the Android, PIC microcontroller or others to a Wi-Fi. The ESP8266 is a low-power chip and costs only a few Dollars.
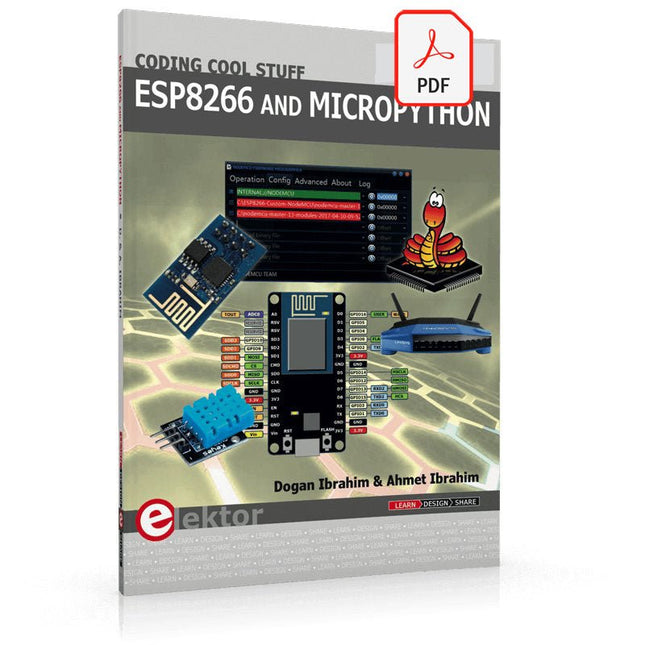
ESP8266 and MicroPython – Coding Cool Stuff is an introduction to the ESP8266 chip and describes the features of this chip and shows how various firmware and programming languages such as the MicroPython can be uploaded to the chip. The main aim of the book is to teach the readers how to use the MicroPython programming language on ESP8266 based hardware, especially on the NodeMCU.
Several interesting and useful projects are given in the e-book (pdf) to show how to use the MicroPython in NodeMCU type ESP8266 hardware:
Project “What shall I wear today?”: You will be developing a weather information system using a NodeMCU development board together with a Text-to-Speech processor module.
Project “The Temperature and Humidity on the Cloud”: You will be developing a system that will get the ambient temperature and humidity using a sensor and then store this data on the cloud so that it can be accessed from anywhere.
Project “Remote Web Based Control”: You will be developing a system that will remotely control two LEDs connected to a NodeMCU development board using an HTTP Web Server application.
Projects with Thonny-IDE, uPyCraft-IDE, and ESP32
The 'Python' programming language has enjoyed an enormous upswing in recent years. Not least, various single-board systems such as the Raspberry Pi have contributed to its popularity. But Python has also found widespread use in other fields, such as artificial intelligence (AI) or machine learning (ML). It is obvious, therefore, to use Python or the 'MicroPython' variant for use in SoCs (Systems on Chip) as well.
Powerful controllers such as the ESP32 from Espressif Systems offer excellent performance as well as Wi-Fi and Bluetooth functionality at an affordable price. With these features, the Maker scene has been taken by storm. Compared to other controllers, the ESP32 has a significantly larger flash and SRAM memory, as well as a much higher CPU speed. Due to these characteristics, the chip is not only suitable for classic C applications, but also for programming with MicroPython.
This book introduces the application of modern one-chip systems. In addition to the technical background, the focus is on MicroPython itself. After the introduction to the language, the programming skills learned are immediately put into practice. The individual projects are suitable for use in the laboratory as well as for everyday applications. So, in addition to the actual learning effect, the focus is also on the joy of building complete and useful devices. By using laboratory breadboards, circuits of all kinds can be realized with little effort, turning the testing and debugging of the 100% homebrew projects into an instructive pleasure.
The various applications, such as weather stations, digital voltmeters, ultrasound range finders, RFID card readers or function generators, make the projects presented ideally suited for practical courses or subject and study work in the natural sciences, or in science and technology classes.
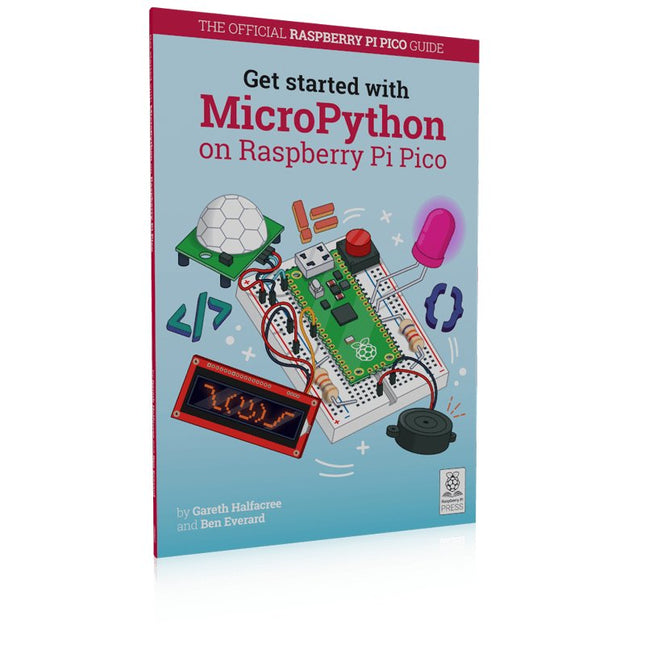
In Get Started with MicroPython on Raspberry Pi Pico, you will learn how to use the beginner-friendly language MicroPython to write programs and connect up hardware to make your Raspberry Pi Pico interact with the world around it. Using these skills, you can create your own electro‑mechanical projects, whether for fun or to make your life easier.
Microcontrollers, like RP2040 at the heart of Raspberry Pi Pico, are computers stripped back to their bare essentials. You don’t use monitors or keyboards, but program them to take their input from, and send their output to the input/output pins.
Using these programmable connections, you can light lights, make noises, send text to screens, and much more. In Get Started with MicroPython on Raspberry Pi Pico, you will learn how to use the beginner-friendly language MicroPython to write programs and connect up hardware to make your Raspberry Pi Pico interact with the world around it. Using these skills, you can create your own electro‑mechanical projects, whether for fun or to make your life easier.
The robotic future is here – you just have to build it yourself. We’ll show you how.
About the authors
Gareth Halfacree is a freelance technology journalist, writer, and former system administrator in the education sector. With a passion for open-source software and hardware, he was an early adopter of the Raspberry Pi platform and has written several publications on its capabilities and flexibility.
Ben Everard is a geek who has stumbled into a career that lets him play with new hardware. As the editor of HackSpace magazine, he spends more time than he really should experimenting with the latest (and not-solatest) DIY tech.
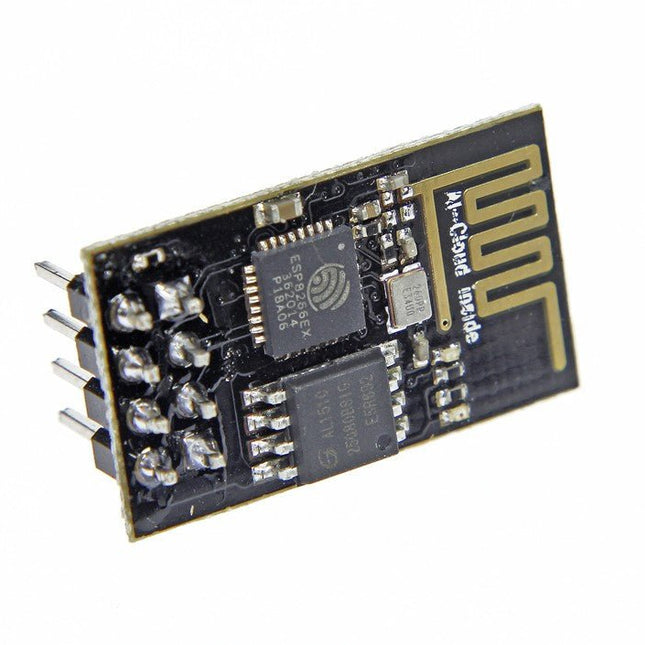
L'ESP8266 est un module WiFi impressionnant et abordable, adapté pour ajouter des fonctionnalités wifi à un projet a microcontrôleur existant via une connexion série UART. Le module peut même être reprogrammé pour agir comme un appareil autonome connecté au wifi– il suffit de l'alimenter ! Protocole 802.11 b/g/n wifi Direct (P2P), soft-AP Pile de protocole TCP/IP intégrée Ce module est un SOC ( système sur puce) autonome qui ne nécessite pas un microcontrôleur pour contrôler ses entrées et sorties comme vous le feriez normalement avec un Arduino, par exemple, car l'ESP-01 agit comme un nano ordinateur. Ainsi, vous pouvez donner à votre microcontrôleur un accès à Internet comme avec un shield wifi pour Arduino, ou vous pouvez simplement programmer l'ESP8266 pour qu'il ait non seulement accès à un réseau wifi, mais qu'il agisse également comme un microcontrôleur, ce qui rend l'ESP8266 très polyvalent.
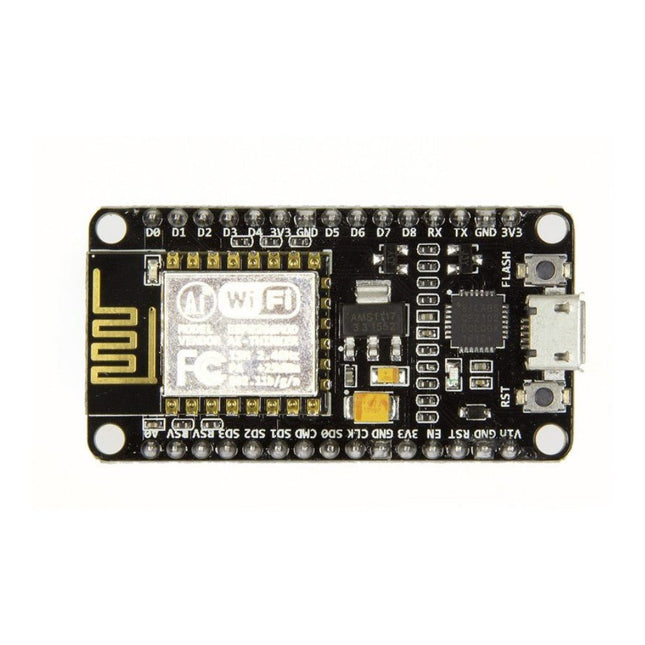
Remarque : NodeMCU est le nom d'un micrologiciel et d'une carte. NodeMCU est une plateforme IoT open source, dont le firmware fonctionne sur le SoC Wi-Fi ESP8266 d'Espressif, basé sur le SDK ESP8266 nonOS . Son matériel est basé sur le module ESP-12. Le langage de script est Lua qui permet d'utiliser de nombreux projets open source comme lua-cjson et spiffs.
Caractéristiques
Module Wi-Fi – Module ESP-12E similaire au module ESP-12 mais avec 6 GPIO supplémentaires.
USB – port micro USB pour l’alimentation, la programmation et le débogage
En-têtes – 2 connecteurs 2,54 mm à 15 broches avec accès aux GPIO, SPI, UART, ADC et broches d'alimentation
Boutons de réinitialisation et de flash
Alimentation : 5 V via port micro USB
Dimensions : 49 x 24,5 x 13 mm
L'ESP8266 d'Espressif est une puce Wi-Fi dotée d'une pile TCP/IP complète et d'une capacité de microcontrôleur. Il a fait des vagues dans la communauté des fabricants grâce à son prix bas.
Mais de nombreux développeurs étaient mécontents de la consommation électrique élevée de l'ESP8266. L'ESP32, équipé d'un coprocesseur ULP (Ultra Low Power), propose un remède à cela.
Cet e-book présente un certain nombre de projets mettant en vedette ESP32 et ESP8266 et démontre leurs performances dans différentes applications.
Des articles
Journal lumineux défiant512 pilotes LED pour Wi-Fi dotés d'un ESP-12F
Regarder avec VFD et ESP32À la précision d'Internet
L'ESP32 est idéal pour la consommationProgrammation du coprocesseur ULP
Adaptateur de programmation USB pour ESP8266Dans la famille Espressif, je voudrais l'ESP-01 et l'ESP-012
Émulateur DCF77 à ESP8266 Des ondes radio à l'internet
Thermostat sur le bureau WiFiSurveillance de la température flexible et programmable
Minutes pour le thermostat du bureau WiFiSept canaux de temporisation d'une précision atomique
Coûteau suisse pour microcontrôleursPlatformIO, un outil de programmation universel
Station Météo NucleoInformations mises à jour sur l'affichage sur l'écran LCD
AllerNotifierUne interface flexible pour les captureurs d'IdO
Regarder RGBChiffreAffiche avec 7 segments et couleur
ESP32 pour les utilitaires exigeantsProgrammation avec les outils d'origine
Mutation de l'ESP8266Découvrons l'ESP32 avec l'EDI d'Arduino
MicroPythonLe Python des petits systèmes
MicroPython et PyBoardLa LED qui clignote…Au serveur web qui fait clignoter une LED
Machine de surveillance pour ESP8266Domotique pour la transition énergétique
WLAN compact et autonomeOu comment utiliser la puce ESP8266 sans µC
ESP8266 sur la carte d'entrées/sorties AndroidLancez-vous dans la mise à jour du micrologiciel
WLAN pour microcontrôleursAvec la puce ESP8266
Carte de commande Wi-Fi : le retourRelies des objets à votre ordiphone
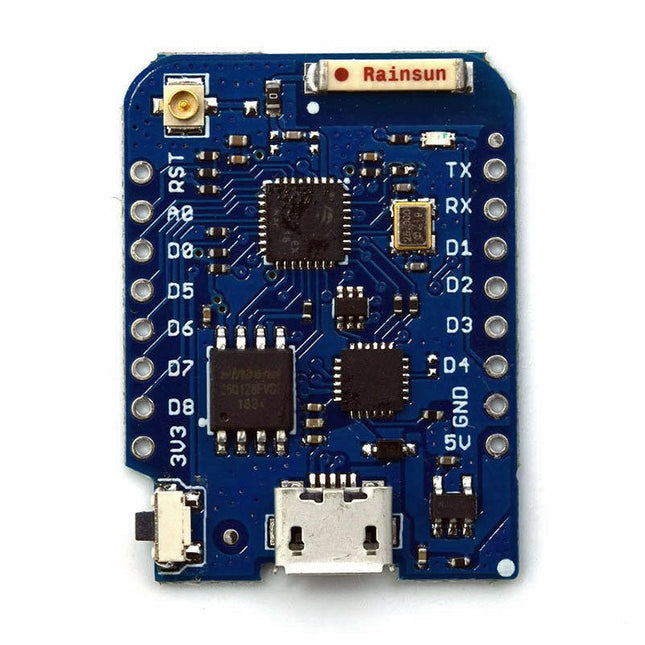
There are many so-called 'Arduino compatible' platforms on the market. The ESP8266 – in the form of the WeMos D1 Mini Pro – is one that really stands out. This device includes WiFi Internet access and the option of a flash file system using up to 16 MB of external flash memory. Furthermore, there are ample in/output pins (though only one analogue input), PWM, I²C, and one-wire. Needless to say, you are easily able to construct many small IoT devices!
This book contains the following builds:
A colourful smart home accessory
refrigerator controller
230 V power monitor
door lock monitor
and some further spin-off devices.
All builds are documented together with relevant background information for further study. For your convenience, there is a small PCB for most of the designs; you can also use a perf board. You don’t need to be an expert but the minimum recommended essentials include basic experience with a PC, software, and hardware, including the ability to surf the Internet and assemble PCBs.
And of course: A handle was kept on development costs. All custom software for the IoT devices and PCB layouts are available for free download from at Elektor.com.
Cette mini carte WiFi dispose d'un flash de 16 Mo, d'un connecteur d'antenne externe et d'une antenne en céramique intégrée basée sur ESP8266EX.
Caractéristiques
11 broches d'entrée/sortie numérique
Interruption/pwm/I²C/un fil
1 entrée analogique (entrée 3,2 V max)
16 Mo de mémoire flash
Connecteur d'antenne externe
Antenne céramique intégrée
CI USB-VERS-UART CP2104
Caractéristiques
Tension de fonctionnement
3,3 V
Broches d'E/S numériques
11
Broches d'entrée analogique
1 (3,2 V maximum)
Vitesse de l'horloge
80/160MHz
Éclair
16 Mo
Taille
34,2 x 25,6 mm
Poids
3g
Configuration des broches
Épingle
Fonction
Broche ESP8266
RX
RXD
RXD
A0
Entrée analogique, max 3,2 V
A0
D0
IO
GPIO16
D1
E/S, SCL
GPIO5
D2
IO, SDA
GPIO4
D3
IO, 10k Pull-up
GPIO0
D4
IO, 10k Pullup, BUILTIN_LED
GPIO2
D5
IO, SCK
GPIO14
D6
IO, MISO
GPIO12
J7
IO, MOSI
GPIO13
D8
IO, 10k Pull vers le bas, SS
GPIO15
g
Sol
GND
5V
5 V
-
3V3
3,3 V
3,3 V
TVD
Réinitialiser
TVD
Inclus
1x WeMos D1 mini Pro (basé sur ESP8266EX)
2x connecteur à broches (court)
2x barrette de connexion femelle (courte)
2x barrette de connexion femelle (longue)
Ce module Wi-Fi est basé sur la populaire puce ESP8266. Le module est certifié FCC et CE et conforme à la directive RoHS.
Entièrement compatible avec l'ESP-12E. 13 broches E/S (GPIO), 1 entrée analogique, 4 Mo de mémoire flash.
Kick off with the MAX1000 and VHDPlus
Ready to Master FPGA Programming? In this guide, we’re diving into the world of Field Programmable Gate Arrays (FPGAs) – a configurable integrated circuit that can be programmed after manufacturing. Imagine bringing your ideas to life, from simple projects to complete microcontroller systems!
Meet the MAX1000: a compact and budget-friendly FPGA development board packed with features like memory, user LEDs, push-buttons, and flexible I/O ports. It’s the ideal starting point for anyone wanting to learn about FPGAs and Hardware Description Languages (HDLs).
In this book, you’ll get hands-on with the VHDPlus programming language – a simpler version of VHDL. We’ll work on practical projects using the MAX1000, helping you gain the skills and confidence to unleash your creativity.
Get ready for an exciting journey! You’ll explore a variety of projects that highlight the true power of FPGAs. Let’s turn your ideas into reality and embark on your FPGA adventure – your journey starts now!
Exciting Projects You’ll Find in This Book
Arduino-Driven BCD to 7-Segment Display Decoder
Use an Arduino Uno R4 to supply BCD data to the decoder, counting from 0 to 9 with a one-second delay
Multiplexed 4-Digit Event Counter
Create an event counter that displays the total count on a 4-digit display, incrementing with each button press
PWM Waveform with Fixed Duty Cycle
Generate a PWM waveform at 1 kHz with a fixed duty cycle of 50%
Ultrasonic Distance Measurement
Measure distances using an ultrasonic sensor, displaying the results on a 4-digit 7-segment LED
Electronic Lock
Build a simple electronic lock using combinational logic gates with push buttons and an LED output
Temperature Sensor
Monitor ambient temperature with a TMP36 sensor and display the readings on a 7-segment LED
Téléchargements
Software
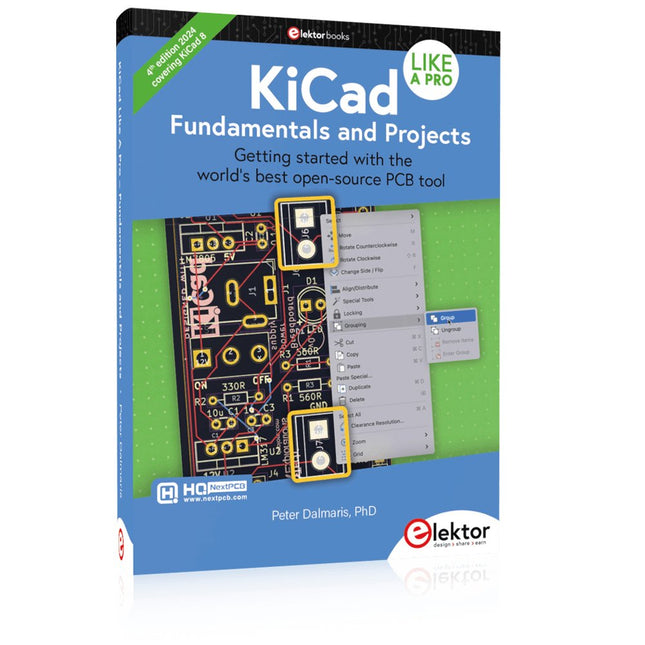
Getting started with the world’s best open-source PCB tool
The latest iteration of KiCad, the world’s best free-to-use Printed Circuit Board tool, is packed with features usually found only in expensive commercial CAD tools. This modern, cross-platform application suite built around schematic and design editors, with auxiliary applications is a stable and mature PCB tool. KiCad 8 is a perfect fit for electronic engineers and makers.
Here are the most significant improvements and features in KiCad 8, both over and under the hood:
Modern user interface, completely redesigned from earlier versions
Improved and customizable electrical and design rule checkers
Theme editor allowing you to customize KiCad on your screen
Ability to import projects from Eagle, CADSTART, and more
Python scripting API
Improved integrated SPICE circuit simulator
Multi-sheet schematics
Filters define selectable elements
Enhanced interactive router helps you draw single tracks and differential pairs with precision
New or enhanced tools to draw tracks, measure distances, tune track lengths, etc.
Advanced interactive router
Built-in bill of materials generator
Realistic ray-tracing capable 3D viewer
Customizable teardrops
Plug-in manager for quick installation of themes, libraries and functionalities such as autorouters and BOM generators
This book will teach you to use KiCad through a practical approach. It will help you become productive quickly and start designing your own boards. Example projects illustrate the basic features of KiCad, even if you have no prior knowledge of PCB design.
The author describes the entire workflow from schematic entry to the intricacies of finalizing the files for PCB production and offers sound guidance on the process. Further full-fledged projects, of incremental difficulty, will be presented in a second book, together with a variety of advanced recipes.