
Résultats de la recherche pour "joy OR it OR 3 OR 5 OR touchscreen OR for OR raspberry OR pi"
-

Elektor Digital Elektor 09-10/2022 (PDF)
Diese Ausgabe steht allen GOLD- und GREEN-Mitgliedern auf der ElektorMagazine-Website zum Download bereit! Sie sind noch kein Mitglied? Hier klicken! electronica Fast Forward Start- & Scale-Up AwardsDie Vorbereitungen laufen auf Hochtouren! Bluetooth Low Energy mit dem ESP32-C3 und ESP32Es muss nicht immer WLAN sein! Bluetooth-LE-SnifferMit dem makerdiary nRF52840 MDK USB-Dongle Magischer RGB-LED-WürfelHardware-Design rund um einen RP2040 Automatischer Ein/Ausschalter für Lötpastenkompressor Elektor - live und in FarbeLivestreams, Webinare und Kurse für Ingenieure und Maker Fahrrad elektrifizierenE-Bike-Nachrüstkit in der Praxis Aller Anfang ...Muss nicht schwer sein: Multiplikation von Spannungen Aus dem Leben gegriffenNebenbeschäftigungen Teensy 4.0 - warum ist das Board so schnell?Oder: Geschwindigkeit ist keine Hexerei! Simulation von Audio-Leistungsverstärkern mit TINADer „Try-Before-You-Build“-Ansatz LoRaWAN-Knoten im IoTEin Beispiel-Kapitel: Die LoRaWAN-Module Dragino LHT65, LDS01 und LDS02 Projekt 2.0Korrekturen, Updates und Leserbriefe 5G für mich alleinVollständige Kontrolle über 5G-Implementierungen in privaten Mobilfunknetzen Infographics 7-8/2022 Wie lernt mein Gerät funken?Applikationen mit WiFi-Schnittstellen ausrüsten Rheinturmuhr – Wecker de luxe Audio-Spektrum-Analysator mit DekatronsEine neue Art, alte Röhren zu verwenden Senden von Daten an TelegramEin ESP32 und ein paar Bauteile erledigen den Job32 and a Few Parts Fliege-Bandsperre für Audio-MessungenBesseres Messen durch Notch-Filterung CO2-Messgerät auseinandergenommenIst das Gerät hackbar für Ihre Projekte? Spielereien mit PUTsAnaloge Entwürfe mit dem Programmierbaren Unijunction-Transistor Ein runder Touchscreen für den Raspberry PiHyperPixel 2.1 Round von Pimoroni Fernwirken und die Erkennung von Verbindungsverlustenmit Hilfe von nRF24L01+ Modulen Digitaler UKW-EmpfängerMit Arduino Nano und TEA5767 OLED-Display - aus SPI mach I²C Zutritt für Unbefugte verboten!Ein Hobby geht nicht in Rente! Ein Jahrzehnt der Ethik in der ElektronikTessel Renzenbrink sinniert über die digitale Gesellschaft HexadokuSudoku für Elektroniker
€ 11,90
-
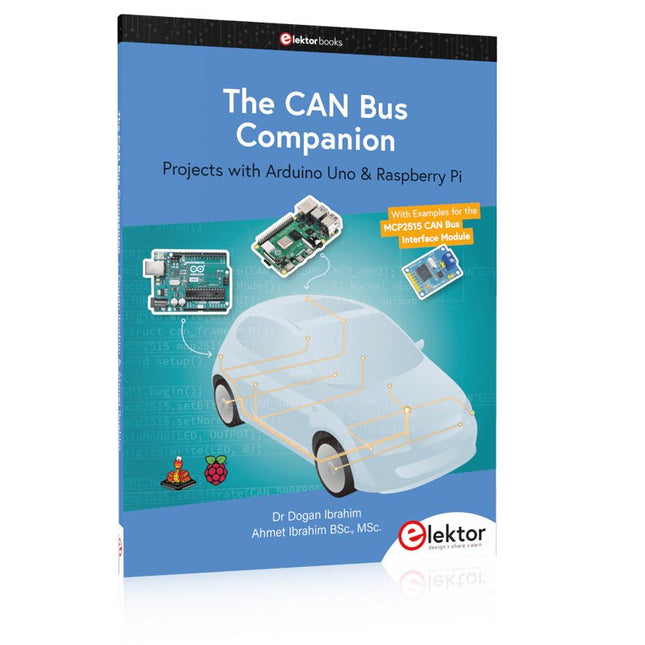
Elektor Publishing The CAN Bus Companion
This book details the use of the Arduino Uno and the Raspberry Pi 4 in practical CAN bus based projects. Using either the Arduino Uno or the Raspberry Pi with off-the-shelf CAN bus interface modules considerably ease developing, debugging, and testing CAN bus based projects. This book is written for students, practicing engineers, enthusiasts, and for everyone else wanting to learn more about the CAN bus and its applications. The book assumes that the reader has some knowledge of basic electronics. Knowledge of the C and Python programming languages and programming the Arduino Uno using its IDE and Raspberry Pi will be useful, especially if the reader intends to develop microcontroller-based projects using the CAN bus. The book should be a useful source of reference material for anyone interested in finding answers to questions such as: What bus systems are available for the automotive industry? What are the principles of the CAN bus? How can I create a physical CAN bus? What types of frames (or data packets) are available in a CAN bus system? How can errors be detected in a CAN bus system and how dependable is a CAN bus system? What types of CAN bus controllers exist? How do I use the MCP2515 CAN bus controller? How do I create 2-node Arduino Uno-based CAN bus projects? How do I create 3-node Arduino Uno-based CAN bus projects? How do I set the acceptance masks and acceptance filters? How do I analyze data on the CAN bus? How do I create 2-node Raspberry Pi-based CAN bus projects? How do I create 3-node Raspberry Pi-based CAN bus projects?
€ 39,95
Membres : € 35,96
-

Testeur de diodes Zener Elektor
Le testeur de diodes Zener Elektor est essentiellement une source de courant constant commutable par paliers de 1 à 50 mA. Il peut être utilisé pour tester des diodes Zener jusqu’à un maximum de 54 V. Grâce à un convertisseur élévateur de 60 V, l’appareil peut être alimenté par une tension courante de 5 à 12 V. Le principe de ce testeur est simple. Une diode Zener ou un autre DUT (device under test, dispositif sous test, comme une LED) est polarisé par une source de courant réglable. La tension aux bornes du DUT peut être mesurée avec un multimètre. La tension de la plupart des (petites) diodes Zener est spécifiée pour un courant de 5 mA. Selon l’application, la tension à d’autres courants peut également présenter un intérêt. C’est pourquoi six réglages de courant sont disponibles : 1, 2, 5, 10, 20 et 50 mA. Les LED sont souvent spécifiées pour un courant de 20 mA. Il est possible de tester : Si une diode Zener est défectueuse (court-circuit ou haute impédance). Si une diode Zener présente la bonne tension Zener. Comment une tension Zener évolue avec différents courants. Quelle tension exacte est présente sur une référence de tension intégrée. Si des LED montées en série présentent des différences de luminosité (d’où le courant de 20 mA). Quel est le gain en courant pour différents courants de base dans des transistors (de puissance). Le kit contient toutes les pièces indiquées dans la nomenclature, y compris le circuit imprimé et le boîtier. Spécifications Tension d'alimentation 5…12 V/2 A (USB-C) Courant d'alimentation (Itest = 50 mA) 1,1 A à 5 V / 412 mA à 12 V Courants sélectionnables 1, 2, 5, 10, 20 et 50 mA Tension de test max. >54 V à Itest ≥1 mA Tension de sortie max. 60 V à Itest = 0 mA Limite de tension à 5 V 4,5 V à Itest = 1 mA / 5,18 V à Itest = 50 mA Dimensions du boîtier 110 x 82 x 44 mm Dimensions du circuit imprimé 105,4 x 67,3 mm Connexions Douilles banane 4 mm pour multimètre Douilles banane 2 mm pour pinces de test Connecteur USB-C pour l'alimentation Inclus Résistances R1 = 3.3 kΩ, 600 mW, 1% R2 = 0.15 Ω, 1 W, 5%, LS 12.7 mm, ø 3.5 mm R3, R8 = 180 Ω, 600 mW, 1% R4, R6, R16 = 1 kΩ, 600 mW, 1% R5, R19 = 47 kΩ, 600 mW, 1% R7 = 3.9 kΩ, 1 W, 5%, LS 12.7 mm, ø 3.5 mm R9, R10, R12 = 10 kΩ, 600 mW, 1% R11, R13 = 100 Ω, 600 mW 1% R14 = 249 Ω, 600 mW, 1% R15 = 499 Ω, 600 mW, 1% R17 = 2.49 kΩ, 250 mW, 1% R18 = 4.99 kΩ, 250 mW, 1% Condensateurs C1 = 470 uF / 35 V, 20%, Ir = 1.86 A, ø 12.5 mm, LS 5 mm, ESR = 0.038 Ω (Panasonic EEUTP1V471) C2 = 1 uF / 100 V, 10%, X7R, LS 5 mm C3 = 2.2 nF / 50 V, 10%, X7R, LS 5 mm C4, C7 = 100 nF / 100 V, 10%, X7R, LS 5 mm C5 = 100 uF / 100 V, 20%, ø 14 mm max., LS 5 mm C6 = 1 nF / 100 V, 10%, X7R, LS 5 mm Inducteur L1 = 100 uH, Irms = 2.4 A, Isat = 3.5 A, 0.09 Ω, radial, pitch 2.5/5/10 mm, ø 14 mm max. (Kemet SBC8-101-242) Semi-conducteurs D1 = MUR120G, DO-41 D2, D4 = STPS3150RL, DO-201AD D3 = Z-diode, 18 V, 1.3 W (BZX85C18) D5 = Z-diode, 5.1 V, 0.5 W (1N5231B) LED1 = LED in pushbutton S1 LED2 = LED, green, 3 mm IC1 = MC34063, DIP-8 IC2 = LM4040BIZ-5.0/NOPB, TO-92 (TO-226AA-3) IC3 = TL051CP, DIP-8 T1 = BC327.25, TO-92 T2 = STP40NF10L, TO-220 T3 = IRF9510PBF, TO-220 T4 = 2N7000, TO-92 Autres K1, K2, S1, S3 = 2-way screw terminal block, LS 3.5 mm, max. 1.5 mm² connected to K1 = USB-C socket, 30 V/3 A, chassis mounted, wired, 9 x 16 mm connected to K2 = Banana Connector, 2 mm, Socket, 60 VDC, Panel Mount, red (Multicomp 24.102.1) connected to K2 = Banana Connector, 2 mm, Socket, 60 VDC, Panel Mount, black (Multicomp 24.102.2) Test clip, red, 30 VAC/60 VDC (Hirschmann 931467101) Test clip, black, 30 VAC/60 VDC (Hirschmann 931467100) S1 = Pushbutton, panel mount, SPST-NO, 30 DC/100 mA, with red LED S2 = Rotary Switch, 6 position, 2 pole, 30°, 250 V/150 mA S3 = Toggle switch, panel mount, SPDT, solder lugs, 28 VDC T2, T3 = Heat sink, 15°C/W, FK 214 SA-CB Enclosure Hammond 1591XXSSBK, ABS, 110 x 82 x 44 mm Knob for S2, round shaft 6 mm, ø 21 mm, with indicator line (Multicomp CP-LB21-6-6D) 4 x Self-tapping screw #4-1/4", carbon steel, pan head Banana plug, red, 2 mm, 60 VDC (Multicomp 25.205.1) Banana plug, black, 2 mm, 60 VDC (Multicomp 25.205.2) Banana socket, black 4 mm, panel mount Banana socket, red 4 mm, panel mount for LED1, LED2 = Pin header, 1 x 2, vertical, pitch 2.54 mm for LED1, LED2 = Pin socket, 1 x 2, vertical, pitch 2.54 mm for T2, T3 = M3 screw, 10 mm, steel, pan head 2 x M3 washer, plain, steel 4 x M3 nut for IC1, IC3 = DIP-8 socket Wire, black, 0.25 mm² (24 AWG), stranded 14 x 0.15 mm, 1 m Wire, red, 0.25 mm² (24 AWG), stranded 14 x 0.15 mm, 1 m PCB 250772-1 v1.1 Liens Article Elektor Labs
€ 79,95
Meilleur prix
-

Elektor Digital Elektor septembre/octobre 2023 (PDF)
Les membres d'Elektor GREEN et GOLD peuvent télécharger ce numéro ici . Pas encore membre? Cliquez ici pour souscrire une adhésion. Raspberry Pi Pico comme analyseur de spectre FFT avec du matériel bon marché Régulateur de tension linéaire ±40 V alimentation alternative pour l'amplificateur de puissance Fortissimo-100... et autres ! Communication sans fil flexible avec un MCU L'EEPROM ouvre des possibilités de mise en réseau pour les MCU sans fil 5 000 € à gagner ! participez au concours de conception d'innovation sans fil STM32 2023 : une odyssée de l’IA Premiers pas avec l'interpréteur de code de ChatGPT LoRa – un couteau suisse partie 1 : le protocole LoRa et ses avantages Puits de courant réglable avec générateur d'horloge intégré tester les alimentations, les convertisseurs de tension et les batteries Deux nouvelles cartes Arduino UNO R4 : Minima et WiFi Potentiomètres logarithmiques ils sont exponentiels ! Carte de dérivation du pilote de moteur un BoB pour un driver de moteur 5 A DC de 3×3 mm Electronique extraite de la vie périculosa Le cellulaire offre-t-il la consommation d’énergie la plus faible pour l’IoT ? besoins énergétiques du LTE-M et du NB-IoT dans les déploiements LPWAN Communication sans fil dans les systèmes IoT avec les modules Arduino MKR la bonne carte pour WiFi, LoRa et autres standards Pertes AC dans les composants magnétiques évitez les coils chauds ! Mesurez pour une connectivité cloud optimale Implémentation de Matter : que faut-il pour déployer des appareils Matter ? YARD Bâton Un outil de test sans fil inférieur à 1 GHz Relais de maintien parties étrangères PIC avant dix heures – pile à l’heure conception d'un récepteur de signaux horaires SDR Directive sur le devoir de diligence Le statu quo ne suffira pas Tous les débuts... ...amplifie les tensions Enregistreur d'infrasons avec l'Arduino Pro Mini un exemple de projet de la publication Elektor « Arduino & Co » Compteur d'énergie basé sur le cloud avec un module ESP32 et un capteur tension/courant PZEM-004T Un guide de programmation puriste (partie 2) timing précis, l'UART et le débogage
€ 9,95
-

Elektor Digital Elektor Special: Robotics and Automation (PDF)
AI in Practice Dive into the fascinating world of robotics and automation! This Elektor Special shows you how to build your own robots with creativity, a little know-how, and affordable technology. From your first DIY project with Arduino or Raspberry Pi to intelligent systems with AI – this issue makes modern robotics understandable and accessible. Discover practical instructions, inspiring projects, and exciting insights into the maker scene. Learn how experimentation, community, and openness give rise to true innovation – and why robotics is so much more than just a technical hobby. Contents Imagination turns into reality Arduino-controlled Drawing Robot GalaxyRVR Mars Rover Kit for Arduino YDLIDAR X4Pro Lidar xHuskyLens AI Camera DOF Robot Arm with Raspberry Pi Pico Manufacturing Robots with Fischertechnik Pneumatic Industrial Robot Why Do We Keep Building Robot Dogs? Elektor Mini-Wheelie Robot Vehicles and Autonomous Driving
€ 14,95
Membres : € 13,46
-
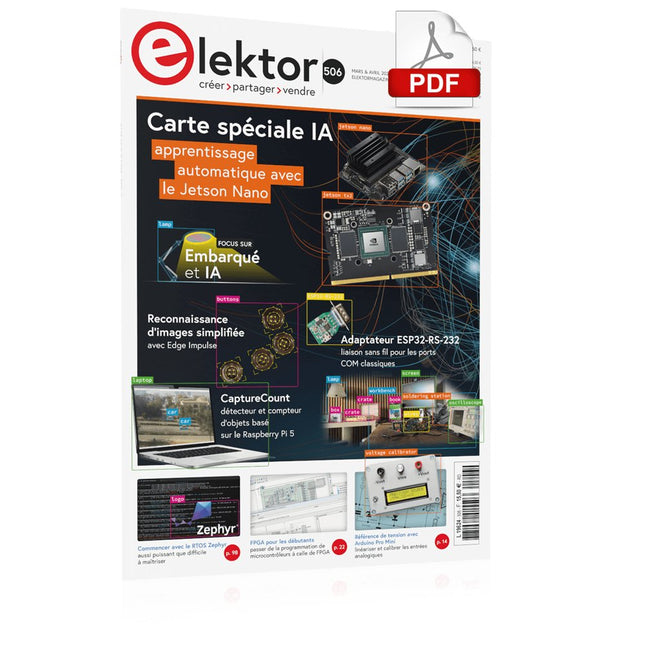
Elektor Digital Elektor Mars/Avril 2024 (PDF)
Le téléchargement intégral de ce numéro est disponible pour nos membres GOLD et GREEN sur le site Elektor Magazine ! Pas encore membre ? Cliquez ici. CaptureCountdétecteur et compteur d'objets basé sur le Raspberry Pi 5 référence de tension avec Arduino Pro Minilinéariser et calibrer les entrées analogiques FPGA pour les débutantsThe Path From MCU to FPGA Programming mise à jour : STM32 Wireless Innovation Design Contest 2024 Bluetooth LE avec MAUIControl Apps for Android & Co. carte d'extension de portsaugmentez le nombre d'E/S de votre carte de développement carte spéciale IAapprentissage automatique avec le Jetson Nano 2024 : l'Odyssée de l'IApremiers essais avec TensorFlow 262 144 façons de jouer au Jeu de la Vieun projet de lecteur en bref sur le vifle souffle du dragon sur mon cou faites tourner votre moteur CCSample Projects from the Elektor Motor Control Development Bundle Adaptateur ESP32-RS-232A Wireless Link for Classic Test Equipment démarrer en électronique…en savoir plus sur les ampli-op bibliothèques ESP recommandées composants piézoélectriques compteur d'objets intelligentreconnaissance d'images simplifiée avec Edge Impulse des solutions à vos problèmes de développement de systèmes embarqués les plus délicats Terminal ESP32un appareil portable avec un écran tactile commencer avec le RTOS Zephyraussi puissant que difficile à maîtriser Award-Winning EthicsDialogue avec Alexander Gerfer, Directeur Technique chez Würth Elektronik eiSos sur la promotion du comportement respectueux et innovant projet 2.0corrections, mises à jour et courrier des lecteurs
€ 10,95
-
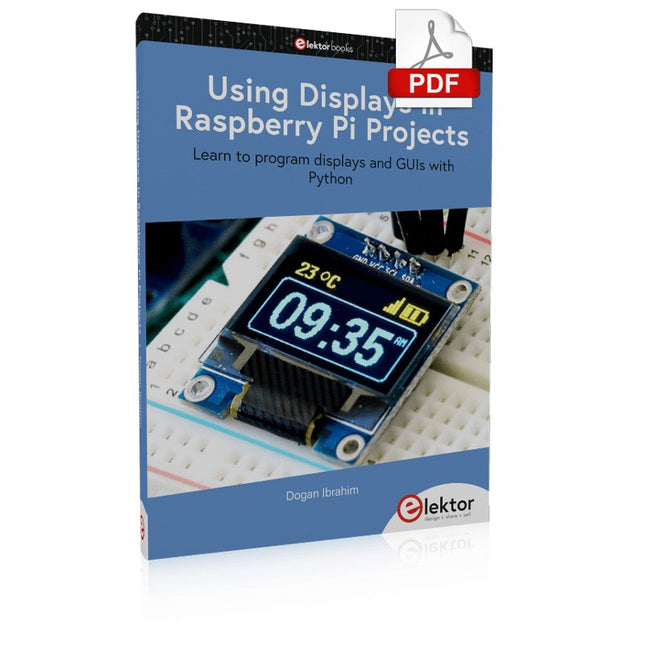
Elektor Digital Using Displays in Raspberry Pi Projects (E-book)
Learn to program displays and GUIs with Python This book is about Raspberry Pi 4 display projects. The book starts by explaining how to install the latest Raspbian operating system on an SD card, and how to configure and use the GPIO ports. The core of the book explains the following topics in simple terms with fully tested and working example projects: Simple LED projects Bar graph LED projects Matrix LED projects Bitmap LED projects LED strips LCDs OLED displays E-paper displays TFT displays 7-inch touch screen GUI Programming with Tkinder One unique feature of this book is that it covers almost all types of display that readers will need to use in their Raspberry Pi based projects. The operation of each project is fully given, including block diagrams, circuit diagrams, and commented full program listings. It is therefore an easy task to convert the given projects to run on other popular platforms, such as Arduino or PIC microcontrollers. Python program listings of all Raspberry Pi projects developed in this book are available for download at Elektor.com. Readers can use these programs in their projects. Alternatively, they can modify the programs to suit their applications.
€ 32,95
Membres : € 29,66
-

Elektor Digital Elektor 03-04/2023 (PDF)
Diese Ausgabe steht allen GOLD- und GREEN-Mitgliedern auf der ElektorMagazine-Website zum Download bereit! Sie sind noch kein Mitglied? Hier klicken! Cloc 2.0Der Wecker, den Sie sich schon immer gewünscht haben Raspberry Pi Pico: PIO in der PraxisExperimente mit der Programmable I/O des RP2040 ChipTweaker des armen MannesBillige Wege, sie zum Sprechen zu bringen Echter Zufallszahlen-Generator mit USBZwei PICs zum Preis von einem AVR Pimp my mike...Pegelanhebung selbst gebaut FFT mit MaixduinoFrequenzspektren erfassen Aus dem Leben gegriffenEntwurfslogik (oder Un-Logik) Schrittmotor-Treiber UCN5804Bemerkenswerte Bauteile Schaltungssimulation mit Micro-CapErste Schritte in eine komplizierte Welt Der PAUL Award 2022Junge Techniktalente und ihre kreativen Lösungen Mein erstes Software-definiertes RadioGebaut in weniger als 15 Minuten Mikrocontroller-Dokumentation verstehenTeil 1: Aufbau einer Dokumentation KI und eingebettete Systeme - Was kommt als Nächstes?Werkzeuge, Plattformen und das Ende der Textarbeiter Digitalisierung der vertikalen Landwirtschaft Infografik: Embedded und KI, heute und morgen Einführung in TinyML Casestudy KwickPOS High-Performance in jeder KlasseComputer-on-Module-Standards Aller Anfang...muss nicht schwer sein: Werden wir aktiv! I²C-Kommunikation mit Node.js und einem Raspberry PiSehen Sie Ihre Sensordaten in einem Browser Videoausgabe mit MikrocontrollernTeil 2: VGA- und DVI-Ausgabe Das Echtzeit-Betriebssystem MetronomEin RTOS für AVR-Prozessoren DVI auf dem RP2040Ein Interview mit Luke Wren, Chip-Entwickler bei Raspberry Pi Display HAT MiniZeigt die Wettervorhersage auf dem Raspberry Pi WEEF 2022 Awards: Feiern Sie das Gute! Hexadoku
€ 11,90
-

Elektor Digital Raspberry Pi ontdekken in 45 Elektronica projecten (2e versie) | E-book
Met de Raspberry Pi heeft u voor slechts een paar tientjes een complete computer in handen, waar op eenvoudige wijze allerlei elektronica aangesloten kan worden. In deze 2e herziene en uitgebreide versie gaan we in op een van de sterke kanten van de Raspberry Pi: de combinatie van programmeren en elektronica. Na een korte introductie van de Raspberry Pi wordt de benodigde software geïnstalleerd. Op de SD-kaart die u bij dit boek kunt aanschaffen, is die allemaal al aanwezig voor de Raspberry Pi. Aan de (optionele) Windows PC kant gebeurt dit met gratis software die u kunt downloaden. Daarna volgt een beknopte inleiding in het besturingssysteem Linux en gaan we programmeren in Bash, Python en JavaScript. De nadruk ligt hierbij op Python, maar in alle gevallen houden we het kort. We bespreken net voldoende zodat u de projecten kunt begrijpen en aan uw wensen aanpassen, en gaan dan aan de slag met leuke projecten. Maar liefst 45 spannende en interessante projecten worden in detail besproken en uitgelegd. Van wisselknipperlicht, aansluiten van een elektromotor, het verwerken en maken van analoge signalen tot lichtmeter en temperatuurregeling. Maar ook gecompliceerdere projecten zoals een motorsnelheidsregeling, webserver met CGI, client-server applicaties en Xwindows programma‘s. U kunt dit boek gebruiken als projecten boek en de projecten nabouwen en in de praktijk inzetten. Door de duidelijke uitleg, schema‘s en foto‘s van de opstellingen op een steekbord wordt het nabouwen een erg leuke bezigheid. RPi Alle software voor de RPi is voorgeïnstalleerd op een SD-kaart die u bij dit boek kunt aanschaffen. Dat wil zeggen dat alle software en drivers voor SSH, SPI, I²C, GPIO, PWM, muziek, Python Ontwikkelversie, wxPython, IdleX en de seriële verbinding gegarandeerd werken. Tevens staan alle broncodes van de projecten uitdit boek op deze kaart. Windows-PC In het gratis download-pakket dat bij dit boek hoort, vindt u de software die in dit boek gebruikt wordt op de Windows-PC handig bij elkaar in een enkel ZIP-bestand. Alle software is gratis. Tevens bevat het pakket een filmpje van de Nutteloze Doos (Useless Machine) van project 13.4. Software download-pakket WinOscillo Putty Xming WinSCP DiskImager Notepad2 IdleX Useless Box film
€ 29,95
Membres : € 26,96
-
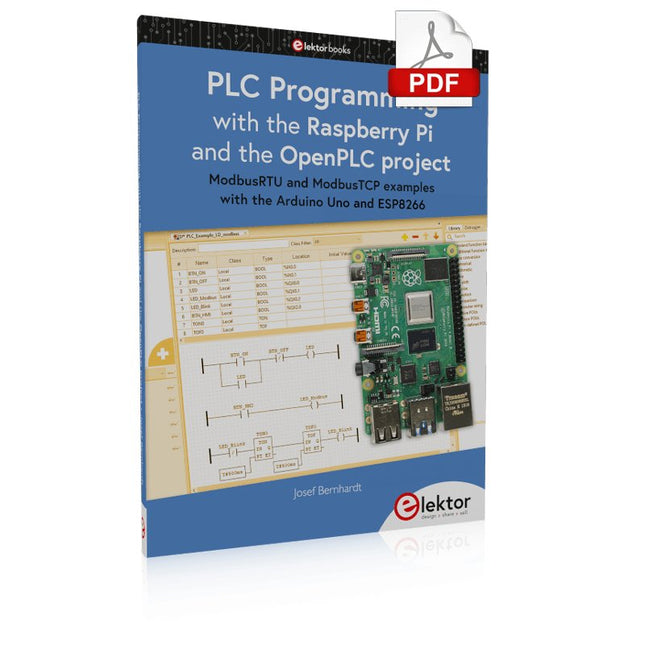
Elektor Digital PLC Programming with the Raspberry Pi and the OpenPLC Project (E-book)
ModbusRTU and ModbusTCP examples with the Arduino Uno and ESP8266 Introduction to PLC programming with OpenPLC, the first fully open source Programmable Logic Controller on the Raspberry Pi, and Modbus examples with Arduino Uno and ESP8266 PLC programming is very common in industry and home automation. This book describes how the Raspberry Pi 4 can be used as a Programmable Logic Controller. Before taking you into the programming, the author starts with the software installation on the Raspberry Pi and the PLC editor on the PC, followed by a description of the hardware. You'll then find interesting examples in the different programming languages complying with the IEC 61131-3 standard. This manual also explains in detail how to use the PLC editor and how to load and execute the programs on the Raspberry Pi. All IEC languages are explained with examples, starting with LD (Ladder Diagram) over ST (Structured Control Language) to SFC (Special Function Chart). All examples can be downloaded from the author's website. Networking gets thorough attention too. The Arduino Uno and the ESP8266 are programmed as ModbusRTU or ModbusTCP modules to get access to external peripherals, reading sensors and switching electrical loads. I/O circuits complying with the 24 V industry standard may also be of interest for the reader. The book ends with an overview of commands for ST and LD. After reading the book, the reader will be able to create his own controllers with the Raspberry Pi.
€ 32,95
Membres : € 29,66
-
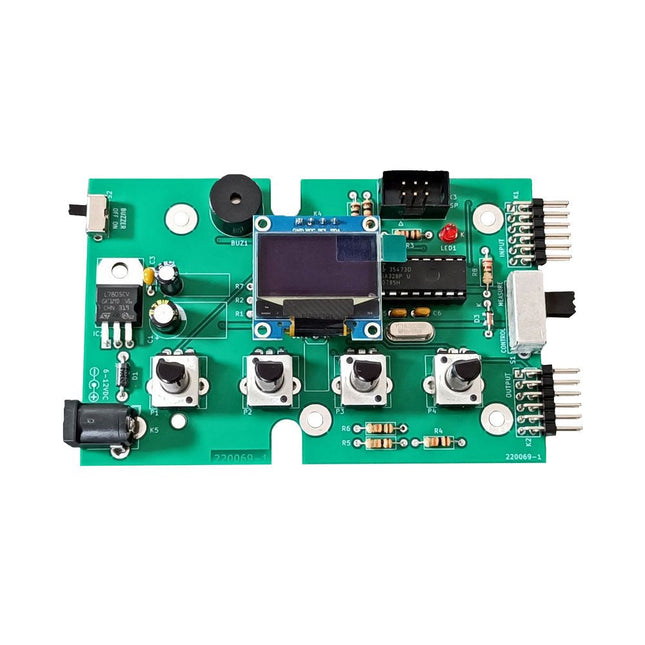
Elektor Labs Kit de test Super Servo Elektor
Le kit de test Super Servo Elektor permet le contrôle des servomoteurs et la mesure de leurs signaux. Il permet le test simultané de quatre servomoteurs. Le testeur est fourni en kit. Tous les composants nécessaires à l'assemblage du dispositif sont fournis dans le kit. Une expérience basique de soudure électronique est nécessaire pour réaliser l'assemblage du kit. Le microcontrôleur est préprogrammé. Le testeur Super Servo est doté de deux modes de fonctionnement: Control/Manual et Measure/Inputs : Dans le mode Control/Manual, le Testeur Super Servo délivre à ses sorties , les signaux de contrôle pour quatre servomoteurs, ou pour un contrôleur de vol ou un contrôleur de vitesse ESC (Electronic Speed Controller) pour moteur sans balai (brushless). Les signaux sont contrôlés par quatre potentiomètres. Dans le mode Measure/Inputs le Testeur Super Servo mesure les signaux des servomoteurs reliés à ses entrées. Ces signaux peuvent par exemple provenir d'un ESC, d'un contrôleur de vol, d'un récepteur ou de tout autre dispositif. Les signaux sont également dirigés vers ses sorties afin de contrôler les servomoteurs, l'ESC ou le contrôleur de vol. Les résultats sont visualisés sur l'écran. Spécifications Modes de fonctionnement Control/Manual et Measure/Inputs (Contrôle manuel et mesures) Nombre de canaux 3 Entrées des signaux des servomoteurs 4 Sorties des signaux vers les servomoteurs 4 Alarme Buzzer & LED Affichage Écran OLED de 0,96' (128 x 32 pixels) Tension d'entrée K5 7-12 V CC Tension d'entrée K1 5-7,5 V CC Courant d'entrée 30 mA (9 VDC sur K5, K1 et K2 non reliés) Dimensions 113 x 66 x 25 mm Poids 60 g Inclus Résistances (0,25 W) R1, R3 1 kΩ, 5% R2, R4, R5, R6, R7, R9, R10 10 kΩ, 5% R8 22 Ω, 5% P1, P2, P3, P4 10 kΩ, potentiomètre vertical linéaire/B Condensateurs C1 100 µF 16 V C2 10 µF 25 V C3, C4, C7 100 nF C5, C6 22 pF Semiconducteurs D1 1N5817 D2 LM385Z-2.5 D3 BZX79-C5V1 IC1 7805 IC2 ATmega328P-PU, programmé LED1 LED, 3 mm, rouge T1 2N7000 Divers BUZ1 Buzzer Piezo avec oscillateur K1, K2 Connecteur à 2 rangées de 12 broches à 90° K5 Connecteur jack K4 Connecteur à 1 rangée de 4 broches K3 Connecteur à 2 rangées de 6 broches S1 Interrupteur à glissière 2P2T S2 Interrupteur à glissière 1P2T X1 Quartz, 16 MHz Support DIP 28 broches pour IC2 Circuit imprimé Elektor Afficheur OLED de 0,96', 128 x 32 pixels, interface I²C à 4 broches Liens Elektor Magazine Elektor Labs
€ 59,95
Membres : € 53,96
-
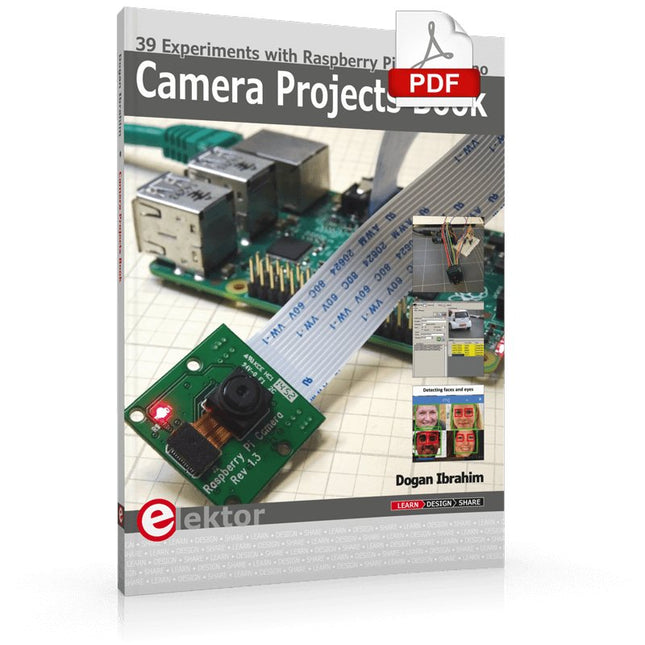
Elektor Digital Camera Projects Book (E-book)
39 Experiments with Raspberry Pi and Arduino This book is about Raspberry Pi 3 and Arduino camera projects. The book explains in simple terms and with tested and working example projects, how to configure and use a Raspberry Pi camera and USB based webcam in camera-based projects using a Raspberry Pi. Example projects are given to capture images, create timelapse photography, record video, use the camera and Raspberry Pi in security and surveillance applications, post images to Twitter, record wildlife, stream live video to YouTube, use a night camera, send pictures to smartphones, face and eye detection, colour and shape recognition, number plate recognition, barcode recognition and many more. Installation and use of popular image processing libraries and software including OpenCV, SimpleCV, and OpenALPR are explained in detail using a Raspberry Pi. The book also explains in detail how to use a camera on an Arduino development board to capture images and then save them on a microSD card. All projects given in this book have been fully tested and are working. Program listings for all Raspberry Pi and Arduino projects used in this book are available for download on the Elektor website.
€ 29,95
Membres : € 26,96


