
Résultats de la recherche pour "sensebox OR edu OR diy OR environmental OR monitoring"
-

Elektor Digital Elektor July/August 2023 (PDF)
Elektor GREEN and GOLD members can download their digital edition here. Not a member yet? Click here. Rotary Dial Phone as Remote ControlTo Switch On the Lights, Dial 1; For the Coffee Maker, Dial 2 GPS-Based Speed MonitorNo More Speeding Tickets RGB Stroboscope with ArduinoA Colorful Adaptation of a Useful Instrument Wireless Emergency Push ButtonEnhanced Safety with LoRa Starting Out in ElectronicsFollow the Emitter Arbitrary, Independent Hysteresis Levels for Comparatorswith Simulations, Spreadsheets and Algebra ESP32-Based Impedance AnalyzerSimple, Low-Part-Count, and Inexpensive! HomeLab ToursEncouraging DIY The MCCAB Arduino Nano Training BoardAll-in-One Hardware for the “Microcontrollers Hands-On Course” From Life’s ExperienceModern Luddism Sensor 101: The DS18B20 Temperature SensorConnection to the 1-Wire Bus Is Matter the Thread to Save the Smart Home?New Standards to Simplify the Smart Home A Matter of CollaborationDeveloping with the Thing Plus Matter Board and Simplicity Studio Infographics: IoT and Sensors Matter, ExpressLink, Rainmaker — What Is This All About?Q&A with Amey Inamdar, Technical Marketing Director at Espressif Selecting Microcontroller Dev Kits for IoT and IIoT ApplicationsAn Introductory Guide Capacitors Do Not Always Behave Capacitively! An NTP Clock with CircuitPythonWhy Should You Use This Programming Language? Build a Cool IoT DisplayWith the Phambili Newt The HB100 Doppler Motion SensorTheory and Practice A Bare-Metal Programming Guide (Part 1)For STM32 and Other Controllers Siglent SDM3045X Multimeter Microprocessors for Embedded SystemsPeculiar Parts, the Series Microcontroller Documentation Explained (Part 3)Block Diagrams and More Low-Power LoRa Weather StationBuild a long-range weather station by yourself Transverter for the 70 cm Band Climate Calling EngineersMove Fast and Fix Things Hexadoku
€ 7,50
-

Elektor Digital Raspberry Pi 4 und Pico (PDF)
Pfiffige Projekte zum Messen, Steuern und Regeln Der Raspberry Pi dominiert seit vielen Jahren die Maker-Szene. Frei verfügbare I/O-Pins machten ihn zu einem der beliebtesten Prozessorboards aller Zeiten. Allerdings verfügt der klassische Raspberry Pi über keinerlei Analogeingänge. Eine direkte Messung analoger Werte ist damit nicht möglich. So können weder Photodioden noch NTCs oder Hallsensoren etc. unmittelbar ausgelesen werden. Zudem sind die Pins direkt, d. h. ohne Treiber oder Schutzschaltung, mit den freiliegenden Kontakten verbunden. Dadurch kann der zentrale Controller und damit der gesamte Raspberry Pi schnell zerstört werden. Mit dem Pico können diese Probleme elegant gelöst werden. Er kann als sogenanntes „Frontend“ problemlos vielfältige Messaufgaben übernehmen. Zudem ist der Pico deutlich preisgünstiger als ein klassischer Raspberry Pi 4. Falls eine Fehlbeschaltung zur Zerstörung des Pico führt, ist dies vor allem für nicht-professionelle Anwender relativ leicht zu verkraften. Der klassische Raspberry Pi und der Pico werden so zum idealen Duo. Das Buch führt entsprechend in das weite und hochaktuelle Gebiet der modernen Controllertechnik anhand der beiden Boards „Raspberry Pi 4“ und „Raspberry Pi Pico“ ein. Neben einer tiefergehenden Einführung in die Arbeits- und Funktionsweise der Controllerboards selbst wird insbesondere auch auf die Messwerterfassung und -verarbeitung mit digitalen Prozessoren eingegangen. Insbesondere die Kombination beider Systeme bietet vielfältige und hochinteressante Möglichkeiten. Praktische Projekte aus dem Inhalt: USB-Verbindung zwischen Raspberry Pi 4 und Pico I²C-Kommunikation und Pico als I²C-Device Voltmeter und Computerthermometer Pico W als Web-Server und WLAN-Scanner Frequenzmesser und -generatoren OLED-Displays an Pico und Raspberry Pi 4 Energiesparmonitor Welche Astronauten sind im Orbit? Mini-Monitor für den aktuellen Bitcoin-Kurs
€ 32,80
Membres : € 29,52
-

Elektor September/October 2026 (EN)
Elektor GREEN and GOLD members can download their digital edition here. Not a member yet? Click here. The ESP-BLASTA Mini ESP32 Rocket Drone That Flies 100 km/h+ Wireless Workshop (1)Radio Modules Unlocked: 433 MHz CC1101 Sub-GHz Transceiver AM TransmitterWith Square/Sine Wave Generator on Raspberry Pi Pico STM32Cube Innovation ChallengeCompete with Your Best STM32C5 Design CoffeeCallerHow a Long Hallway Led to a Custom Mesh-Networked PCB AudiotronicsTotal Harmonic Distortion Elektor at 65Projects from Septembers and Octobers Past Bluetooth Channel Sounding for Asset TrackingCentimeter-Level Precision Ranging for Next-Generation IoT 2026: An AI OdysseyQuantum Computing Is Not the Next GPU Protecting the Cloud Demands Security at the Edge First Experiences with the HackRF ProPractical Tests with the New SDR Hardware Modem Upgrade from GPRS/2G to LTE/4GUsing a Wireless Alarm Control Panel as an Example Loop Antenna with RF BricksPart 1: A DIY Shortwave Antenna with Adjustable Directivity Internet Radio to AM ConverterUsing an ESP32-S3 as Transmitter Err-lectronics mioty — An OverviewFraunhofer’s Approach to LPWAN Workbench WisdomPractical Tips from Experts Walter, the Compact IoT ModulePart 2: Accessing Weather and Data Services
€ 14,90
-

Elektor Digital Elektor March/April 2021 (PDF) EN
The Vision and Engineering Behind SparkFun Getting Started with MicroMod Leveling Up Your SparkFun JetBotHow I Expanded the Functionality of My JetBot, Powered by the NVIDIA Jetson Nano Programming an FPGA How to Build a DIY GNSS Reference Station The ClockClock Project Under the Hood: SparkFun Inventor's Kit SparkFun’s Glenn Samala on Product Development and New Ventures Creating Custom Circuit Boards with SparkFun À La Carte Designing with the SparkFun Artemis Getting Started with the Qwiic Ecosystem for Rapid Prototyping Poster - Qwiic Under the Hood: The GreatScott! / Elektor DIY LiPo Supercharger Kit Memorable Electronics from SparkFun Past Perfect Parking with LiDAR Buried Pad PCB Fixing Design to Sale: the SparkFun RTK Surveyor Hello World from the Raspberry Pi Pico and RP2040A Look at Raspberry Pi’s First Microcontroller and Microcontroller Chip DIY Quadrupedal Robots Poster - Micromod RISC-V IoT Development in AWS Using FreeRTOS Libraries Yep, Electronics = Fun!A Conversation Among Electronics Enthusiasts Sparkfun Product Catalog HexadokuThe Original Elektorized Sudoku
€ 7,50
-
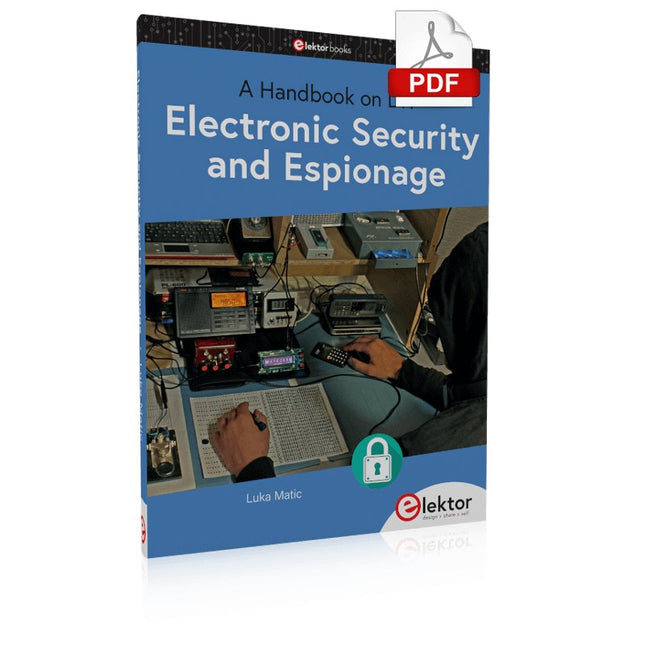
Elektor Digital Electronic Security and Espionage (E-book)
A Handbook on DIY Nowadays, security problems are rarely properly solved or correctly addressed. Electronic security is only part of the chain in making a system secure. Electronic security is usually addressed as network or software security, neglecting other aspects, but the chain is only as strong as its weakest link. This book is about electronic hardware security, with an emphasis on problems that you can solve on a shoestring DIY budget. It deals mostly with secure communications, cryptosystems, and espionage. You will quickly appreciate that you can’t simply buy a trustworthy and reliable cryptosystem off the shelf. You will then realise that this applies equally to individuals, corporations, and governments. If you want to increase your electronic security awareness in a world already overcrowded with networks of microphones and cameras, this is a book for you. Furthermore, if you want to do something DIY by designing and expanding upon simple electronic systems, please continue reading. Some of the devices described are already published as projects in the Elektor magazine. Some are still ideas yet to be worked out. Complexity is the main enemy of security, so we'll try to keep to simple systems. Every chapter will analyse real-life espionage events or at least several hypothetical scenarios that will hopefully spark your imagination. The final goal is to build a security-conscious mindset (or “to get into a head of a spy”) which is necessary to recognise possible threats beforehand, to design a truly secure system. Don’t bother reading if: you think you and your secrets are 100% safe and secure you think somebody else can effectively handle your security you think conspiracy theories only exist in theory – Telefunken’s masterpiece the “FS-5000 Harpoon” was built on one!
€ 32,95
Membres : € 29,66
-

Elektor Digital Elektor July/August 2024 (PDF)
Elektor GREEN and GOLD members can download their digital edition here. Not a member yet? Click here. Small Thermal Imaging CameraAn Arduino UNO-Based DIY Solution Project Update #3: ESP32-Based Energy MeterIntegration and Testing with Home Assistant 2024: An AI OdysseyEnhancing Object Detection: Integrating Refined Techniques Raspberry Pi Goes AINew Kit Incorporates M.2 HAT+ With AI Accelerator Weather Station SensorsWhich One Should You Choose? AI-Based Water Meter Reading (1)Get Your Old Meter Onto the IoT! A GSM AlarmHarnessing GSM Technology for Remote Garage Safety Low-Power Thread Devices Optimized and ScrutinizedLow Power … Low Effort? From Life’s ExperienceThe Gender Gap DIY Cloud ChamberMaking Invisible Radiation Visible SparkFun Thing Plus MatterA Versatile Matter-Based IoT Development Board IoT RetrofittingMaking RS-232 Devices Fit for Industry 4.0 Enabling IoT with 8-Bit MCUs Technology Drives SustainabilityAdvances Lead to More Efficient Use of Energy in Many Applications AWS for Arduino and Co. (1)Using AWS IoT ExpressLink in Real Life Airflow Detector Using Arduino OnlyNo External Sensors Needed! Water Leak DetectorConnected to Arduino Cloud CrystalsPeculiar Parts, the Series Universal Garden LoggerA Step Towards AI Gardening Analog 1 kHz GeneratorSine Waves with Low Distortion Miletus: Using Web Apps OfflineSystem and Device Access Included! From 4G to 5GIs It Such an Easy Step? Starting Out in Electronics……Balances Out
€ 7,50
-
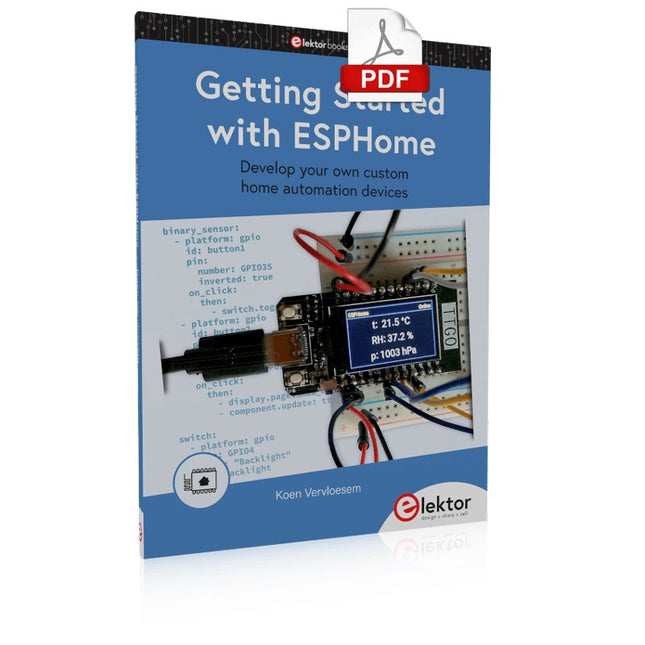
Elektor Digital Getting Started with ESPHome (E-book)
Develop your own custom home automation devices Espressif's ESP8266 and ESP32 microcontrollers have brought DIY home automation to the masses. However, not everyone is fluent in programming these microcontrollers with Espressif's C/C++ SDK, the Arduino core, or MicroPython. This is where ESPHome comes into its own: with this project, you don’t program your microcontroller but configure it. This book demonstrates how to create your own home automation devices with ESPHome on an ESP32 microcontroller board. You’ll learn how to combine all kinds of electronic components and automate complex behaviours. Your devices can work completely autonomously, and connect over Wi-Fi to your home automation gateways such as Home Assistant or MQTT broker. By the end of this book, you will be able to create your own custom home automation devices the way you want. Thanks to ESPHome and the ESP32, this is within everyone’s grasp. Set up an ESPHome development environment and create maintainable configurations Use buttons and LEDs Sound a buzzer and play melodies Read measurements from various types of sensors Communicate over a short distance with NFC, infrared light, and Bluetooth Low Energy Show information on various types of displays Downloads Software
€ 29,95
Membres : € 26,96
-

Paggen Werkzeugtechnik SMD Starter I – Ligne de production pour prototypes
La ligne de production de prototype SMD Starter I se compose de l'imprimante de pochoir TSD240, du dispositif de placement CMS PlaceMAN et du four de refusion 3LHR10. Imprimante de pochoir SD240 (+ Raclette métallique 155 mm) Dimensions du pochoir : max. 175 x 255 mm Dimensions de la carte de circuit imprimé : max. 180 x 240 mm Dimensions : 410 x 270 x 110 mm Poids : 6,7 kg Comprend une raclette métallique de 155 mm Comprend 8 aimants pour maintenir la carte de circuit imprimé, dont 6 avec vis M3 Dispositif manuel de placement CMS PlaceMAN pour composants standard incl. pompe à vide (sans alimentateurs, caméra, moniteur et distributeur) Équipé d'un bras de placement à mouvement fluide, d'une tête de placement à fonctionnement d'une main, de rotation de l'axe Z et d'une coupure automatique du vide, avec porte-carte de circuit imprimé, unité d'aspiration et 2 aiguilles de placement avec ventouses en caoutchouc. Capacité des alimentateurs (non inclus) 2x cassette d'alimentation pour rouleaux de 10 x 8 mm à gauche 4x cassette d'alimentation pour alimentateurs de tiges pour 5 tiges chacun D'autres systèmes d'alimentation sont possibles dans la zone d'assemblage, par exemple le système enfichable à alimentation par bande Dimensions Unité de base (LxlxH) : 765 x 390 x 210 mm Avec cassette d'alimentation pour rouleaux de 10 x 8 mm (LxlxH) : 765 x 390 x 210 mm Avec cassette d'alimentation pour rouleaux de 10 x 8 mm et cassette d'alimentation pour alimentateur de tiges (LxlxH) : 765 x 430 x 210 mm (la hauteur peut varier en fonction de la longueur des tiges) Avec cassette d'alimentation pour rouleaux de 10 x 8 mm incl. support pour 10 rouleaux et cassette d'alimentation pour alimentateur de tiges (LxlxH) : 765 x 430 x 210 mm (la hauteur peut varier en fonction de la longueur des tiges) Spécifications Poids de l'unité de base : environ 6 kg Déplacement des axes (x, y, z) : 470 x 230 x 15 mm Zone de travail maximale : 380 x 240 mm Dimensions maximales de la carte de circuit imprimé : 230 x 360 mm Alimentation électrique : 230/12 V, 800 mA Alimentation de la pompe à vide : 230 V, 6 W Four de refusion 3LHR10 (programmable pour la soudure sans plomb avec tiroir manuel et contrôle par tablette) Four de refusion avec chauffage IR et convection. La convection à air chaud forcé garantit un profil de température uniforme dans la chambre. Après avoir ouvert manuellement la porte, les ventilateurs s'allument et la carte de circuit imprimé soudée est refroidie rapidement. Four de refusion compact avec porte manuelle Prêt pour l'industrie 4.0, communication Bluetooth + tablette Chauffage IR + convection Application Android pour se connecter à une tablette ou un smartphone 100 programmes utilisateur différents Contenu de la livraison : 3LHR10, tablette avec application, couverture de protection pour la tablette, 4 porte-cartes de circuit imprimé, thermocouple externe, manuel sur la tablette Application Connectez le four à l'alimentation électrique et raccordez le système d'extraction en option (3LFE10S) au conduit d'évacuation d'air. Lors de la première mise en marche, le four recherchera une tablette ou un smartphone. Lorsque les deux sont connectés à l'application Android, choisissez la programmation du four. Ici, la température programmable et le temps de préchauffage, ainsi que la température et d'autres données, doivent être définis. Enregistrez-vous avec la tablette pour utiliser toutes les fonctionnalités du logiciel. Si le four est déjà programmé, l'utilisateur peut contrôler le fonctionnement avec les boutons et l'écran sur le panneau avant. Lorsque le processus de refusion est terminé, un signal sonore retentit. Un signal s'affiche également sur la tablette/smartphone. Le tiroir doit maintenant être ouvert manuellement. L'application Android affiche l'état du processus, le temps et la température, ou d'autres informations. Spécifications Alimentation électrique : 230 V, 50 Hz Puissance maximale : 3100 W Températures : 50-260°C Dimensions : 510 x 370 x 340 mm Poids maximal : 16 kg Dimensions de la grille : 350 x 220 mm Dimensions maximales de la carte de circuit imprimé : 300 x 200 mm Hauteur maximale des composants sur la carte de circuit imprimé : 50 mm en haut, 30 mm en bas Contenu de la livraison Imprimante de pochoir TSD240 Dispositif de placement CMS PlaceMAN Four de refusion 3LHR10
€ 6.549,00
Meilleur prix
-

Elektor Digital Elektor Circuit Special 2024 PDF (EN)
Elektor GREEN and GOLD members can download their digital edition here. Not a member yet? Click here. Digital Load for High-Current TestingFrom Necessity to Innovation Vocal RemoverInstant Karaoke Circuit Audio A/B Selector With Gain ControlSwitches from Microphone to Line Inputs Better Charging for the LIR2032Be Kind to Your Coin Cells Touch Sensing Made SimpleA DIY Guide for Any Microcontroller Universal Infrared Remote SwitchA New Life for Old Remotes Microcontroller-Powered Moo BoxMaking Playful Sounds With a Microcontroller USB Battery Interface Powering Low-Draw Devices With Power BanksA “Stay Alive” Solution Small Class-A Audio Amplifier With Current OutputDrive Speakers with Current Instead of Voltage Pseudo-Balanced ModuleHigh CMRR with Unbalanced Audio Links Ni-MH Cells Automatic ChargerRefill All Your Battery Packs in One Go! Thyristor-Based Power Supply Protection Fingerprint Sensor SwitchA Useful Proof-of-Identity Device DC-DC 3-A Power ConverterUpgrade Your Fixed-Voltage Sources Remote Water Heater MonitorVoltage and Current Detection for AC Lines Attenuators for Audio Signals (1)Adjustable Via Jumpers Pimp My Car Battery Charger (Part 1)Don’t Throw It Away, Mod It! A Board for the Blue OnePCB for Alps Motorized Potentiometer with Feedback 50-Hz Reference from 60-Hz Mains VoltageHow to Use 50-Hz Electronics in 60-Hz Environments Digital IsolatorsRealizing Galvanic Isolation Easily Compact 12-W Hi-Fi Mono AmplifierSmall But Powerful LM386 Ramp Generator Three-Phase GeneratorWith Raspberry Pi Pico Door Opener for the Musically Talented Elektor Classic: Surf SynthesizerOcean Watersports Background Sound Generator (OWBSG) Pimp my Car Battery Charger (Part 2)Don’t Throw It Away, Mod It! Lamp Current MonitorWith a Raspberry Pi Pico Infrared Telegraphy Fnirsi SWM-10Repair Battery Packs With This Portable Intelligent Spot Welding Machine Stereo Audio Codec for the ESP32 and Co.No Need to Be Afraid of Audio Measurement Technology Tin Soldering TechniquesMake Them Well Right Away! Attenuators for Audio Signals (2)Switching Via Relays USB-C PowerDrawing Power from USB-C Power Adapters Three Circuits with Two and Three Counter ICs4017 ICs Working Together Active Components – The Diode A Timer For Ultra-Long DelaysSet It, and Forget It! Jack In and Jack OutA Useful Insert Option for Audio Circuits Power an ESP32 from a Single Li-ion Cell Hexadoku
€ 7,50
-

Velleman Whadda kit arbre de Noël 3D
Le kit Whadda 3D Xmas Tree est destiné aux amateurs et aux débutants intéressés par la soudure et l'électronique. Avec ce kit DIY, vous pouvez construire un sapin de Noël LED festif. Caractéristiques 16 LED rouges clignotantes LED vertes et jaunes supplémentaires fournies pour personnaliser votre arbre Peut être accroché et alimenté par des fils Fonctionne sur 12 V CC (par exemple dans les voitures) Spécifications Faible consommation d'énergie 8 mA Alimentation Pile 9 V (non incluse) Dimensions 102 x 88 x 80 mm Poids 65 g Téléchargements Manuel
€ 10,86
-
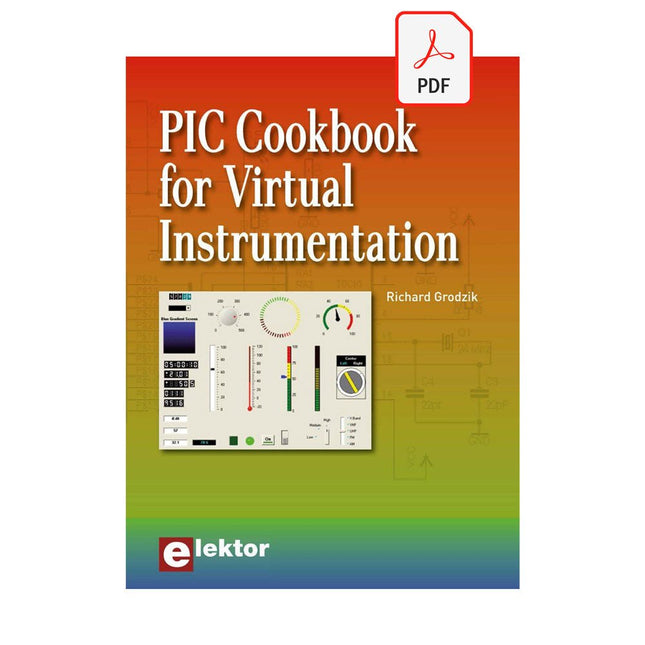
Elektor Digital PIC Cookbook for Virtual Instrumentation (E-book)
The software simulation of gauges, control-knobs, meters and indicators which behave just like real hardware components on a PC’s screen is known as virtual instrumentation. In this book, the Delphi program is used to create these mimics and PIC based external sensors are connected via a USB/RS232 converter communication link to a PC. Detailed case studies in this Book include a virtual compass displayed on the PC’s screen, a virtual digital storage oscilloscope, virtual -50 to +125 degree C thermometer, and FFT sound analyser, a joystick mouse and many examples detailing virtual instrumentation Delphi components. Arizona’s embedded microcontrollers – the PIC's are used in the projects and include PIC16F84A, PIC16C71, DSPIC30F6012A, PIC16F877, PIC12F629 and the PIC16F887. Much use is made of Microchip’s 44 pin development board (a virtual instrument ‘engine)’, equipped with a PIC16F887 with an onboard potentiometer in conjunction with the PIC’s ADC to simulate the generation of a variable voltage from a sensor/transducer, a UART to enable PC RS232 communications and a bank of 8 LED's to monitor received data is also equipped with an ISP connector to which the ‘PICKIT 2’ programmer may easily be connected. Full source code examples are provided both for several different PIC’s, both in assembler and C, together with the Pascal code for the Delphi programs which use different 3rd party Delphi virtual components.
€ 19,95
Membres : € 17,96
-

Elektor March/April 2026 (EN)
Elektor GREEN and GOLD members can download their digital edition here. Not a member yet? Click here. PIO Programming on the Raspberry Pi PicoNine Instructions, Many Possibilities Breaking AI Out of the BrowserUsing AI CLIs to Code, Compile, and Validate Embedded Projects The Scrutiny DebuggerDebug, Visualize, and Test Embedded C/C++ Code Sigfox Breakout Board (1)A Self-Built Radio BoB Low-Noise Power Supply (2)Construction, Assembly, and Practical Implementation Simple Signal Generator Using the RP2040Analog and Digital Signals for Around €10 Navigating the Future of Smart Homes with Matter and Edge AIAre Matter’s Latest Updates and the Rise of Edge AI Finally Giving Engineers the Tools to Build the Intelligent, Seamless Smart Homes Users Have Been Promised? Differential Pressure SensorsPredictive Maintenance in HVAC-Systems Security by DesignEngineering Fundamentals Limit Failure Embedded Security Is No Longer Optional CRA and PQC Are Rewriting Embedded Security PrioritiesWhy Even Small IoT and Industrial Firms Need an Upgrade Plan embedded world 2026An Interview With Benedikt Weyerer, Executive Director of embedded world Hands on with I3CUsing Hardware from ST and Microchip The BLEnky ProjectRapid Prototyping of Bluetooth Low Energy Applications Pulse Width ModulationFrom a Simple On/Off Thermostat to a Smoothed DC Analog Signal AudiotronicsEar-Pleasing Electronics for DIY Construction From Life’s ExperienceRead The F...ing Manual! ESP32 Audio Transceiver Board (Part 4)Tuning the Clocks - And a Wired Option 2026: An AI OdysseyThe 2025 Vibe-Coding Hangover Symmetrical DC LoadDC Load, Static or Dynamic, and Symmetrical Counting Faces with MaixCAMAn Easy Way to Capture Audience Sizes
€ 14,90


