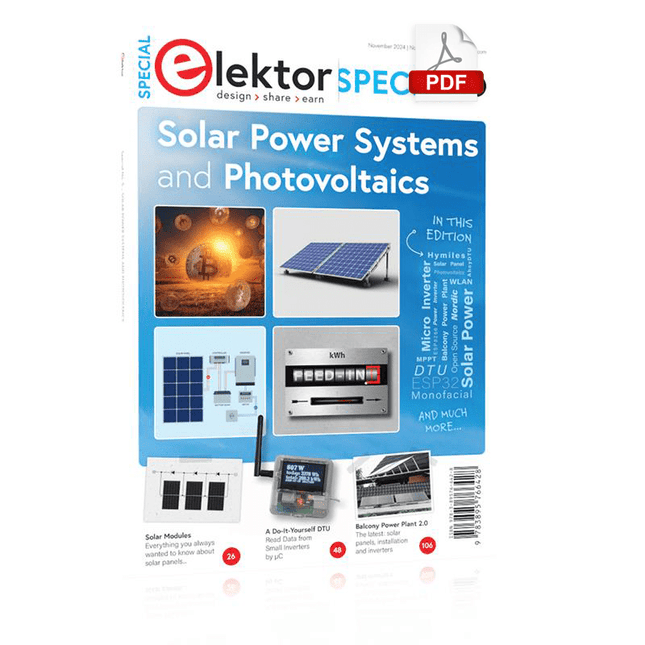
As demand for solar panel installation has risen sharply, especially for installations larger than balcony power plants, the order books of solar companies are full. If you ask for a quote today, you may have to wait a while, if your request isn't simply postponed indefinitely. Another consequence of the solar boom is that some companies are charging very high prices for installations.
Yet there is an obvious and radical solution to the problem of excessive prices: Do it yourself, as the English say. The price of materials is currently affordable, and it's the ideal time for those who do the work themselves. They couldn't save more. Add to this the satisfaction of doing something useful, both economically and ecologically, and the pleasure of building yourself.
In this special issue, you'll find a wide selection of Elektor assemblies, from solar panel controllers to solar water heaters and solar panel orientation systems. The issue also contains practical information on solar panel installation and the technology behind them. Finally, there are a number of articles on the subject of balcony power plants, from how to install them to how to connect them to the Internet...
Contents
BASICS
Dimensioning Photovoltaic Panel ArraysAn introduction to photovoltaic energy and the commonest techniques,followed by simplified calculation models and setup guidelines.
Light Sensor TechnologyMeasuring daylight using LEDs.
Solar Power Made SimpleSolar charging with and without a controller.
Cable Cross-sections and Energy Losses in Solar SystemsKey considerations on the minimum values to respect for electricalcurrent in solar panel cabling.
Solar ModulesEverything you always wanted to know about solar panels...
Ideal Diode ControllerDiode Circuits with Low Power Dissipation.
TIPS
Tracking for Solar Modules
zBot Solar/Battery Power Supply
Solar Cell Array Charger with Regulator
Solar Cell Voltage Regulator
Solar-Powered Night Light
Alternative Solar Battery Charger
PROJECTS
Energy LoggerMeasuring and Recording Power Consumption.
Tiny Solar SupplySunlight In, 3.3 V Out.
A Do-It-Yourself DTURead Data from Small Inverters by μC.
Solar ChargerPortable energy for people on the move.
Solar Thermal Energy RegulatorMaximum power point tracking explored.
2-amp Maximum Power Tracking ChargerSolar Power To The Max.
Computer-driven HeliostatFollow the sun or the stars.
Garden LightingUsing solar cells.
Solar Panel Voltage Converter for IoT DevicesYes we CAN exploit indoor lighting.
Travel ChargerFree power in the mountains.
Solar Cell Battery Charger/MonitorWith protection against deep discharge.
Solar-powered Battery ChargerPIC12C671 avoids overcharging and deep charging.
Converters for Photovoltaic PanelsContributed by TME (Transfer MultisortElektronik).
Solar Charging RegulatorFor panels up to 53 watts.
Solar-Powered ChargerFor lead-acid batteries.
CAN Bus + Arduino for Solar PV Cell MonitoringDetect and locate serviceable panels in large arrays.
Balcony Power Plant 2.0The latest: solar panels, installation and inverters
Le FNIRSI HS-03 fer à souder sans fil FNIRSI HS-03 allie portabilité et contrôle précis de la température, ce qui le rend idéal pour la réparation d'appareils électroniques, le soudage de composants CMS et les interventions sur site. Doté d'une batterie remplaçable de 2600 mAh, d'une fonction de chauffe rapide et d'une alimentation via USB-C, il offre des performances flexibles et fiables, quel que soit votre lieu de travail.
Caractéristiques
Batterie remplaçable de 2600 mAh pour une utilisation sans fil
Double mode d'alimentation : batterie ou USB-C
Chauffe rapide : fait fondre la soudure en seulement 7 secondes
Plage de température : 100–450°C
Contrôle de température PID pour une chauffe stable
5 préréglages de température pour des ajustements rapides
Écran IPS de 0,96" pour un suivi en temps réel
Mise en veille et mode repos automatiques pour économiser l'énergie
Pannes de soudage série F210 pour un travail de précision
Design compact et ergonomique avec revêtement en silicone
Spécifications
Tension de fonctionnement
5 V
Plage de température
100-450°C
Écran
Écran couleur IPS HD de 0,96"
Panne de fer à souder
F210
Batterie
Li-Ion 18650 (2600 mAh)
Puissance
10 W (max.)
Alimentation
USB-C
Poids
134 g
Inclus
1x FNIRSI HS-03 Fer à souder avec batterie intégrée
3x Pointes : 1x pointe K (lame), 1x pointe I (très fine), 1x pointe IS (crochet coudé)
1x Capuchon
1x Tournevis
1x Câble USB
1x Boîte de rangement
1x Manuel
Téléchargements
Manual
Firmware V1.2.0
A Beginner's Guide to AI and Edge Computing
Artificial Intelligence (AI) is now part of our daily lives. With companies developing low-cost AI-powered hardware into their products, it is now becoming a reality to purchase AI accelerator hardware at comparatively very low costs. One such hardware accelerator is the Hailo module which is fully compatible with the Raspberry Pi 5. The Raspberry Pi AI Kit is a cleverly designed hardware as it bundles an M.2-based Hailo-8L accelerator with the Raspberry Pi M.2 HAT+ to offer high speed inferencing on the Raspberry Pi 5. Using the Raspberry Pi AI Kit, you can build complex AI-based vision applications, running in real-time, such as object detection, pose estimation, instance segmentation, home automation, security, robotics, and many more neural network-based applications.
This book is an introduction to the Raspberry Pi AI Kit, and it is aimed to provide some help to readers who are new to the kit and wanting to run some simple AI-based visual models on their Raspberry Pi 5 computers. The book is not meant to cover the detailed process of model creation and compilation, which is done on an Ubuntu computer with massive disk space and 32 GB memory. Examples of pre-trained and custom object detection are given in the book.
Two fully tested and working projects are given in the book. The first project explains how a person can be detected and how an LED can be activated after the detection, and how the detection can be acknowledged by pressing an external button. The second project illustrates how a person can be detected, and how this information can be passed to a smart phone over a Wi-Fi link, as well as how the detection can be acknowledged by sending a message from the smartphone to your Raspberry Pi 5.
Modelle für 3D-Druck, CNC-Fräsen, Prozesskommunikation und Dokumentation erstellen
Das Design dreidimensionaler Modelle mit Werkzeugen wie Blender oder 3D Studio Max ist eine Aufgabe, die ingenieurwissenschaftlich begabte Personen nur allzu gern delegieren.
OpenSCAD wählt einen erfrischend anderen Zugang. Anstatt ein Objekt als Punktwolke zu betrachten, schreibt der Modellerzeuger in einer an JavaScript erinnernden Sprache ein Programm. Dieses beschreibt die zu erzeugende Geometrie als eine Serie von Arbeitsschritten. Dreidimensionale Modelle entstehen so in einem Workflow, der an die Entwicklung klassischer ingenieurwissenschaftliche Güter erinnert. Wegen der Nähe zur manuellen Fertigung mit Werkzeug ist das ein Prozess, der Ingenieuren gut in die Hände spielt.
Aber Achtung: trotz der Einfachheit der Syntax ist OpenSCAD kein primitives Modellierungsprogramm. Umfangreiche Scriptingmöglichkeiten sorgen dafür, dass sich die Modelle dynamisch an geänderte Situationen anpassen.
Dieses Lehrbuch demonstriert die Möglichkeiten von OpenSCAD anhand praktischer Beispiele. Freuen Sie sich auf Ersatzknöpfe für ein LeCroy-Oszilloskop, Garderobenstangenhalter, einen Halter für Seifenspender und diverse andere Beispiele aus dem realen Leben.
Der mit mehr als 15 Dienstjahren Erfahrung ausgestattete Autor entwickelte dieses für Linux und Windows gleichermaßen geeignete Buch explizit für informatikaffine Personen. Wenn Sie mit irgendeiner Programmiersprache Erfahrung haben, ist dieses Buch ihr Weg zum schnellen und unbürokratischen Erzeugen dreidimensionaler Modelle.
The author, Johan Basse Bergqvist, is an engineer, a musician, and an audiophile with a knack for building projects that produce the desired results. The combination of these skills leads to a uniquely valuable perspective on audio design that is routinely reflected in the book and passed on to the readers.
Several design projects are provided, 40 in total. The designs are explained, and the unique features or methods he uses are described in further detail. Each design includes detailed schematics and a complete parts list. Many of the projects also include layout documentation in the form of CAD photos of the PCB layouts. The range of projects is very diverse and includes something that will appeal to everyone. Stereo amplifiers, guitar and bass amplifiers, preamplifiers for phono, and microphones are all covered. Several variants for each type are included, and the power amplifier designs range from a few watts to several hundred watts, which meet almost any power level you might tackle.
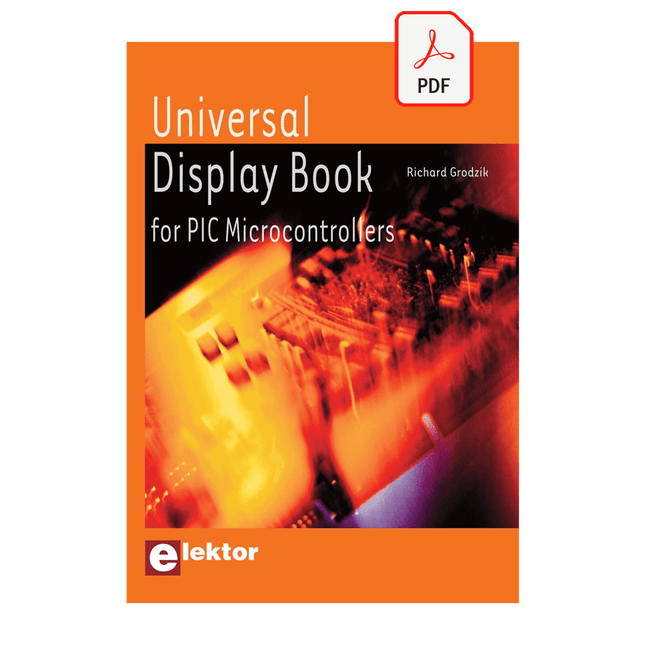
The newcomer to Microchip’s PIC microcontrollers invariably gets an LED to flash as their first attempt to master this technology. You can use just a simple LED indicator in order to show that your initial attempt is working, which will give you confidence to move forward. This is how the book begins — simple programs to flash LEDs, and eventually by stages to use other display indicators such as the 7-segment display, alphanumeric liquid crystal displays and eventually a colour graphic LCD.
As the reader progresses through the book, bigger and upgraded PIC chips are introduced, with full circuit diagrams and source code, both in assembler and C.
In addition, a small tutorial is included using the MPLAB programming environment, together with the EAGLE schematic and PCB design package to enable readers to create their own designs using the book’s many case studies as working examples to work from.
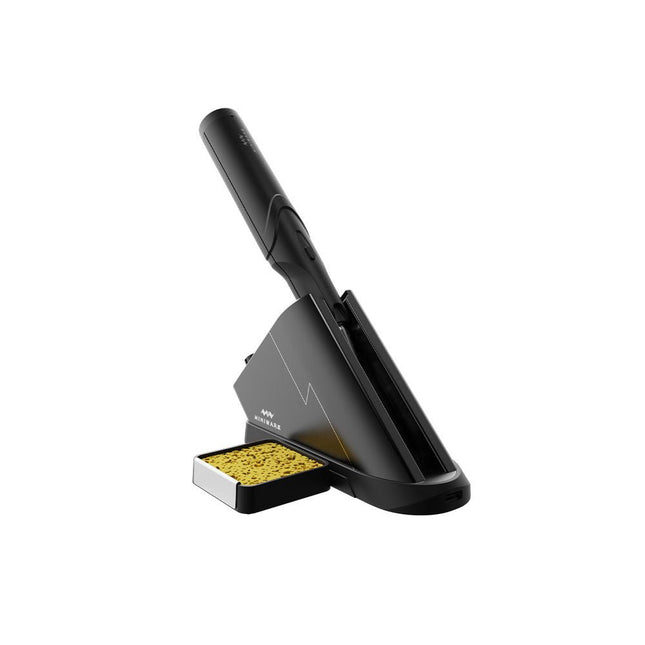
La station de soudure sans fil Miniware TS1C (avec écran OLED intégré et Bluetooth) est un outil de soudure intelligent qui chauffe jusqu'à 400°C en moins de 20 secondes. Grâce à sa batterie intégrée, le fer à souder sans fil est confortable à tenir et facile à utiliser.
Caractéristiques
Nouvelle technologie de stockage d'énergie avec supercondensateur à haut rendement, temps de charge et de décharge de 10 000 niveaux.
Conception séparée + véritable sans-fil, pour profiter de la soudure sans fil
PD2 standard 20 V avec une consommation d'énergie maximale de 45 W, et jusqu'à 36 W de puissance de soudage, peut souder en continu plus de 180 joints de soudure (0805) avec une seule charge complète.
Préchauffage dans la station de contrôle, pour améliorer l'efficacité du chauffage
Trois emplacements d'extension pour les accessoires
Station de contrôle
PD2 standard 20 V avec une consommation d'énergie maximale de 45 W, protection contre les surintensités
Écran OLED de 128x64 pixels, affichage en temps réel de l'état du fer à souder
Préchauffage dans la station de contrôle, pour améliorer l'efficacité du chauffage
Commande et réglage à distance : contrôle de la température, réglage du menu, affichage des informations et de l'état de l'appareil, etc.
Fonctions de support de soudure et de station de chargeTrois emplacements d'extension pour de multiples accessoires supplémentaires, tels qu'un emplacement pour l'éponge
Fer à souder
Supercondensateur 750F intégré pour un stockage d'énergie à haute efficacité, pouvant être chargé via la station de contrôle (ou en cas d'urgence via l'interface USB Type-C).
Puissance de chauffe maximale de 36 W, peut souder en continu plus de 180 joints de soudure (0805) avec une seule charge complète.
Compatible avec les pannes à souder d'interface audio Miniware 3,5 mm (série de pannes TS80/80P)
Mode Boost (maintenir le bouton du fer enfoncé)
Inclus
Fer à souder TS1C
Station de contrôle TS1C
Panne à souder (TS-B02)
Câble en silicone
Emplacement pour éponge avec éponge inclus
Manuel
Over 50 Circuits & Projects US-Style Siren Two Rotary Encoders on One Analog Input How to Build a Digital 220-V AC Dimmer with Arduino Current Source for LEDs Detect Four Switches with 1 Pin Tiny On/Off Switch with Battery Level Check DIY Hand Sanitizer Dispenser A Simple Electronic Organ Ultra-Simple Stereo Amplifier Sound Activated Switch for Amplifiers Balanced/Unbalanced Converter External Mains Filter Button-Free Door Control DI Box for a Smartphone Fun With Running Lights One-Button Thyristor Control Quasi-Analog Exposure Timer for the Dark Room Circuits Galore From the Hackster.io Community Analog Tanning Timer Yet Another Single-Wire LCD Interface Simple AVR ATtiny13-Based PWM Generator Second Life for Batteries Touch Switch for LED Lights Tester for LEDs and DIP Switches Go/No-Go IR Control Tester Power Semiconductor Tester SPI for WS2812(B) LEDs Measuring Power Inductors One Plug for Raspberry Pi and Audio DAC DIY Test Fixture for the LCR Meter Arduino Ammeter Two-Finger Organ Low Noise ADC Calibrator DC/DC Boost Converter Two Potentiometers on One Digital Input Acoustic Proximity Sensor Battery-Free Radiator Sensor A Circuit for Detecting Bugs and Wireless Cameras Car Interior Light Timer Candle Simulator Digital Kitchen Timer Milliohm Meter Hot Water Production Delay Timer Simple Charger for 2S 18650 Cells Tiny Frequency Reference Low-Power IR Switch Recycle Your Car’s Telephone Charger Microphone Pre-Amp for Arduino DIY EMI Filters Electronic Dice Without an MCU Finger Capacitor A Self-Charging LED Flasher Also in this edition KiCad 6 – Five Features to Consider Flashback – The Elektor SC/MP Computer Interview – Making Art with Electricity My First PCB – Going Head First Into KiCad Minimizing Hardware with Smart Software Infographics – Facts and Figures New Devices from Analog Flashback – The Elektor Metal Detector Hexadoku – The Original Elektorized Sudoku
Diese Ausgabe steht allen GOLD- und GREEN-Mitgliedern auf der ElektorMagazine-Website zum Download bereit!
Sie sind noch kein Mitglied? Hier klicken!
Cloc 2.0Der Wecker, den Sie sich schon immer gewünscht haben
Raspberry Pi Pico: PIO in der PraxisExperimente mit der Programmable I/O des RP2040
ChipTweaker des armen MannesBillige Wege, sie zum Sprechen zu bringen
Echter Zufallszahlen-Generator mit USBZwei PICs zum Preis von einem AVR
Pimp my mike...Pegelanhebung selbst gebaut
FFT mit MaixduinoFrequenzspektren erfassen
Aus dem Leben gegriffenEntwurfslogik (oder Un-Logik)
Schrittmotor-Treiber UCN5804Bemerkenswerte Bauteile
Schaltungssimulation mit Micro-CapErste Schritte in eine komplizierte Welt
Der PAUL Award 2022Junge Techniktalente und ihre kreativen Lösungen
Mein erstes Software-definiertes RadioGebaut in weniger als 15 Minuten
Mikrocontroller-Dokumentation verstehenTeil 1: Aufbau einer Dokumentation
KI und eingebettete Systeme - Was kommt als Nächstes?Werkzeuge, Plattformen und das Ende der Textarbeiter
Digitalisierung der vertikalen Landwirtschaft
Infografik: Embedded und KI, heute und morgen
Einführung in TinyML
Casestudy KwickPOS
High-Performance in jeder KlasseComputer-on-Module-Standards
Aller Anfang...muss nicht schwer sein: Werden wir aktiv!
I²C-Kommunikation mit Node.js und einem Raspberry PiSehen Sie Ihre Sensordaten in einem Browser
Videoausgabe mit MikrocontrollernTeil 2: VGA- und DVI-Ausgabe
Das Echtzeit-Betriebssystem MetronomEin RTOS für AVR-Prozessoren
DVI auf dem RP2040Ein Interview mit Luke Wren, Chip-Entwickler bei Raspberry Pi
Display HAT MiniZeigt die Wettervorhersage auf dem Raspberry Pi
WEEF 2022 Awards: Feiern Sie das Gute!
Hexadoku
L'OWON HDS272S est la solution parfaite tout-en-un ! Oscilloscope, multimètre et générateur de formes d'onde dans le même appareil alimenté par batterie, pour travailler en déplacement. Caractéristiques Oscilloscope + multimètre + générateur de formes d'onde, multifonction en un. Écran LCD couleur haute résolution de 3,5 pouces, à contraste élevé, adapté à une utilisation en extérieur. Batterie au lithium 18650, consommation électrique globale ≤3 W, peut fonctionner en continu pendant environ 6 heures. Interface USB Type-C, prise en charge de la banque d'alimentation, prise en charge de la connexion du logiciel PC. Fonction d'auto-calibrage SCPI supporté, facilite le développement secondaire Spécifications Oscilloscope Bande passante 70 MHz Canaux 2x oscilloscope + 1x générateur Taux d'échantillonnage 250 MSa/s Modèle d'acquisition Normal, détection des pics Longueur d'enregistrement 8K Affichage LCD de 3,5 pouces Fréquence de rafraîchissement de la forme d'onde 10,000 wfrms/s Couplage d'entrée CC, CA, et GND Impédance d'entrée 1 MΩ ±2%, en parallèle avec 16 pF ±10 pF Facteurs d'atténuation de la sonde 1x, 10x, 100x, 1.000x, 10.000x Tension d'entrée maximale 400 V (CC+CA, crête-crête, impédance d'entrée 1 MΩ) (atténuation de la sonde 10:1) Limite de la bande passante (typique) 20 MHz Échelle horizontale 5 ns/div - 1000 s/div, pas par 1 - 2 - 5 Sensibilité verticale 10 mV/div - 10 V/div Résolution verticale 8 bits Type de déclenchement Front Modes de déclenchement Auto, normal, simple Mesure automatique Période, fréquence, moyenne, crête-crête, max, min Mesure par curseur ΔV, ΔT, ΔT & ΔV entre curseurs Interface de communication USB Type-C Multimètre Résolution max. 20 000 comptes Mode de test Test de tension, de courant, de résistance, de capacité, de diode et de continuité. Impédence d’entrée 10 MΩ Tension d’entrée maximale CA 750 V, CC 1000V Courant d’entrée maximum CA 10A, CC 10A Diode 0 - 2 V Générateur de forme d’onde Fréquence de sortie Sinus 0,1 Hz - 25 MHz Carré 0,1 Hz - 5 MHz Rampe 0,1 Hz - 1 MHz Impulsion 0,1 Hz - 5 MHz Arbitraire 0,1 Hz - 5 MHz Taux d’échantillonage 125 MSa/s Canal 1-ch Plage d’amptitude 20 mVpp - 5 Vpp Longueur de la forme d’onde 8K Résolution verticale 14 bits Impédance de sortie 50 Ω Télechargements User Manual for HDS200 Series SCPI Protocol for HDS200 Series Quick Guide for HDS200 Series PC Software for OWON HDS200 Series
Diese Ausgabe steht allen GOLD- und GREEN-Mitgliedern auf der ElektorMagazine-Website zum Download bereit!
Sie sind noch kein Mitglied? Hier klicken!
Die Open-Source-Prozessorarchitektur RISC-V16 Boards und MCUs, die Sie kennen sollten
Audio-Player mit FPGA und EqualizerTeil 1. Digitale Audiosignale mischen mit einem MKR Vidor 4000 von Arduino
Laserkopf für Pico-basierte SanduhrZeichnen mit Licht
Nehmen Sie teil am STM32 Edge AI Contest!
Umweltüberwachung von Pflanzen mit mehreren SensorenDrahtlose Messung der Wasserversorgung und Lichtverhältnisse
Maixduino: Automatischer KI-TüröffnerGesichtserkennung mit einer Kamera
Embedded-Elektronik 2024KI wird die Branche neu definieren
Ladungsbasiertes In-Memory Compute bei EnCharge AI
KI-Inferencing bei 10-fach geringerer Leistungsaufnahme zu 20-fach geringeren Kosten
Click-Board hilft bei der Entwicklung und dem Training von ML-Modellen für die Schwingungsanalyse
Der Elektor Mini-WheelieEin Bausatz für einen selbstbalancierenden Roboter
MCU, ich sehe dich!MCUViewer, ein Open-Source-Multiplattform-Debugging-Werkzeug
USB-2.0-IsolatorGeräte galvanisch isoliert per USB verbinden
Eingriff vor dem SchadenPredictive Maintenance in der Praxis
SPoE - Elektromagnetische VerträglichkeitSingle-Pair mit Power-over-Ethernet im EMV-Fokus
Retro-TechnikWie das Farbfernsehen eine neue Welt schuf
EKG-MonitorMit Hexabitz-Modulen und einem STM32CubeMonitor
Der Kampf um KI at the Edge
HaLow erreicht Rekorddistanz von 16 km für WLAN bei 900 MHz
Erster CHERI RISC-V-Embedded Chip und Early Access Programm
Die dritte Generation der Waldbrandfrüherkennung nutzt Satellitenverbindungen
Aus dem Leben gegriffenDie Qual der Wahl
Aller Anfang......ist nicht schwer: Wir setzen die Filterung und Klangregelung fort.
Riesen-LED-UhrNeuauflage eines Elektor-Klassikers
Ein modularer Ansatz für die SensorprüfungDas Sensor Evaluation Board mit ESP32-S3
2025: Eine Odyssee in die KIDer Aufstieg der Basismodelle und ihre Rolle bei der Demokratisierung der KImocratizing AI
Standalone MIDI-Synthesizer mit Raspberry PTeil 1: Eine Plattform für Edge-KI-Experimente vorbereiten
Projekt 2.0Korrekturen, Updates und Leserbriefe
CPU, GPU, DSP, FPGA; ein universeller KI-RISC-V-Prozessor kann alles!
CEO-Interview: Ventivas dünne und kühle Technologie
Dual-Core-Programmierung beim Raspberry Pi PicoEinstieg in die Welt der parallelen Programmierung
Open-Source-Code mit Arduino IDE und PlatformIO
Autonomes Fahren: GPS, Accelerometer, Gyroskop
PS3-Controller
Mikrocontroller wie der Arduino und Einplatinenrechner wie der Raspberry Pi haben sich zu beliebten Komponenten entwickelt. Dritter im Bunde ist der ESP32 der Firma Espressif. Mikrocontroller dieser Baureihe zeichnen sich durch eine Vielzahl implementierter Funktionen aus, die bei einem Arduino konventioneller Prägung mit einem Atmel-AVR-Mikrocontroller erst mit weiterer Hardware möglich sind. Prominentes Beispiel sind hier die WiFi- und Bluetooth-Funktionalitäten. Gegenüber einem Raspberry Pi zeichnen sie sich durch einen deutlich geringeren Preis aus.
Allgemeine Informationen für die Realisierung eines Roboterauto-Projekts mit dem ESP32 sind leicht zu finden. Dabei handelt es sich aber oft nur um Ausführungen zu einem Teilaspekt, ohne inhaltliche oder funktionale Abstimmung. So ist nicht nur die Beschaffung der benötigten Informationen mühselig und zeitaufwändig, sie kann auch außerordentlich fehlerträchtig sein.
Ansatzpunkt dieses Buches ist, diese Lücke zu schließen. Es geht auf verschiedene Möglichkeiten eines Chassis ein, vermittelt nötige Kenntnisse und führt schrittweise von einer einfachen Motorsteuerung zu einem komplexen sensor- und sprachgesteuerten Roboterauto. Hacks rund um GPS und eine PlayStation 3 runden die Sache ab.
Inhalt
Bei der Reihenfolge der Kapitel wurde versucht – beginnend bei der Darstellung von grundlegenden Informationen – über die Lösung einfacher Aufgaben zu etwas anspruchsvolleren Techniken zu führen.
Der Mikrocontroller ESP32
Die Software erstellen
Die Stromversorgung
Rund um die Hardware
Das Chassis
Der Gleichstrommotor
Kabellose Steuerung über WiFi
Mit Sensoren Hindernisse erkennen
Eine eigene Roboterauto-App
Servo und Lichtsensor
GPS
Accelerometer / Gyroskop
PS3-Controller
Roboterauto-App
Hinweis zur Software
Die Dateien haben das Suffix (.cpp). Grund ist die Entwicklung mit PlatformIO. Mit Copy & Paste sollten sie auch in der Arduino-IDE verwendet werden können.