Le FNIRSI HT-P1B Pro est une mini plaque chauffante compacte conçue pour le brasage, le dessoudage et la reprise de composants montés en surface (CMS) sur des circuits imprimés (PCB). Avec une puissance de chauffe atteignant 150 W, un contrôle précis de la température par PID et une plage réglable de 100°C à 350°C, il assure une montée en température rapide et stable pour vos projets électroniques.
Sa surface de chauffe de 50 x 50 mm est idéale pour les petits circuits imprimés et les composants électroniques. Deux modes de fonctionnement – chauffage à température constante et simulation de brasage par refusion – offrent une grande polyvalence selon les besoins. L'appareil est doté d'un écran couleur de 1,44 pouce, de trois préréglages de température et de dispositifs de sécurité intégrés pour une utilisation pratique et sereine.
Compatible avec les alimentations CC et USB-C PD 3.1, et fourni avec un chargeur USB-C de 100 W, le HT-P1B Pro est un outil pratique, parfaitement adapté aux créateurs, aux passionnés d'électronique et aux professionnels de la réparation.
Caractéristiques
Puissance de chauffe jusqu'à 150 W : Montée en température rapide avec réglages de puissance ajustables de 30 W à 150 W.
Contrôle précis de la température par PID : Plage réglable de 100°C à 350°C, avec une stabilité de température de ±3°C.
Deux modes de fonctionnement : Chauffe à température constante et simulation de brasage par refusion (reflow).
Surface de chauffe de 50 × 50 mm : Idéale pour les petits circuits imprimés (PCB), le brasage de composants CMS (SMD) et la reprise de composants.
Alimentation flexible : Entrée CC 12-28 V (jusqu'à 150 W) et USB-C PD 3.1 (jusqu'à 140 W).
Trois préréglages de température : Accès rapide aux réglages de température fréquemment utilisés.
Écran couleur de 1,44 pouce : Affiche la température, la tension, la puissance, la durée de chauffe et l'état de fonctionnement.
Fonctions de sécurité intégrées : Protections contre les températures excessives, la basse tension, la chauffe prolongée et l'inclinaison.
Spécifications
Entrée d'alimentation
12-28 V CC / USB-C PD
Plage de puissance
30-150 W
Consommation en veille
1,6 W
Plage de température
100-350°C
Stabilité de la température
±3°C
Surface de chauffe
50 x 50 mm
Écran
Écran couleur 1,44"
Détection d'inclinaison
20°-50°
Protocole
PD 3.1
Dimensions
68,8 x 81,8 x 44,5 mm
Poids
157 g
Included
1x FNIRSI HT-P1B station de préchauffage
1x FNIRSI chargeur 100 W PD GaN (UE)
1x FNIRSI câble de charge rapide USB-C 100 W
1x Housse en silicone résistante à la chaleur
1x Étui de rangement
1x Manuel
Téléchargements
Manual
Eerste stappen met een ESP32-C3 en het IoTWiFi-knop en -relais IoT Cloud à la Arduino
Arduino-shield met dubbele Geiger-Müller buisuiterst gevoelige en zeer zuinige stralingssensor
CO2-wachterluchtkwaliteit bewaken – doe het zelf!
MonkMakes Air Quality Kit voor de Raspberry Pimeet temperatuur en eCO2
Alle begin......verwelkomt de diode
Tips & trucs voor het testen van componentenzonder kostbare apparatuur
Reduceer het stroomverbruik van uw mollenverjagerATtiny13 in plaats van 555
Lichtschakelaar DeLuxuiterst nauwkeurig lichtgestuurd schakelen
Uitdagingen bij het op de markt brengen van IoT-oplossingenzorgen over veiligheid, schaalbaarheid en de concurrentie Elektor Infographics
Toch beter bedraadTips voor het ontwikkelen van een 1 Gbit/s interface in de industriële omgeving
Edge Impulse FOMOreal-time objectdetectie voor MCU’s
Lopende-golfbuisVreemde onderdelen, de serie
Smalband-Internet of Thingsstandaarden, dekking, overeenkomsten en modules
Dragino LPS8 indoor-gatewayLoRaWAN-gateway snel geïnstalleerd
Ontdek ATtiny-microcontrollers met behulp van C en assemblervoorbeeldhoofdstuk: ATtiny I/O-poorten
Project 2.0correcties, updates en brieven van lezers
LoRa GPS-tracker updateontvang en toon de locatie met een Raspberry Pi
Schakelingen simuleren met TINA Design Suite & TINACloudvoorbeeldhoofdstuk: sinusoscillatoren
Uit het leven gegrepenlopendebandwerk
Het WinUI grafische framework voor Windows-appseen kleine demo-applicatie
GUI's maken met Python's Werelds slechtste GUI
Off-grid PV-systeemelektrische energie onafhankelijk van het net
De 10-jaar-smartphonestel uw verwachtingen bij Hexadoku
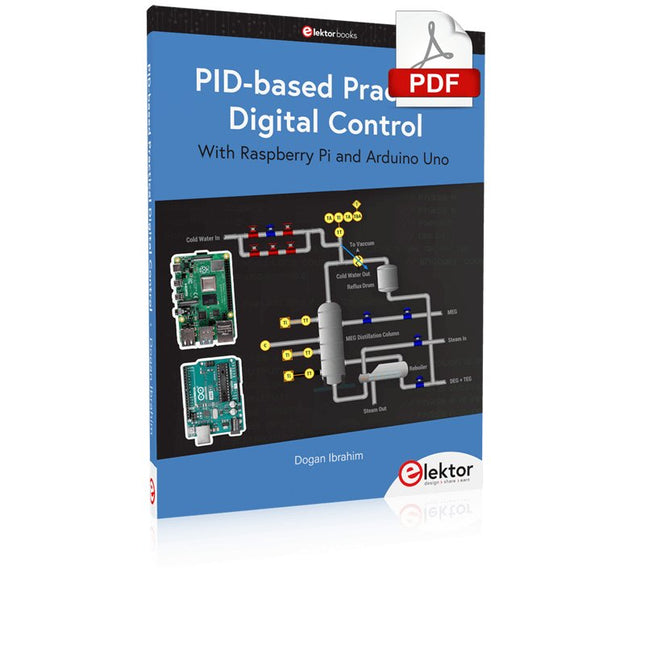
The Arduino Uno is an open-source microcontroller development system encompassing hardware, an Integrated Development Environment (IDE), and a vast number of libraries. It is supported by an enormous community of programmers, electronic engineers, enthusiasts, and academics. The libraries in particular really smooth Arduino programming and reduce programming time. What’s more, the libraries greatly facilitate testing your programs since most come fully tested and working.
The Raspberry Pi 4 can be used in many applications such as audio and video media devices. It also works in industrial controllers, robotics, games, and in many domestic and commercial applications. The Raspberry Pi 4 also offers Wi-Fi and Bluetooth capability which makes it great for remote and Internet-based control and monitoring applications.
This book is about using both the Raspberry Pi 4 and the Arduino Uno in PID-based automatic control applications. The book starts with basic theory of the control systems and feedback control. Working and tested projects are given for controlling real-life systems using PID controllers. The open-loop step time response, tuning the PID parameters, and the closed-loop time response of the developed systems are discussed together with the block diagrams, circuit diagrams, PID controller algorithms, and the full program listings for both the Raspberry Pi and the Arduino Uno.
The projects given in the book aim to teach the theory and applications of PID controllers and can be modified easily as desired for other applications. The projects given for the Raspberry Pi 4 should work with all other models of Raspberry Pi family.
The book covers the following topics:
Open-loop and closed-loop control systems
Analog and digital sensors
Transfer functions and continuous-time systems
First-order and second-order system time responses
Discrete-time digital systems
Continuous-time PID controllers
Discrete-time PID controllers
ON-OFF temperature control with Raspberry Pi and Arduino Uno
PID-based temperature control with Raspberry Pi and Arduino Uno
PID-based DC motor control with Raspberry Pi and Arduino Uno
PID-based water level control with Raspberry Pi and Arduino Uno
PID-based LED-LDR brightness control with Raspberry Pi and Arduino Uno
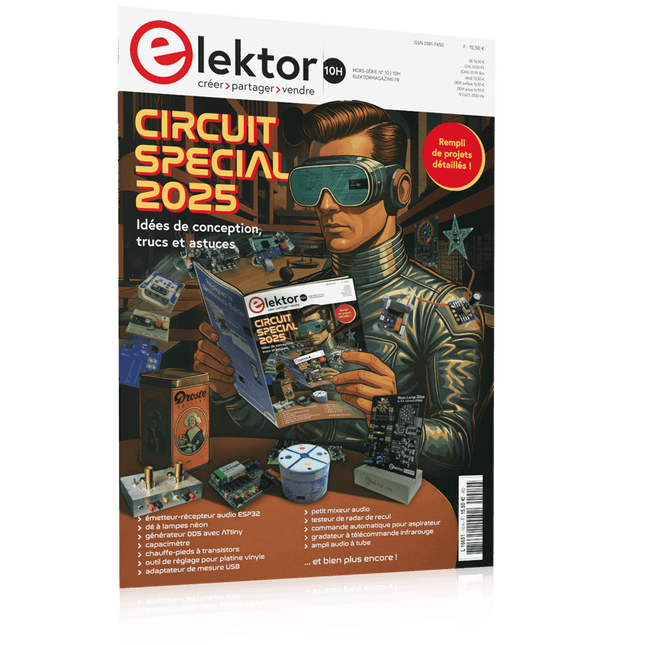
Le téléchargement intégral de ce numéro est disponible pour nos membres GOLD et GREEN sur le site Elektor Magazine !
Pas encore membre ? Cliquez ici.
adaptateur de mesure USBTest du courant et des signaux des ports USB
sortie boucle de courant 4-20 mA pour Arduino UnoUne interface de boucle de courant fiable et insensible aux interférences électromagnétiques
commande automatique pour aspirateurGardez votre établi propre
générateur DDS avec ATtiny
testeur d'ampli-op V2Nouveau circuit imprimé – désormais compatible avec les CMS
amplificateur audio à tube 550 mWson chaleureux des tubes à vide
surveillance des fusiblesavec une LED clignotante
préamplificateur RIAA HQExploitez tout le potentiel sonore de vos disques vinyles !
Outil de réglage pour platines vinylesGénérateur de lumière stroboscopique 100–120 Hz basé sur Arduino
Elektor Classics : ampli vidéo
gradateur à télécommande infrarougeContrôlez votre éclairage avec confort et précision
comment utiliser switch…case avec des chaînes de caractères en C++/EDI Arduino
détecteur d’aimantsAvec un simple capteur à effet Hall
bouton de mise sous tension intelligent pour Raspberry PiUne solution pour Raspberry Pi jusqu’au modèle 4
astuces clés pour makersDes conseils pros pour vos projets
projets pratiques avec le timer 555Commande de moteur CC et jeux de rapidité
moniteur de charge CA simpleÉconomisez de l'énergie grâce à un appareil simple
batteries externes en parallèleTrois jours d’autonomie
VFO jusqu’à 15 MHzRéalisation avec un Raspberry Pi Pico
accordeur de violon avec ATtiny202
Elektor Classics : ampli vidéo pour TV N&B
capacimètre20 pF à 600 nF
horloge quasi analogique Mk IIDeux anneaux LED pour les heures et les minutes
concevez sans limites(grâce à l’écosystème complet d’Arduino)
dé à lampes néon
Elektor Classics : indicateur d'accord RTTY
solutions matérielles inspirantes pour vos projets ESP
Elektor Classics : alimentation 3 A
LED RGB avec circuit de commande intégréLumière de précision : les ICLED établissent de nouvelles normes
expérience : un Thérémine analogico-numérique ?Combiner des capteurs numériques modernes avec l’intemporel générateur analogique XR2206
carte émetteur-récepteur audio ESP32 (1)Démo : lecture de fichiers WAV depuis une carte SD
infographies : Circuits et conception de circuits 2025
petit mixeur audioUne conception polyvalente et modulable
minuteur intelligent pour éclairage d’escalierÉconomisez encore plus sur votre facture d’énergie !
modernisez vos voletsContrôlez les systèmes Velux avec un ESP32 et MQTT
chauffe-pieds à transistorsConfort économe en énergie
le quadricoptère M5Stamp Fly est-il le prochain drone Tello ? (Revue)
optimiser la portée Wi-Fi de l’ESP32-C3 SuperMiniUne modification d’antenne simple et efficace
station de soudage à air chaud ZD-8968Un outil de travail économique ou uniquement de l'air chaud ?
testeur de radar de reculDétecter les pannes du système d’aide au stationnement d’un véhicule
Elektor GREEN and GOLD members can download their digital edition here.
Not a member yet? Click here.
PIO Programming on the Raspberry Pi PicoNine Instructions, Many Possibilities
Breaking AI Out of the BrowserUsing AI CLIs to Code, Compile, and Validate Embedded Projects
The Scrutiny DebuggerDebug, Visualize, and Test Embedded C/C++ Code
Sigfox Breakout Board (1)A Self-Built Radio BoB
Low-Noise Power Supply (2)Construction, Assembly, and Practical Implementation
Simple Signal Generator Using the RP2040Analog and Digital Signals for Around €10
Navigating the Future of Smart Homes with Matter and Edge AIAre Matter’s Latest Updates and the Rise of Edge AI Finally Giving Engineers the Tools to Build the Intelligent, Seamless Smart Homes Users Have Been Promised?
Differential Pressure SensorsPredictive Maintenance in HVAC-Systems
Security by DesignEngineering Fundamentals Limit Failure
Embedded Security Is No Longer Optional
CRA and PQC Are Rewriting Embedded Security PrioritiesWhy Even Small IoT and Industrial Firms Need an Upgrade Plan
embedded world 2026An Interview With Benedikt Weyerer, Executive Director of embedded world
Hands on with I3CUsing Hardware from ST and Microchip
The BLEnky ProjectRapid Prototyping of Bluetooth Low Energy Applications
Pulse Width ModulationFrom a Simple On/Off Thermostat to a Smoothed DC Analog Signal
AudiotronicsEar-Pleasing Electronics for DIY Construction
From Life’s ExperienceRead The F...ing Manual!
ESP32 Audio Transceiver Board (Part 4)Tuning the Clocks - And a Wired Option
2026: An AI OdysseyThe 2025 Vibe-Coding Hangover
Symmetrical DC LoadDC Load, Static or Dynamic, and Symmetrical
Counting Faces with MaixCAMAn Easy Way to Capture Audience Sizes
Diese Ausgabe steht allen GOLD- und GREEN-Mitgliedern auf der ElektorMagazine-Website zum Download bereit!
Sie sind noch kein Mitglied? Hier klicken!
Kleine WärmebildkameraRealisiert mit einem Arduino UNO
Projekt-Update #3: Energiemessgerät mit ESP32Integration und Test mit Home Assistant
2024: Eine Odyssee in die KIVerbessern der Objekterkennung: Nutzung verfeinerter Techniken
Raspberry Pi Goes KINeues Kit enthält M.2-HAT mit KI-Beschleuniger
Sensoren für WetterstationenWelchen Sensor sollte man wählen?
KI-gestützter WasserzählerTeil 1: Bringen Sie Ihren alten Zähler ins IoT!
Ein GSM-AlarmNutzung der GSM-Technologie für die Fernüberwachung von Garagen
Low-Power-Thread-Geräte optimiert und getestetNiedriger Energiebedarf ... Niedrige Leistung?
Aus dem Leben gegriffenDer Gender-Gap
Nebelkammer selbstgebautUnsichtbare Strahlung sichtbar machen
SparkFun Thing Plus MatterEin vielseitiges Matter-basiertes IoT-Entwicklungsboard
IoT-RetrofittingRS232-Geräte fit für Industrie 4.0 machen
IoT mit 8-Bit-Mikrocontrollern
Technologie als Motor der NachhaltigkeitNeuerungen führen zu Energieeffizienz in vielen Applikationen
AWS für Arduino und Co.Teil 1: AWS-IoT-ExpressLink in der Praxis
Luftstromdetektor (nur) mit ArduinoKeine externen Sensoren erforderlich!
WasserleckdetektorVerbunden mit der Arduino-Cloud
QuarzeBemerkenswerte Bauteile
Universeller Garten-LoggerEin Schritt auf dem Weg zur KI-gestützten Gartenarbeit
Analoger 1-kHz-GeneratorSinuswellen mit geringen Verzerrungen
Miletus: Web-Apps offline nutzenSystem- und Gerätezugriff inklusive
Von 4G zu 5GIst es wirklich so einfach?
Aller Anfang...muss nicht schwer sein: Der Ausgleich
Ce cours complet de programmation de microcontrôleurs STM32 comprend un manuel, un kit de composants, des projets pratiques et une formation en ligne approfondie. Il est idéal pour apprendre étape par étape la programmation de systèmes embarqués avec Arduino grâce à une approche pratique.
Une introduction pratique aux systèmes embarqués avec le STM32
Ce cours s'adresse aux débutants dans le domaine des systèmes embarqués qui recherchent une méthode structurée et basée sur des exemples pour se lancer. Un kit de composants est inclus ; il contient notamment des LED, des résistances, des interrupteurs, des capteurs, des actionneurs, des afficheurs, une plaque d'essai (breadboard) et des fils de connexion. Ces éléments sont utilisés tout au long du cours pour illustrer des exemples d'applications.
Aucune expérience préalable d'Arduino ou du développement de systèmes embarqués n'est requise. Chaque section propose des exemples pratiques et des mini-projets conçus pour consolider les concepts clés et encourager une exploration plus approfondie. À l'issue de la formation, vous serez capable non seulement de reproduire les exemples présentés, mais aussi de les enrichir grâce à vos propres idées et applications.
Que allez-vous apprendre ?
Programmation de microcontrôleurs STM32 en C/C++ avec l'IDE Arduino
Utilisation des entrées/sorties numériques, lecture de boutons et encodeurs, commande de LED et relais
Lecture des entrées analogiques, tensions et capteurs analogiques
Génération de signaux analogiques et PWM
Utilisation des communications série comme UART, I²C et SPI pour piloter des afficheurs et lire des capteurs numériques et cartes SD
Gestion du temps
Utilisation des interruptions
Entrées capteurs en temps réel et contrôle via boutons, LED et afficheurs
Commande d’actionneurs comme relais et servomoteurs
Déboguer des programmes à l'aide de points d'arrêt et de l'exécution pas à pas
À qui s’adresse ce cours ?
Étudiants et autodidactes explorant les systèmes embarqués
Makers et passionnés d’IoT souhaitant améliorer leurs compétences en hardware
Formateurs et enseignants à la recherche de matériel pédagogique prêt à l’emploi
Contenu de la boîte
Accès au cours complet sur la plateforme Elektor Academy Pro
Carte microcontrôleur STM32 NUCLEO-F411RE
Livre : Arduino for STM32
Fichiers de projet téléchargeables pour chaque module
Boîte de composants :
2× LED, rouge, 5 mm
LED, verte, 5 mm
3× résistance, 470 Ω, 0,25 W
LDR
Potentiomètre, 10 kΩ, linéaire
Bouton-poussoir
Module encodeur rotatif
Module relais
Capteur DHT22 (température & humidité)
Afficheur 7 segments 4 digits compatible TM1637
MPU-6050 IMU avec connecteurs
Afficheur OLED I²C compatible SSD1306
Adaptateur carte micro SD avec connecteur
Buzzer
Micro servo SG90
Écran TFT SPI 240×320 compatible ILI9341
20× fils jumper
Breadboard
Open-Source-Code mit Arduino IDE und PlatformIO
Autonomes Fahren: GPS, Accelerometer, Gyroskop
PS3-Controller
Mikrocontroller wie der Arduino und Einplatinenrechner wie der Raspberry Pi haben sich zu beliebten Komponenten entwickelt. Dritter im Bunde ist der ESP32 der Firma Espressif. Mikrocontroller dieser Baureihe zeichnen sich durch eine Vielzahl implementierter Funktionen aus, die bei einem Arduino konventioneller Prägung mit einem Atmel-AVR-Mikrocontroller erst mit weiterer Hardware möglich sind. Prominentes Beispiel sind hier die WiFi- und Bluetooth-Funktionalitäten. Gegenüber einem Raspberry Pi zeichnen sie sich durch einen deutlich geringeren Preis aus.
Allgemeine Informationen für die Realisierung eines Roboterauto-Projekts mit dem ESP32 sind leicht zu finden. Dabei handelt es sich aber oft nur um Ausführungen zu einem Teilaspekt, ohne inhaltliche oder funktionale Abstimmung. So ist nicht nur die Beschaffung der benötigten Informationen mühselig und zeitaufwändig, sie kann auch außerordentlich fehlerträchtig sein.
Ansatzpunkt dieses Buches ist, diese Lücke zu schließen. Es geht auf verschiedene Möglichkeiten eines Chassis ein, vermittelt nötige Kenntnisse und führt schrittweise von einer einfachen Motorsteuerung zu einem komplexen sensor- und sprachgesteuerten Roboterauto. Hacks rund um GPS und eine PlayStation 3 runden die Sache ab.
Inhalt
Bei der Reihenfolge der Kapitel wurde versucht – beginnend bei der Darstellung von grundlegenden Informationen – über die Lösung einfacher Aufgaben zu etwas anspruchsvolleren Techniken zu führen.
Der Mikrocontroller ESP32
Die Software erstellen
Die Stromversorgung
Rund um die Hardware
Das Chassis
Der Gleichstrommotor
Kabellose Steuerung über WiFi
Mit Sensoren Hindernisse erkennen
Eine eigene Roboterauto-App
Servo und Lichtsensor
GPS
Accelerometer / Gyroskop
PS3-Controller
Roboterauto-App
Hinweis zur Software
Die Dateien haben das Suffix (.cpp). Grund ist die Entwicklung mit PlatformIO. Mit Copy & Paste sollten sie auch in der Arduino-IDE verwendet werden können.
Your First Steps with an ESP32-C3 and the IoTA Wi-Fi Button and Relay IoT Cloud a la Arduino
Dual Geiger-Müller Tube Arduino ShieldA High Sensitivity, Very Low-Power Radiation Sensor
CO2 GuardA DIY Approach to Monitoring Air Quality
MonkMakes Air Quality Kit for Raspberry PiMeasures Temperature and eCO2
Starting Out in ElectronicsWelcome to the Diode
Tips & Tricks for Testing ComponentsNo Expensive Equipment Required
Reducing the Power Consumption of Your Mole RepellerAn ATtiny13 Replaces a 555
Light Switch DeLuxA Solution for High-Precision Light-Controlled Switching
The Challenges in Bringing IoT Solutions to MarketWorries Around Security, Scalability, and Competition Infographics 5-6/2022
Preferably Wired After AllTips for Developing a 1 Gbit/s Interface in an Industrial Environment Bringing Real-Time Object Detection to MCUs with Edge Impulse FOMO
Traveling-Wave TubesPeculiar Parts, the Series
Narrowband Internet of ThingsStandards, Coverage, Agreements, and Modules
Dragino LPS8 Indoor GatewaySpeedy LoRaWAN Gateway Setup
Explore ATtiny Microcontrollers Using C and Assembly LanguageSample Chapter: ATtiny I/O Ports
Err-lectronicsCorrections, Updates and Readers’ Letters
LoRa GPS Tracker UpdateReceive and Show Location Using a Raspberry Pi
Circuit Simulation with TINA Design Suite & TINACloudSample Chapter: Sinusoidal Oscillators
From Life’s ExperienceAssembly Line Work
The WinUI Graphics Framework for Windows AppsA Small Demo Application
GUIs with PythonWorst GUI of the world
Off-Grid Solar SystemsElectrical Energy Independent of the Mains Grid
The 10-Year SmartphoneRenew Your Expectations
HexadokuThe Original Elektorized Sudoku
Elektor GREEN and GOLD members can download their digital edition here.
Not a member yet? Click here.
OBD2 Sensor DashboardOld Dials Sparked a Quest for Real Data
OBD2: Add a Rev Counter and Gear Shift Indicator to Your CarRetro, but Super Useful
LiDAR and Vision Sensors for Robotics
Sensor+Test 2025 and PCIM 2025
Contact-Free E-Field Measurements (1)A Vibrating Membrane for Assessing DC Voltages or Static Electric Fields
Wireless Mailbox NotifierFrom Optical Sensors to Radar, Exploring a Few Options
Elektor Mini-WheelieA Self-Balancing Robot
Solar CellsPeculiar Parts, the Series
Getting Started With a Modern Radar SensorIs an Accurate Measurement on Your Radar?
From Life’s ExperiencePaper Factory
CybersecurityTough Times for Hackers
Siglent Presents Next-Gen Multi-Channel OscilloscopesHigh-Performance Solutions for Modern Power and Embedded Systems
Bluetooth 6.0 Brings Enhanced Distance-Ranging ApplicationsNew Version Offers Improved Device Positioning and Location Services
Exploring Wireless Communication with BeagleY-AI
Err-lectronicsCorrections, Updates, and Readers’ Letters
Starting Out in Electronics……Concludes the Topic on Opamps
A Powerful AI Code AssistantSpeed Up Your Development with Continue and Visual Studio Code
Solar Charge Controller with MPPT (2)The Circuit
Ultrasonic Obstacle DetectorA Simple Project to Help Those with Impaired Vision
2025: An AI OdysseyMid-Year Review
Raspberry Pi Standalone MIDI Synthesizer (3)Making It Smarter and Adding a User Interface
Meshtastic: A Demo ProjectAn Intelligent Mesh of LoRa Radios
Analog Audio Frequency GeneratorHigh-Quality Adjustable Frequency Sine Wave Generator
Touch-GUI voor ESP32 en Raspberry & cografische gebruikersinterface met de LittlevGL-bibliotheek
“Niet zomaar een project”vraaggesprek met Gábor Kiss-Vámosi, ontwikkelaar van LittlevGL
Capaci-metermet tweecijferig LED-display in dekatron-stijl
Hoe... een mechanisch contact of schakelaar ontdendereneen schakelaar is open of gesloten – toch?
Developer's Zonetips & trucs, vakkunstigheden en andere nuttige informatie
Uitbreidbaar milieumonitorsysteempubliceert gegevens op IoT-platforms
Multitasking met de ESP32Multitasking met de ESP32 taakgeoriënteerd programmeren met FreeRTOS en de Arduino IDE
Interactiefcorrecties & updates || vragen & antwoorden
Autoverlichting tunenlegaal, illegaal – maakt wél uit!
Review Toolcraft digitaal soldeerstation
Arduino Pro IDEeen eerste indruk
Twee warmtebeeldcamera’s vergeleken
Uit het leven gegrepende inrichting van een lab en werkplaats
Monsanto MAN1 LED-displayvreemde onderdelen
Theetimereen experiment met energy harvesting
Eenfase 1 kW AC-motorsturingdrie bedrijfsmodi: perioderegeling, fase-afsnijding en fase-aansnijding
Snel 3,5'-touchscreen voor de Raspberry Pipresteert beter voor hetzelfde geld
Oost West Lab Besteen blik in het allerheiligste, waar onbevoegden geen toegang hebben...
Eerste stappen met RISC-Vhet LoFive-board onder de loep
LoRa-Tracker: een uitdaging voor het labproblemen en oplossingen bij de ontwikkeling van elektronica
Met de vos in het IoT (2)aanmelden in het Sigfox-netwerk
Alle begin......hoeft niet zo moeilijk te zijn
Analoge elektronica ontwerpencase-study #1 – deel 1: MEMS-microfoon... test-een-twee-drie
Wie het kleine niet eertuit de ideeënbus van Elektor
In het kort: teksten voor microcontrollersspaar geheugen met compressie
In de schijnwerpers: de autonome autooverzicht van de stand van de techniek
Leidende start-ups en innovatoren over “Innovation 4.0” in München
Lego Electronic anno 1968elektronisch speelgoed fascineert na 50 jaar nog steeds
Beyond ElectronicsThe MX3D Bridge Senses the City
Hexadoku
Using the RFID Starter Kit
An Arduino board has now become ‘the’ basic component in the maker community. No longer is an introduction to the world of microcontrollers the preserve of the expert. When it comes to expanding the capabilities of the basic Arduino board however, the developer is still largely on his own. If you really want to build some innovative projects it’s often necessary to get down to component level. This can present many beginners with major problems. That is exactly where this book begins.
This book explains how a wide variety of practical projects can be built using items supplied in a single kit together with the Arduino board. This kit, called the 'RFID Starter Kit for Arduino' (SKU 17240) is not just limited to RFID applications but contains more than 30 components, devices and modules covering all areas of modern electronics.
In addition to more simple components such as LEDs and resistors there are also complex and sophisticated modules that employ the latest technology such as:
A humidity sensor
A multicolor LED
A large LED matrix with 64 points of light
A 4-character 7-segment LED display
An infra red remote-controller unit
A complete LC-display module
A servo
A stepper motor and controller module
A complete RFID reader module and security tag
On top of that you will get to build precise digital thermometers, hygrometers, exposure meters and various alarm systems. There are also practical devices and applications such as a fully automatic rain sensor, a sound-controlled remote control system, a multifunctional weather station and so much more.
All of the projects described can be built using the components supplied in the Elektor kit.