Le téléchargement intégral de ce numéro est disponible pour nos membres GOLD et GREEN sur le site Elektor Magazine !
Pas encore membre ? Cliquez ici.
programmation PIO sur le Raspberry Pi PicoNeuf instructions, de multiples possibilités
l'IA en ligne de commandeDéveloppement, compilation et validation de projets embarqués depuis le terminal
le Scrutiny DebuggerDéboguer, visualiser et tester du code C/C++ embarqué
carte breakout Sigfox (1)Développement d’une BoB radio
alimentation à faible bruit (2)Construction, assemblage et mise en œuvre pratique
générateur de signaux simple basé sur le RP2040Signaux analogiques et numériques
à la découverte du futur de la domotique avec Matter et l’IA EdgeLes dernières versions de Matter et l’essor de l’IA en périphérie de réseau (edge) donnent-ils enfin aux ingénieurs les outils nécessaires pour construire les maisons intelligentes et parfaitement intégrées promises aux utilisateurs ?
capteurs de pression différentielleLa maintenance prédictive appliquée aux systèmes CVC
la sécurité dès la conceptionPrincipes d’ingénierie pour limiter les défaillances
la sécurité des systèmes embarqués n’est plus une option
la CRA et la PQC redéfinissent les priorités de la sécurité embarquéePourquoi même les petites entreprises IoT et industrielles doivent prévoir une mise à niveau
embedded world 2026Entretien avec Benedikt Weyerer, directeur d’embedded world
prise en main du bus I3CUtilisation de matériel de ST et Microchip
le projet BLEnkyPrototypage rapide d’applications Bluetooth Low Energy
modulation de largeur d’impulsionDu thermostat tout ou rien à un signal analogique continu filtré
audiotroniqueDes circuits audio agréables à l’écoute, à réaliser soi-même
sur le vifLisez donc le manuel !
carte émetteur-récepteur audio ESP32 (4)Réglage des horloges et une option filaire
2026 : une odyssée de l’IAConséquences du vibe coding
charge CC symétriqueCharge CC symétrique, statique ou dynamique
comptage de visages avec MaixCAMUne méthode simple pour estimer la taille d’un public
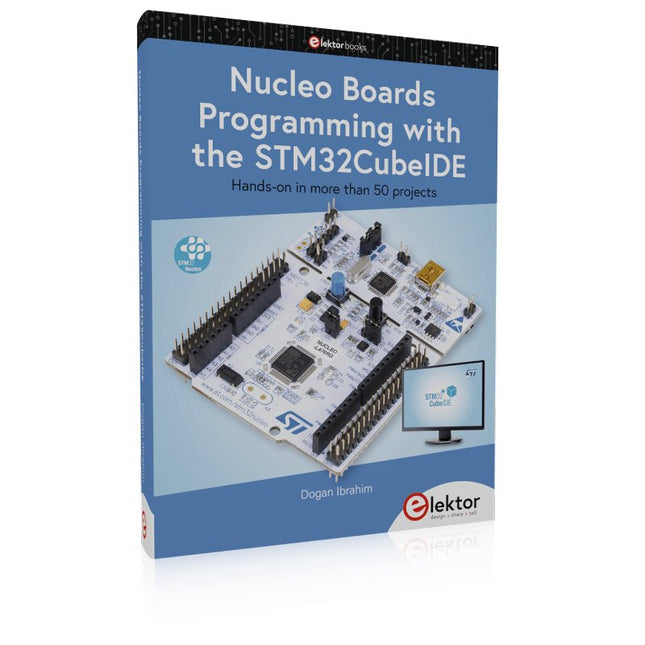
Hands-on in more than 50 projects
STM32 Nucleo family of processors are manufactured by STMicroelectronics. These are low-cost ARM microcontroller development boards. This book is about developing projects using the popular STM32CubeIDE software with the Nucleo-L476RG development board. In the early Chapters of the book the architecture of the Nucleo family is briefly described.
The book covers many projects using most features of the Nucleo-L476RG development board where the full software listings for the STM32CubeIDE are given for each project together with extensive descriptions. The projects range from simple flashing LEDs to more complex projects using modules, devices, and libraries such as GPIO, ADC, DAC, I²C, SPI, LCD, DMA, analogue inputs, power management, X-CUBE-MEMS1 library, DEBUGGING, and others. In addition, several projects are given using the popular Nucleo Expansion Boards. These Expansion Boards plug on top of the Nucleo development boards and provide sensors, relays, accelerometers, gyroscopes, Wi-Fi, and many others. Using an expansion board together with the X-CUBE-MEMS1 library simplifies the task of project development considerably.
All the projects in the book have been tested and are working. The following sub-headings are given for each project: Project Title, Description, Aim, Block Diagram, Circuit Diagram, and Program Listing for the STM32CubeIDE.
In this book you will learn about
STM32 microcontroller architecture;
the Nucleo-L476RG development board in projects using the STM32CubeIDE integrated software development tool;
external and internal interrupts and DMA;
DEBUG, a program developed using the STM32CubeIDE;
the MCU in Sleep, Stop, and in Standby modes;
Nucleo Expansion Boards with the Nucleo development boards.
What you need
a PC with Internet connection and a USB port;
STM32CubeIDE software (available at STMicroelectronics website free of charge)
the project source files, available from the book’s webpage hosted by Elektor;
Nucleo-L476RG development board;
simple electronic devices such as LEDs, temperature sensor, I²C and SPI chips, and a few more;
Nucleo Expansion Boards (optional).
Diese Ausgabe steht allen GOLD- und GREEN-Mitgliedern auf der ElektorMagazine-Website zum Download bereit!
Sie sind noch kein Mitglied? Hier klicken!
Die Open-Source-Prozessorarchitektur RISC-V16 Boards und MCUs, die Sie kennen sollten
Audio-Player mit FPGA und EqualizerTeil 1. Digitale Audiosignale mischen mit einem MKR Vidor 4000 von Arduino
Laserkopf für Pico-basierte SanduhrZeichnen mit Licht
Nehmen Sie teil am STM32 Edge AI Contest!
Umweltüberwachung von Pflanzen mit mehreren SensorenDrahtlose Messung der Wasserversorgung und Lichtverhältnisse
Maixduino: Automatischer KI-TüröffnerGesichtserkennung mit einer Kamera
Embedded-Elektronik 2024KI wird die Branche neu definieren
Ladungsbasiertes In-Memory Compute bei EnCharge AI
KI-Inferencing bei 10-fach geringerer Leistungsaufnahme zu 20-fach geringeren Kosten
Click-Board hilft bei der Entwicklung und dem Training von ML-Modellen für die Schwingungsanalyse
Der Elektor Mini-WheelieEin Bausatz für einen selbstbalancierenden Roboter
MCU, ich sehe dich!MCUViewer, ein Open-Source-Multiplattform-Debugging-Werkzeug
USB-2.0-IsolatorGeräte galvanisch isoliert per USB verbinden
Eingriff vor dem SchadenPredictive Maintenance in der Praxis
SPoE - Elektromagnetische VerträglichkeitSingle-Pair mit Power-over-Ethernet im EMV-Fokus
Retro-TechnikWie das Farbfernsehen eine neue Welt schuf
EKG-MonitorMit Hexabitz-Modulen und einem STM32CubeMonitor
Der Kampf um KI at the Edge
HaLow erreicht Rekorddistanz von 16 km für WLAN bei 900 MHz
Erster CHERI RISC-V-Embedded Chip und Early Access Programm
Die dritte Generation der Waldbrandfrüherkennung nutzt Satellitenverbindungen
Aus dem Leben gegriffenDie Qual der Wahl
Aller Anfang......ist nicht schwer: Wir setzen die Filterung und Klangregelung fort.
Riesen-LED-UhrNeuauflage eines Elektor-Klassikers
Ein modularer Ansatz für die SensorprüfungDas Sensor Evaluation Board mit ESP32-S3
2025: Eine Odyssee in die KIDer Aufstieg der Basismodelle und ihre Rolle bei der Demokratisierung der KImocratizing AI
Standalone MIDI-Synthesizer mit Raspberry PTeil 1: Eine Plattform für Edge-KI-Experimente vorbereiten
Projekt 2.0Korrekturen, Updates und Leserbriefe
CPU, GPU, DSP, FPGA; ein universeller KI-RISC-V-Prozessor kann alles!
CEO-Interview: Ventivas dünne und kühle Technologie
Dual-Core-Programmierung beim Raspberry Pi PicoEinstieg in die Welt der parallelen Programmierung
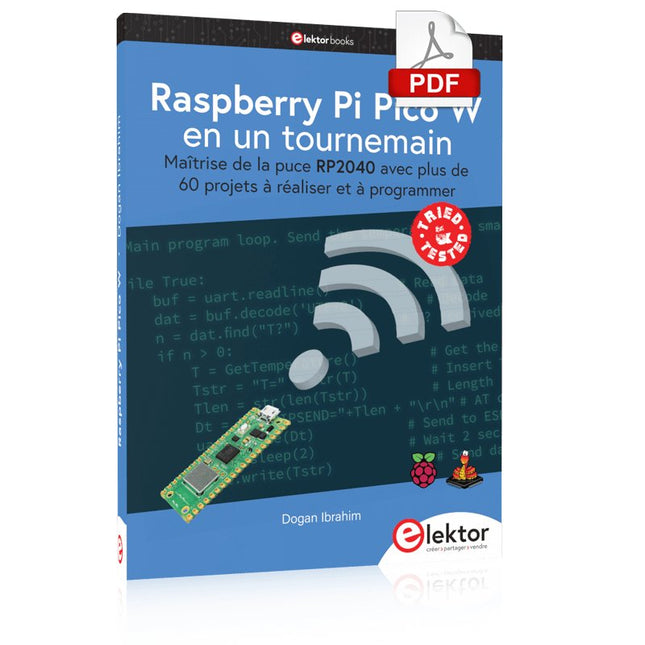
Maîtrise de la puce RP2040 avec plus de 60 projets à réaliser et à programmer
Les cartes Raspberry Pi Pico et Pico W sont animées par un microcontrôleur ARM Cortex M0+ RP2040 à double coeur, rapide, efficace et peu coûteux, qui fonctionne jusqu'à 133 MHz et dispose de 264 Ko de SRAM et de 2 Mo de mémoire Flash. Outre une vaste mémoire, le Pico et le Pico W disposent de nombreuses broches GPIO et d'interfaces telles que CA/N, SPI, I²C, UART, MLI, de fonctions de temporisation, d'une interface de débogage matériel et d'un capteur de température interne.
La carte Raspberry Pi Pico W comporte en plus une puce CYW43439 Bluetooth et Wi-Fi d'Infineon. Au moment de la rédaction de ce livre, le micrologiciel Bluetooth pour le Pico W n'était pas encore disponible. Le Wi-Fi à 2,4 GHz est toutefois entièrement pris en charge avec les protocoles 802.11b/g/n.
Ce livre est une introduction à l'utilisation du Raspberry Pi Pico W avec le langage de programmation MicroPython. Les quelque soixante projets testés et opérationnels sont présentés à l'aide de l'environnement de développement intégré (EDI) Thonny. Les sujets abordés sont nombreux :
Installation de MicroPython sur le Raspberry Pi Pico depuis un PC
Interruptions de l'horloge et interruptions externes
Convertisseur analogique-numérique (CA/N)
Capteurs de température interne et externe
Capteurs externes (pression, humidité, pouls, à ultrasons)
Enregistrement de données
MLI, UART, I²C et SPI
Bluetooth, Wi-Fi et applis sur smarphone
Convertisseur numérique-analogique (CN/A)
Tous les projets ont été testés et éprouvés. Ils peuvent être mis en oeuvre sur le Raspberry Pi Pico ainsi que sur le Raspberry Pi Pico W. Toutefois les projets avec une liaison Wi-Fi ne fonctionnent que sur le Pico W. Une petite expérience en programmation et en électronique est nécessaire pour suivre les projets. De brèves descriptions, des schémas fonctionnels, des schémas détaillés du câblage des montages et des listings MicroPython complets sont fournis pour tous les projets.
USB to S/PDIF InterfaceDigital audio output for computer, laptop, tablet or smartphone
Practical ESP32 Multitasking (4)Binary semaphores
A Wireless Temperature Sensor for the Nixie Bargraph ThermometerA multipurpose solution with a design trick
Multitasking with Raspberry PiShowcase: a traffic lights controller
Timer for Headphone Amplifier
Open-Network Weather Station Mk.2Part 2: Software
Home Automation Made EasyWith ESPHome, Home Assistant & MySensors
The Storage CRTPeculiar Parts, the series
Artificial Intelligence for Beginners (3)A stand-alone neural network
Programming PICs from the Ground UpAssembler routine to output a sine wave
IKEA Lamp HackEquipping an inexpensive IKEA lamp with NeoPixel LEDs and WLAN
Don't Let Your Hobby Project Collect Dust in a CornerSupply-side time management and spiral development
Starting Out in Electronics (4)Easier than imagined!
Homelab Tours: The Vinyl CutterReturning to the golden age of LPs
The 8-Bit Microcontroller and BeyondInterview with Tam Hanna
Small Circuits RevivalFrom the Elektor suggestions box
Review: Owon OW18E Bluetooth Multimeter
InteractiveCorrections & Updates || Questions & Answers
Steeped in ElectronicsLead-free soldering and EU regulatory zeal
Promising Project: New 50 Hz – 2 MHz LCR meterAccuracy and ease of use
Error AnalysisTips on FMEA, High Current, and More
Developer's ZoneTips & Tricks, Best Practices and Other Useful Information
Review: Siglent SDL1020X Programmable DC Electronic Load
High-Voltage Power Supply with Curve TracerGenerate voltages up to 400 V and trace characteristics curves for valves and transistors
Hexadoku 2009EL
Analogue Electronics DesignCase Study #2 — Part 1: Analogue filter theory
The Elektor StoreNever expensive, always surprising
How to Draw a Circuit Diagram
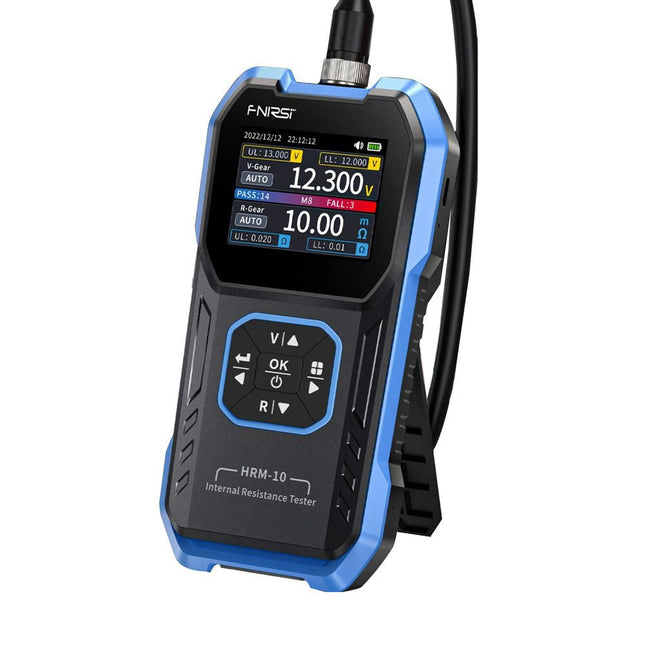
Le FNIRSI HRM-10 est un testeur de tension et de résistance interne de batterie portable et de haute précision. Cet appareil offre une véritable mesure à quatre fils et est conçu pour la précision et la facilité d'utilisation. Il mesure automatiquement les valeurs de résistance interne et de tension simultanément, affichant les résultats sur son écran couleur HD. Les utilisateurs ont la possibilité d'ajuster manuellement les plages de tension et de résistance en fonction de leurs besoins. L'appareil comprend également un mode de tri qui filtre automatiquement les bonnes et mauvaises batteries en fonction de seuils définis par l'utilisateur. De plus, il prend en charge le stockage des données historiques et permet d'exporter des enregistrements de mesures sous forme de tableau.
Caractéristiques
Haute précision des mesures
Exportation de données tabulaires
Évaluer automatiquement les résultats des mesures
8 paramètres de seuil
Écran couleur HD
Support pliable
Batterie au lithium de 1000 mAh
Spécifications
Tension
Résistance
Plage de mesure
0-100 V (CC)
0-200 Ω
Précision
±0,5%
±0,5%
Équipement
Automatique, 1 V, 10 V, 100 V
Automatique, 20 mΩ, 200 mΩ, 2 Ω, 20 Ω, 200 Ω
Fréquence du signal de test de l'instrument
1 Khz (CA)
Rechargeable
USB-C (5 V/1 A)
Batterie intégrée
Batterie au lithium 1000 mAh
Calibrage utilisateur
Oui
Mode de tri
Oui
Historique
Oui
Export de données enregistrées
Oui
Environnement de travail
–10°C à +45°C, humidité relative <80%
Environnement de stockage
–20°C à +80°C, humidité relative <80%
Dimensions
158,7 x 80,5 x 28,4 mm
Poids
225 g
Inclus
1x FNIRSI HRM-10 Testeur de résistance interne
1x Ligne de test de clip
1x Câble de données USB-C
1x Manuel
Téléchargements
Manual
Firmware V0.3
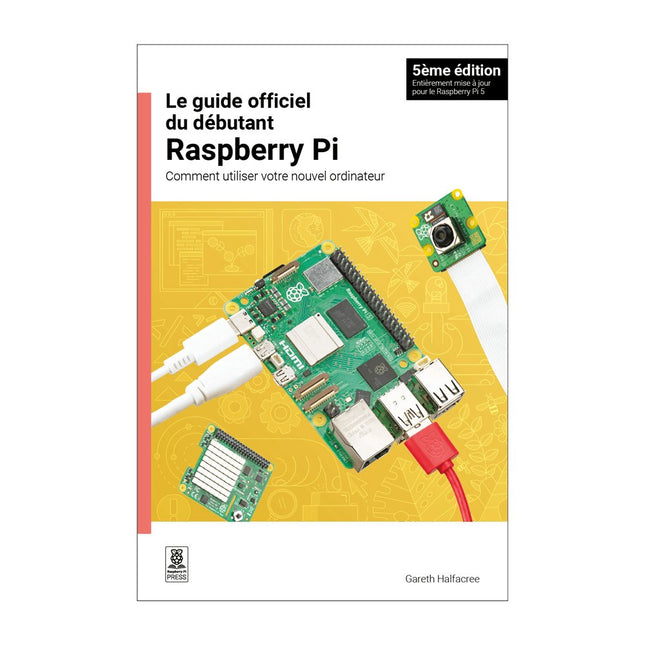
Entièrement mise à jour pour le Raspberry Pi 5
Raspberry Pi 5 est un petit ordinateur intelligent, de construction britannique qui regorge de potentiel. Fabriqué à l'aide d'un processeur économe en énergie, le Raspberry Pi est conçu pour vous aider à apprendre le codage, découvrir comment fonctionne un ordinateur et construire vos propres projets uniques et incroyables. Ce guide est conçu pour vous montrer à quel point il est facile de démarrer.
Apprendre à :
Configurez votre Raspberry Pi, installez son système d'exploitation, et commencez à utiliser cet ordinateur entièrement fonctionnel.
Commencez à coder des projets, avec des guides étape par étape utilisant les langages de programmation Scratch 3, Python et MicroPython.
Expérimentez en connectant des composants électroniques, et amusez-vous à créer des projets incroyables.
Nouveauté de la 5ème édition :
Mise à jour pour les derniers ordinateurs Raspberry Pi : Raspberry Pi 5 et Raspberry Pi Zèro 2 W.
Couvre le dernier système d'exploitation Raspberry Pi.
Comprend un nouveau chapitre sur le Raspberry Pi Pico !
Téléchargements
GitHub
AI Projects for the Raspberry Pi with the AI HAT+
Edge AI is transforming everyday devices by putting intelligence where it matters most: directly inside the hardware. With on-device inference, a camera can recognize a visitor instantly, a phone can translate speech without streaming audio to the cloud, and a wearable can detect anomalies in real time—fast, private, and reliable even when the network disappears.
This book is your practical guide to building exactly those kinds of systems with the Raspberry Pi AI HAT+ and the Hailo-8L accelerator. You’ll start with clear foundations: core AI and machine-learning concepts, how neural networks work, and what truly distinguishes Edge AI from cloud AI—plus an honest look at ethical considerations and future impacts.
Then it’s straight to hands-on physical computing. Step by step, you’ll set up Raspberry Pi OS, power and cooling, and develop in Python using the Thonny IDE. You’ll learn GPIO basics with lights and servos, mount the AI HAT+ hardware, install and verify the Hailo software stack, and connect the right camera—official modules or USB webcams, even multiple cameras.
From your first pipeline to real projects, you’ll run person detection, pose estimation, segmentation, and depth estimation, then level up with YOLO object detection: smart alerts, guest counters, and custom extensions. You’ll even connect vision to motion by combining gesture recognition with servo-driven mechanisms, including a robotic arm.
With troubleshooting tips, hardware essentials, and a practical Python refresher, this book turns Edge AI from buzzword into buildable reality.
Elektor GREEN and GOLD members can download their digital edition here.
Not a member yet? Click here.
For Eyes and Ears
Video Output with Microcontrollers (1)Composite Video
electronica 2022News from the world’s leading electronics trade show
ESP32 CameraSo Simple, It Doesn’t Even Have to Use Wi-Fi
ATX Power Supply for Raspberry Pi
32 Ω Headphone AmplifierSimple But High-Quality 3-Chip Solution
SDR Radio-Controlled clocksFive Time Signals, Six Displays
Starting Out in ElectronicsSpecial Diodes
From Life's ExperienceMusings on the Quality of Things
Reverse-Engineering a Bluetooth Low Energy LED BadgeHow to Control a BLE Device with a Python Script
MakePython ESP32 Development KitEverything in a Box
THD Measurement with an Oscilloscope and FFTEasily Calculate the Distortion Factor
All-Seeing MachinesThe Technology Behind Today’s Industrial Vision Systems
Infographics
The Evolution of Voice and Audio Control for Electronic Devices
WEEF 2022 in Review
FFWD electronica 2022 in ReviewInnovators Did Not Fail to Impress
The TubeAn Unusual Tube Amplifier
Biomaterial in Electronics: Ready or Not
Opera Cake Antenna Switch for HackRF OneConnect Up To Eight Antennas To Your SDR
Engineering with Arduino and MoreAn Interview with Author Ashwin Pajankar
LiDAR Precision GaugeMeasure up to 12 Meters
Audio Signals and the ESP32The ESP-ADF Environment in Practice
Elektor Fortissimo-100 Power Amplifier Kit
Using Light for Sound EffectsLDR-Based Voltage-Controlled 24 dB/oct Synthesizer Filter
Elektor High-Power AF AmplifierThe Loudest of Them All!
HomeLab ToursA Volumetric Display Made in Canada
Err-lectronicsCorrections, Updates and Readers’ Letters
Hexadoku
Learn RC and RL Filters with Hands-On Circuits and Simulation
Introduction to Electronic Filters is your comprehensive guide to understanding, designing, and applying first-order electronic filters using resistors, capacitors, and inductors. Whether you are a student, maker, or educator, this book demystifies the theory behind RC and RL filters and bridges the gap between concepts and real-world applications through simulation and experimentation.
From the basics of frequency response and phase shift to hands-on breadboard builds and Python-based simulations, this book offers a deeply practical learning experience. You will learn to analyse filters using Bode plots and phasors, and explore applications in audio tone shaping, sensor signal conditioning, noise reduction, and power supply filtering.
As you progress, you’ll build, measure, simulate, and tune filters using modern tools like CircuitLab, Python, and the Analog Discovery 3. Each chapter includes thoughtfully crafted activities that reinforce learning by doing – designing filters for specific tasks, simulating dynamic behaviour, and observing how theory translates into performance.
Inside you’ll find:
A clear introduction to the fundamentals of electronic filters
Detailed explanations of RC and RL filters, cutoff frequency, and phase
Guided activities using both simulation and hardware tools
Real-life applications in audio, sensors, power supplies, and more
A beginner-friendly primer on Python and algebra for electronics
Whether you’re working through simulations or experimenting with real components on your workbench, this book will help you develop a solid understanding of electronic filters and their role in practical circuits.
Elektor GREEN en GOLD leden kunnen deze uitgave hier downloaden.
Nog geen lid? Klik hier om een lidmaatschap af te sluiten.
OBD2-sensordashboardOude meters vormden het startpunt van een zoektocht naar echte gegevens
OBD2: voeg een toerenteller en schakelindicator toe aan je autoRetro, maar uiterst nuttig
LiDAR- en Visiesensoren voor Robotica
Sensor+Test 2025 en PCIM 2025
Contactloze E-Veldmetingen (1)Een Trillende Membraan voor het Detecteren van Gelijkspanningen of Statische Elektrische Velden
Draadloze brievenbusmeldervan optische sensoren tot radar: enkele mogelijkheden
Elektor Mini-Wheelieeen zelfbalancerende robot
ZonnecellenVreemde onderdelen, de serie
Aan de slag met een moderne radarsensorStaat een nauwkeurige meting op uw radar?
Uit het leven gegrepenpapierfabriek
CybersecurityZware tijden voor hackers
Infographics: IoT en sensoren 2025
Bluetooth 6.0 brengt verbeterde toepassingen voor afstandsbepalingNieuwe versie biedt betere apparaatpositionerings- en -locatieservices
Draadloze communicatie verkennen met BeagleY-AI
Err-lectronicsCorrecties, updates en lezerspost
Alle begin......sluit het thema opamps af
Een krachtige AI-codeerassistentsneller ontwikkelen met Continue en Visual Studio Code
Zonne-laadregelaar met MPPT (2)Het schema
Ultrasone obstakeldetectoreen eenvoudig project om slechtzienden te helpen
2025: Een AI-odysseeHalfjaaroverzicht
Raspberry Pi Standalone MIDI-synthesizer (3)Het slimmer maken en een gebruikersinterface toevoegen
Meshtastic: een demonstratieprojectEen slim netwerk van LoRa-radio's
Analoge audio-frequentiegeneratorHoogwaardige sinusgenerator met instelbare frequentie
PIC und AVR verstehen
In diesem Buch werden wir uns ausschließlich mit 8-Bit-Mikrocontrollern beschäftigen, und zwar mit Mikrocontrollern der 8-Bit-PIC- und der 8-Bit-AVR-Mikrocontroller-Linien. Bei der PIC-Familie handelt es sich dabei um PIC10, PIC12, PIC16 und PIC18; bei der AVR-Familie um ATtiny, ATmega und ATxmega. Die vorgestellten 8-Bit-Chips sind für sehr viele Anwendungen vollkommen ausreichend und preislich auch attraktiv.
Durch die Lektüre des Buches erhalten Sie ein fundiertes Wissen über die genannten 8-Bit-Mikrocontroller, über ihre Architektur, ihre Pinbelegungen und über ihre Programmierung.
Weil wir uns in diesem Buch mit den Grundlagen der Architektur der PICs und AVRs vertraut machen möchten, werden wir auch für alle PIC- und AVR-Anwendungen Assembler einsetzen, denn die Assembler-Sprache erlaubt es, die Technik im Detail kennenzulernen. Wenn man wirklich wissen möchte, was sich im Mikrocontroller abspielt, greift man zu Assembler. Damit hat man die beste Gelegenheit, sehr nah an den Kern zu kommen. Und wenn man schon einen Mikrocontroller-Typ kennengelernt und verstanden hat, ist es bei dem nächsten deutlich einfacher, auch wenn er von einem anderen Hersteller kommt. Bei anderen Programmiersprachen bleibt die Technik immer ziemlich tief versteckt.
Die Assembler-Beispiele sind so einfach gestaltet, dass sie jeder mit den im Buch aufgezeigten Programmiertechniken erstellen kann. Weil es sich um einfache Beispiele handelt, werden wir sie alle auf einer universellen Lochrasterplatine realisieren. Manche sind auch auf einem Experimentier-Breadboard umsetzbar.