
Résultats de la recherche pour "pretzel or board or iot or wifi or board"
-

Elektor Digital Elektor March/April 2020 (PDF) EN
The Elektor LoRa NodeVersatile, long-range, 868-MHz remote control with state feedback and STM32 Inside InteractiveCorrections & Updates || Questions & Answers Analogue Electronics DesignCase Study #1 — Section 2: Preamplifier optimized for MEMS microphone My IoT Button: A Button for the WebPart 1: IoT architecture BASIC for the ESP32 and ESP8266Programming with Annex WiFi RDS ESP32 Doorbell via Telegram“The UPS Man Always Rings Once” Small Circuits RevivalCapita Selecta from the Elektor Project Suggestions Box My First LoRaWANWith Blue Pill, LoRa Breakout Board and The Things Network Elektor Connexions 2003EL “A Strong Supporter of Open Internet”Interview with Wienke Giezeman, Initiator of The Things Network The Meadow F7 BoardA great board for .NET developers Practical ESP32 Multitasking (2)Task priorities Sigfox and the IoT (3)First steps on the network Raspberry Pi Bash Command Cheat Sheet Europe's Most Successful Start-up Accelerator?HighTechXL, Eindhoven, The Netherlands Review: The Enviro+ RPi-HATMeasure air quality with a Raspberry Pi and the Enviro+ HAT Steeped in Electronicsordering components from Ukraine and Russia Review: Andonstar AD407Better than its predecessor? Lab, Sweet LabA glimpse of The Holy Place — no unauthorized entry. Optical Probe for OscilloscopesMeasure brightness fluctuations of lighting systems The 'TABULA' Project - An UpdateTangibles with user feedback How-To Calculate the Prospective Short-Circuit Current or PSCCand choose the proper circuit breaker TMS1000 Series Microcontrollers Peculiar Parts, the series Starting Out in Electronics (2) Easier than imagined! Developer's ZoneTips & Tricks, Best Practices and Other Useful Information Locating Wayward Wires Track and trace concealed and defective cables with ease and certainty Review: Joy-IT DMSO2D72 Portable 3-in-1 Oscilloscope Homebrew PC for the Electronics LabTips on Component Choice and Construction The Elektor ‘Intelekt’ Chess Computer (1981)Tiny Chess 86 ported to the Intel 8088 Beyond ElectronicsPCB Art - Pushing the Limits of Industrial Manufacturing
€ 7,50
-

Elektor Digital Edition spéciale Elektor : Invité édité par Espressif 2023 (PDF)
Les membres d'Elektor GREEN et GOLD peuvent télécharger ce numéro ici . Pas encore membre? Cliquez ici pour souscrire une adhésion. L’innovation IoT au galop Un cadre photo couleur E-Ink WiFi Tutoriel ESP Launchpad de zéro à flasher en quelques minutes ESP32 et ChatGPT en route vers un système d’auto-programmation… Talkie-walkie avec ESP-NOW pas tout à fait WiFi, pas tout à fait Bluetooth, mais... De l'idée au circuit avec l'ESP32-S3 voici comment construire un prototype avec les puces Espressif Innovation en matière de puce AIoT une interview avec Teo Swee-Ann, PDG d'Espressif Simulez ESP32 avec Wokwi le jumeau numérique de votre projet Test de l'ESP32-S3-BOX-3 une plateforme complète de développement AIoT pour votre poste de travail électronique Considérations et conseils des techniciens Espressif L'histoire d'ESP RainMaker comment nous avons construit « votre » cloud IoT Construction de l'Elektor Cloc 2.0 un produit Elektor déballé par Espressif L'ESP32-P4 se déchaîne la prochaine ère des microcontrôleurs Reste + intégré un puissant duo de développement Qui sont les intrépides développeurs Rust embarqués ? c'est ainsi qu'Espressif cultive Rust embarqué pour l'ESP32 la série SoC d'Espressif Un automate avec les solutions Espressif avec les possibilités et fonctionnalités du protocole ISOBUS La carte VGA ESP32-S3 suivez Bitluni pendant le processus de conception Prise d'empreintes acoustiques avec l'ESP32 reconnaissance de chansons avec le projet open-source Olaf Sapin de Noël rond 2023 une façon high-tech de célébrer les vacances Une vie plus simple et plus pratique un projet amateur basé sur le module ESP8266 d'Espressif Créer des applications IoT sans expertise logicielle avec la plateforme Blynk IoT et le matériel Espressif Créez une interface utilisateur intelligente sur ESP32 Développement IoT rapide et facile avec M5Stack Prototype d'un compteur d'énergie basé sur ESP32 Un distributeur à valeur ajoutée pour l'IoT et plus encore Dans les coulisses : entretien avec Arduino à propos du Nano ESP32 Alessandro Ranellucci et Martino Facchin sur la collaboration avec Espressif les coulisses d'Espressif Rationalisez le développement de MCU avec la séparation des privilèges ESP-IDF Un serveur de reconnaissance vocale open source... ...et la BOÎTE ESP L'œil pensant, la reconnaissance faciale et bien plus encore avec l'ESP32-S3-EYE Interrupteur à pile bouton avec ESP32-C2 conception axée sur la performance La matière fait avancer la maison intelligente libère le potentiel de l'IoT pour la maison intelligente Tech the Future : où aller avec Smarthome IoT ?
€ 9,95
-
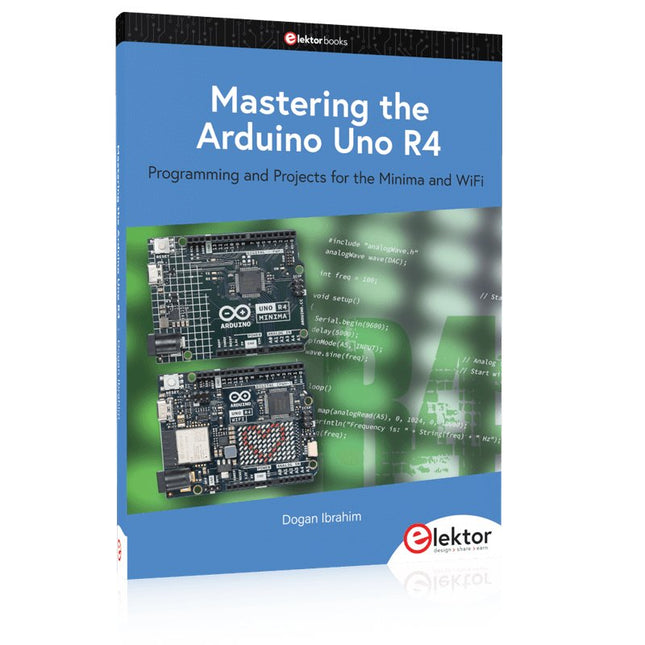
Elektor Publishing Mastering the Arduino Uno R4
Programming and Projects for the Minima and WiFi Based on the low-cost 8-bit ATmega328P processor, the Arduino Uno R3 board is likely to score as the most popular Arduino family member, and this workhorse has been with us for many years. Eleven years later, the long-overdue successor, the Arduino Uno R4, was released. It is built around a 48 MHz, 32-bit Arm Cortex-M4 microcontroller and provides significantly expanded SRAM and Flash memory. Additionally, a higher-precision ADC and a new DAC are added to the design. The Uno R4 board also supports the CAN Bus with an interface. Two versions of the board are available: Uno R4 Minima, and Uno R4 WiFi. This book is about using these new boards to develop many different and interesting projects with just a handful of parts and external modules. All projects described in the book have been fully tested on the Uno R4 Minima or the Uno R4 WiFi board, as appropriate. The project topics include the reading, control, and driving of many components and modules in the kit as well as on the relevant Uno R4 board, including LEDs 7-segment displays (using timer interrupts) LCDs Sensors RFID Reader 4x4 Keypad Real-time clock (RTC) Joystick 8×8 LED matrix Motors DAC (Digital-to-analog converter) LED matrix WiFi connectivity Serial UART CAN bus Infrared controller and receiver Simulators … all in creative and educational ways with the project operation and associated software explained in great detail.
€ 44,95
Membres : € 40,46
-
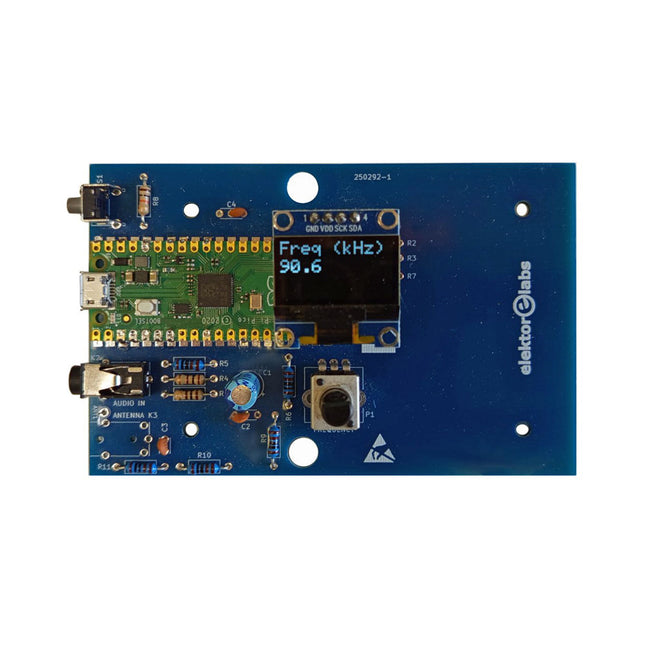
Elektor Labs Kit émetteur AM Elektor
Construisez votre propre émetteur radio vintage Le kit émetteur AM Elektor permet de diffuser de l’audio vers des récepteurs radio AM vintage. Basé sur un module microcontrôleur Raspberry Pi Pico, l’émetteur AM peut transmettre sur 32 fréquences dans la bande AM, de 500 kHz jusqu’à 1,6 MHz en 32 pas d’environ 35 kHz. La fréquence est sélectionnée à l’aide d’un potentiomètre et affichée sur un écran OLED de 0,96". Un bouton-poussoir permet de basculer le mode d’émission entre Marche et Arrêt. La portée de l’émetteur dépend de l’antenne. L’antenne intégrée offre une portée de quelques centimètres, nécessitant de placer l’émetteur AM à proximité ou à l’intérieur de la radio. Une antenne boucle externe (non incluse) peut être connectée pour augmenter la portée. Le kit émetteur AM Elektor est livré en kit de pièces que vous devez souder vous-même sur la carte. Caractéristiques La carte est compatible avec un boîtier Hammond 1593N (non inclus).Une alimentation 5 VDC avec connecteur micro-USB (par exemple, un ancien chargeur de téléphone) est nécessaire pour alimenter le kit (non incluse). Consommation de courant : 100 mA. Le logiciel Arduino (nécessitant le package RP2040 Boards d’Earle Philhower) pour le kit émetteur AM Elektor ainsi que plus d’informations sont disponibles sur la page Elektor Labs de ce projet. Liste des composants Résistances R1, R4 = 100 Ω R2, R3, R8 = 10 kΩ R5, R6, R9, R10, R11 = 1 kΩ R7 = optionnelle (non incluse) P1 = potentiomètre 100 kΩ, linéaire Condensateurs C1 = 22 µF 16V C2, C4 = 10 nF C3 = 150 pF Divers K1 = barrette 4×1 broches K2, K3 = prise 3,5 mm Raspberry Pi Pico Bouton-poussoir, montage en angle Afficheur OLED I²C monochrome 0,96" PCB 150292-1
€ 29,95
Meilleur prix
-

Elektor Academy Pro Arduino (cours de programmation)
Ce cours complet de programmation de microcontrôleurs basé sur l’Arduino Uno comprend un manuel, un kit de composants, des projets pratiques ainsi qu’un cours en ligne complet avec simulations. Il est idéal pour apprendre pas à pas la programmation des systèmes embarqués avec Arduino grâce à une approche pratique. Une introduction pratique aux systèmes embarqués avec l’Arduino Uno Ce cours s’adresse aux débutants en systèmes embarqués recherchant une approche structurée et basée sur des exemples. Un kit de composants comprenant des LED et des résistances, des interrupteurs, des capteurs et actionneurs, des afficheurs, une breadboard et des fils est inclus. Ceux-ci sont utilisés dans le cours pour illustrer des applications concrètes. Aucune expérience préalable avec Arduino ou le développement embarqué n’est requise. Chaque section propose des exemples pratiques et des mini-projets conçus pour renforcer les concepts clés et encourager l’exploration. À la fin du cours, vous serez capable non seulement de reproduire les exemples, mais aussi de développer vos propres idées et applications. Que allez-vous apprendre ? Programmation de microcontrôleurs avec Arduino en utilisant la carte Uno R3 Utilisation des entrées/sorties numériques, lecture de boutons et encodeurs, commande de LED et relais Lecture des entrées analogiques, tensions et capteurs analogiques Génération de signaux analogiques et PWM Utilisation des communications série comme UART, I²C et SPI pour piloter des afficheurs et lire des capteurs numériques et cartes SD Gestion du temps Utilisation des interruptions Entrées capteurs en temps réel et contrôle via boutons, LED et afficheurs Commande d’actionneurs comme relais et servomoteurs À qui s’adresse ce cours ? Étudiants et autodidactes explorant les systèmes embarqués Makers et passionnés d’IoT souhaitant améliorer leurs compétences en hardware Formateurs et enseignants à la recherche de matériel pédagogique prêt à l’emploi Contenu de la boîte Accès au cours complet sur la plateforme Elektor Academy Pro Carte microcontrôleur Uno R3 + câble USB Livre : Programming Microcontrollers in C/C++ Using Arduino Fichiers de projet téléchargeables pour chaque module Boîte de composants : 2× LED, rouge, 5 mm LED, verte, 5 mm 3× résistance, 470 Ω, 0,25 W LDR Potentiomètre, 10 kΩ, linéaire Bouton-poussoir Module encodeur rotatif Module relais Capteur DHT22 (température & humidité) Afficheur 7 segments 4 digits compatible TM1637 MPU-6050 IMU avec connecteurs Afficheur OLED I²C compatible SSD1306 Adaptateur carte micro SD avec connecteur Buzzer Micro servo SG90 Écran TFT SPI 240×320 compatible ILI9341 20× fils jumper Breadboard Tous les cours de programmation (et différences de contenu) Cours Arduino Raspberry Pi Pico with Arduino C/C++ ESP32 with Arduino C/C++ Raspberry Pi Pico with MicroPython ESP32 with MicroPython Cours en ligne Access to Arduino Course Access to Pico with Arduino C/C++ Course Access to ESP32 with Arduino C/C++ Course Access to Pico with MicroPython Course Access to ESP32 with MicroPython Course Carte Uno R3 Raspberry Pi Pico ESP32 Raspberry Pi Pico ESP32 Livre Programming Microcontrollers in C/C++ Using Arduino Programming Microcontrollers in C/C++ Using Arduino Programming Microcontrollers in C/C++ Using Arduino Programming Microcontrollers in MicroPython Programming Microcontrollers in MicroPython Kit Boîte de composants (40 pièces) Boîte de composants (40 pièces) Boîte de composants (40 pièces) Boîte de composants (40 pièces) Boîte de composants (40 pièces)
€ 69,95
Membres : € 62,96
-

Elektor Academy Pro Raspberry Pi Pico with Arduino C/C++ (cours de programmation)
Ce cours complet de programmation de microcontrôleurs basé sur le Raspberry Pi Pico comprend un manuel, un kit de composants, des projets pratiques ainsi qu’un cours en ligne complet avec simulations. Il est idéal pour apprendre pas à pas la programmation des systèmes embarqués avec Arduino grâce à une approche pratique. Une introduction pratique aux systèmes embarqués avec le Raspberry Pi Pico Ce cours s’adresse aux débutants en systèmes embarqués recherchant une approche structurée et basée sur des exemples. Un kit de composants comprenant des LED et des résistances, des interrupteurs, des capteurs et actionneurs, des afficheurs, une breadboard et des fils est inclus. Ceux-ci sont utilisés dans le cours pour illustrer des applications concrètes. Aucune expérience préalable avec Arduino ou le développement embarqué n’est requise. Chaque section propose des exemples pratiques et des mini-projets conçus pour renforcer les concepts clés et encourager l’exploration. À la fin du cours, vous serez capable non seulement de reproduire les exemples, mais aussi de développer vos propres idées et applications. Que allez-vous apprendre ? Programmation de microcontrôleurs en C/C++ avec le Raspberry Pi Pico via l’IDE Arduino Utilisation des entrées/sorties numériques, lecture de boutons et encodeurs, commande de LED et relais Lecture des entrées analogiques, tensions et capteurs analogiques Génération de signaux analogiques et PWM Utilisation des communications série comme UART, I²C et SPI pour piloter des afficheurs et lire des capteurs numériques et cartes SD Gestion du temps Utilisation des interruptions Entrées capteurs en temps réel et contrôle via boutons, LED et afficheurs Commande d’actionneurs comme relais et servomoteurs À qui s’adresse ce cours ? Étudiants et autodidactes explorant les systèmes embarqués Makers et passionnés d’IoT souhaitant améliorer leurs compétences en hardware Formateurs et enseignants à la recherche de matériel pédagogique prêt à l’emploi Contenu de la boîte Accès au cours complet sur la plateforme Elektor Academy Pro Carte microcontrôleur Raspberry Pi Pico + câble USB Livre : Programming Microcontrollers in C/C++ Using Arduino Fichiers de projet téléchargeables pour chaque module Boîte de composants : 2× LED, rouge, 5 mm LED, verte, 5 mm 3× résistance, 470 Ω, 0,25 W LDR Potentiomètre, 10 kΩ, linéaire Bouton-poussoir Module encodeur rotatif Module relais Capteur DHT22 (température & humidité) Afficheur 7 segments 4 digits compatible TM1637 MPU-6050 IMU avec connecteurs Afficheur OLED I²C compatible SSD1306 Adaptateur carte micro SD avec connecteur Buzzer Micro servo SG90 Écran TFT SPI 240×320 compatible ILI9341 20× fils jumper Breadboard Tous les cours de programmation (et différences de contenu) Cours Arduino Raspberry Pi Pico with Arduino C/C++ ESP32 with Arduino C/C++ Raspberry Pi Pico with MicroPython ESP32 with MicroPython Cours en ligne Access to Arduino Course Access to Pico with Arduino C/C++ Course Access to ESP32 with Arduino C/C++ Course Access to Pico with MicroPython Course Access to ESP32 with MicroPython Course Carte Uno R3 Raspberry Pi Pico ESP32 Raspberry Pi Pico ESP32 Livre Programming Microcontrollers in C/C++ Using Arduino Programming Microcontrollers in C/C++ Using Arduino Programming Microcontrollers in C/C++ Using Arduino Programming Microcontrollers in MicroPython Programming Microcontrollers in MicroPython Kit Boîte de composants (40 pièces) Boîte de composants (40 pièces) Boîte de composants (40 pièces) Boîte de composants (40 pièces) Boîte de composants (40 pièces)
€ 69,95
Membres : € 62,96
-

Elektor Publishing Raspberry Pi Pico W (Book)
Program, build, and master 60+ projects with the Wireless RP2040 The Raspberry Pi Pico and Pico W are based on the fast, efficient, and low-cost dual-core ARM Cortex M0+ RP2040 microcontroller chip running at up to 133 MHz and sporting 264 KB of SRAM and 2 MB of Flash memory. Besides spacious memory, the Pico and Pico W offer many GPIO pins, and popular peripheral interface modules like ADC, SPI, I²C, UART, PWM, timing modules, a hardware debug interface, and an internal temperature sensor. The Raspberry Pi Pico W additionally includes an on-board Infineon CYW43439 Bluetooth and Wi-Fi chipset. At the time of writing this book, the Bluetooth firmware was not yet available. Wi-Fi is however fully supported at 2.4 GHz using the 802.11b/g/n protocols. This book is an introduction to using the Raspberry Pi Pico W in conjunction with the MicroPython programming language. The Thonny development environment (IDE) is used in all of the 60+ working and tested projects covering the following topics: Installing the MicroPython on Raspberry Pi Pico using a Raspberry Pi or a PC Timer interrupts and external interrupts Analogue-to-digital converter (ADC) projects Using the internal temperature sensor and external sensor chips Using the internal temperature sensor and external temperature sensor chips Datalogging projects PWM, UART, I²C, and SPI projects Using Bluetooth, WiFi, and apps to communicate with smartphones Digital-to-analogue converter (DAC) projects All projects are tried & tested. They can be implemented on both the Raspberry Pi Pico and Raspberry Pi Pico W, although the Wi-Fi-based subjects will run on the Pico W only. Basic programming and electronics experience are required to follow the projects. Brief descriptions, block diagrams, detailed circuit diagrams, and full MicroPython program listings are given for all projects.
€ 44,95
Meilleur prix
-
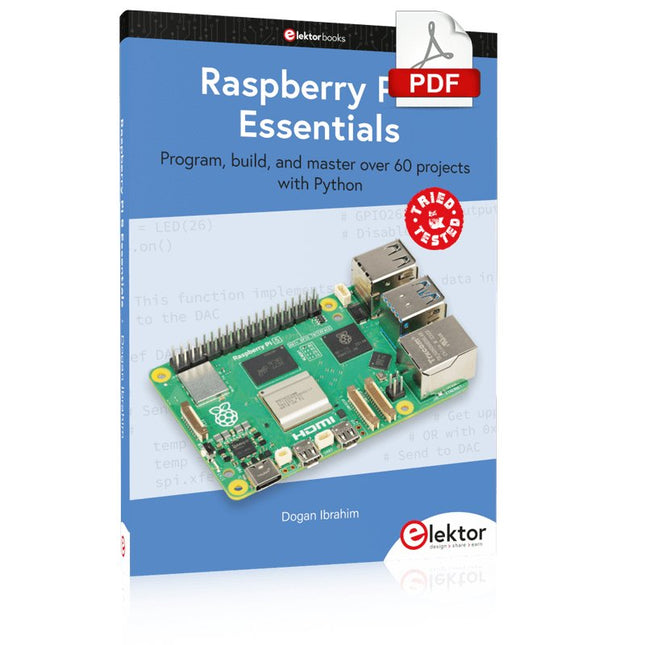
Elektor Digital Raspberry Pi 5 Essentials (E-book)
Program, build, and master over 60 projects with Python The Raspberry Pi 5 is the latest single-board computer from the Raspberry Pi Foundation. It can be used in many applications, such as in audio and video media centers, as a desktop computer, in industrial controllers, robotics, and in many domestic and commercial applications. In addition to the well-established features found in other Raspberry Pi computers, the Raspberry Pi 5 offers Wi-Fi and Bluetooth (classic and BLE), which makes it a perfect match for IoT as well as in remote and Internet-based control and monitoring applications. It is now possible to develop many real-time projects such as audio digital signal processing, real-time digital filtering, real-time digital control and monitoring, and many other real-time operations using this tiny powerhouse. The book starts with an introduction to the Raspberry Pi 5 computer and covers the important topics of accessing the computer locally and remotely. Use of the console language commands as well as accessing and using the desktop GUI are described with working examples. The remaining parts of the book cover many Raspberry Pi 5-based hardware projects using components and devices such as LEDs and buzzers LCDs Ultrasonic sensors Temperature and atmospheric pressure sensors The Sense HAT Camera modules Example projects are given using Wi-Fi and Bluetooth modules to send and receive data from smartphones and PCs, and sending real-time temperature and atmospheric pressure data to the cloud. All projects given in the book have been fully tested for correct operation. Only basic programming and electronics experience are required to follow the projects. Brief descriptions, block diagrams, detailed circuit diagrams, and full Python program listings are given for all projects described.
€ 32,95
Membres : € 29,66
-

Elektor Digital Elektor 09-10/2022 (PDF)
Diese Ausgabe steht allen GOLD- und GREEN-Mitgliedern auf der ElektorMagazine-Website zum Download bereit! Sie sind noch kein Mitglied? Hier klicken! electronica Fast Forward Start- & Scale-Up AwardsDie Vorbereitungen laufen auf Hochtouren! Bluetooth Low Energy mit dem ESP32-C3 und ESP32Es muss nicht immer WLAN sein! Bluetooth-LE-SnifferMit dem makerdiary nRF52840 MDK USB-Dongle Magischer RGB-LED-WürfelHardware-Design rund um einen RP2040 Automatischer Ein/Ausschalter für Lötpastenkompressor Elektor - live und in FarbeLivestreams, Webinare und Kurse für Ingenieure und Maker Fahrrad elektrifizierenE-Bike-Nachrüstkit in der Praxis Aller Anfang ...Muss nicht schwer sein: Multiplikation von Spannungen Aus dem Leben gegriffenNebenbeschäftigungen Teensy 4.0 - warum ist das Board so schnell?Oder: Geschwindigkeit ist keine Hexerei! Simulation von Audio-Leistungsverstärkern mit TINADer „Try-Before-You-Build“-Ansatz LoRaWAN-Knoten im IoTEin Beispiel-Kapitel: Die LoRaWAN-Module Dragino LHT65, LDS01 und LDS02 Projekt 2.0Korrekturen, Updates und Leserbriefe 5G für mich alleinVollständige Kontrolle über 5G-Implementierungen in privaten Mobilfunknetzen Infographics 7-8/2022 Wie lernt mein Gerät funken?Applikationen mit WiFi-Schnittstellen ausrüsten Rheinturmuhr – Wecker de luxe Audio-Spektrum-Analysator mit DekatronsEine neue Art, alte Röhren zu verwenden Senden von Daten an TelegramEin ESP32 und ein paar Bauteile erledigen den Job32 and a Few Parts Fliege-Bandsperre für Audio-MessungenBesseres Messen durch Notch-Filterung CO2-Messgerät auseinandergenommenIst das Gerät hackbar für Ihre Projekte? Spielereien mit PUTsAnaloge Entwürfe mit dem Programmierbaren Unijunction-Transistor Ein runder Touchscreen für den Raspberry PiHyperPixel 2.1 Round von Pimoroni Fernwirken und die Erkennung von Verbindungsverlustenmit Hilfe von nRF24L01+ Modulen Digitaler UKW-EmpfängerMit Arduino Nano und TEA5767 OLED-Display - aus SPI mach I²C Zutritt für Unbefugte verboten!Ein Hobby geht nicht in Rente! Ein Jahrzehnt der Ethik in der ElektronikTessel Renzenbrink sinniert über die digitale Gesellschaft HexadokuSudoku für Elektroniker
€ 11,90
-
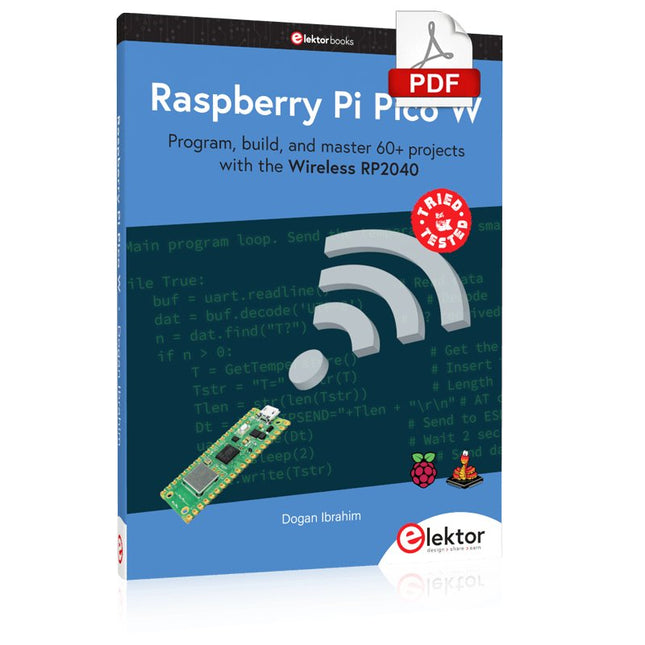
Elektor Digital Raspberry Pi Pico W (E-book)
Program, build, and master 60+ projects with the Wireless RP2040 The Raspberry Pi Pico and Pico W are based on the fast, efficient, and low-cost dual-core ARM Cortex M0+ RP2040 microcontroller chip running at up to 133 MHz and sporting 264 KB of SRAM and 2 MB of Flash memory. Besides spacious memory, the Pico and Pico W offer many GPIO pins, and popular peripheral interface modules like ADC, SPI, I²C, UART, PWM, timing modules, a hardware debug interface, and an internal temperature sensor. The Raspberry Pi Pico W additionally includes an on-board Infineon CYW43439 Bluetooth and Wi-Fi chipset. At the time of writing this book, the Bluetooth firmware was not yet available. Wi-Fi is however fully supported at 2.4 GHz using the 802.11b/g/n protocols. This book is an introduction to using the Raspberry Pi Pico W in conjunction with the MicroPython programming language. The Thonny development environment (IDE) is used in all of the 60+ working and tested projects covering the following topics: Installing the MicroPython on Raspberry Pi Pico using a Raspberry Pi or a PC Timer interrupts and external interrupts Analogue-to-digital converter (ADC) projects Using the internal temperature sensor and external sensor chips Using the internal temperature sensor and external temperature sensor chips Datalogging projects PWM, UART, I²C, and SPI projects Using Bluetooth, WiFi, and apps to communicate with smartphones Digital-to-analogue converter (DAC) projects All projects are tried & tested. They can be implemented on both the Raspberry Pi Pico and Raspberry Pi Pico W, although the Wi-Fi-based subjects will run on the Pico W only. Basic programming and electronics experience are required to follow the projects. Brief descriptions, block diagrams, detailed circuit diagrams, and full MicroPython program listings are given for all projects.
€ 34,95
Membres : € 31,46
-

Elektor Digital Meten en regelen via Android (E-book)
Hebt u altijd al uw elektronicaproject willen aansturen vanuiteen kleurrijke app op een Android smartphone of tablet? Dat is mogelijk met het in dit boek beschreven Android I/O-board. Met de bijbehorende software-library kunt u in Android Studio eenvoudig zelf een app programmeren die dit mogelijk maakt. Het Android I/O-board (los verkrijgbaar, wordt niet met boek meegeleverd!) bezit 22 pennen die u vanuit een app kunt aansturen als digitale I/O, ADC, PWM, touch-sensing en counter. Het Android I/O-board kan met de Android smartphone communiceren via Bluetooth, WiFi of USB. Het board is ook als datalogger te gebruiken. Kortom, dit is een veelzijdig board dat in ieder project past. Dit boek beschrijft stap voor stap hoe u uw project tot een succes kunt maken. Het boek behandelt gestructureerd de volgende onderwerpen: Een snelle handleiding hoe u uw Android I/O-board up and running krijgt. Een uitleg van alle mogelijkheden van het Android I/Oboard, met uitgebreide voorbeelden bij de verschillende opties. Een stap-voor-stap handleiding hoe u een app kunt programmeren in Android Studio. Een beschrijving van de firmware op het Android I/O-board en hoe u dit zelf met MPLAB-X kunt aanpassen. Voorbeeld-projecten om inspiratie op te doen hoe u uw eigen project kunt aansturen met het Android I/O-board.
€ 34,95
Membres : € 31,46
-

Elektor Labs Carte de formation Elektor Arduino Nano MCCAB
La carte d'apprentissage Elektor Arduino Nano MCCAB contient tous les composants (avec Arduino Nano) nécessaires aux exercices, tels que des diodes électroluminescentes, des interrupteurs, des boutons-poussoirs, des émetteurs de signaux acoustiques, etc. Ce système de formation à microcontrôleur permet également d'interroger ou de commander des capteurs, des moteurs ou des assemblages externes. Spécifications (Carte de formation Arduino Nano MCCAB) Alimentation électrique Via la connexion USB du PC connecté ou un bloc d'alimentation externe (non inclus) Tension de fonctionnement +5 Vcc Tension d'entrée Toutes les entrées 0 V to +5 V VX1 and VX2 +8 V to +12 V (uniquement en cas d'utilisation d'une alimentation externe) Périphérie du matériel LCD 2x16 caractères Potentiomètre P1 & P2 JP3 : sélection de la tension de fonctionnement de P1 et P2 Distributeur SV4 : Distributeur pour les tensions de fonctionnementSV5, SV6 : Distributeur pour les entrées/sorties du microcontrôleur Interrupteurs et boutons Bouton RESET sur le module Arduino Nano 6x interrupteurs à bouton poussoir K1 ... K6 6x interrupteurs à glissière S1 ... S6 JP2 : Connexion des interrupteurs avec les entrées du microcontrôleur Buzzer Buzzer piézo Buzzer1 avec cavalier sur JP6 Voyants lumineux 11 x LED : Indicateur d'état des entrées/sorties LED L sur le module Arduino Nano, connectée au GPIO D13 JP6 : Connexion des LED LD10 ... LD20 avec les GPIO D2 ... D12 Interfaces sérieSPI ET I²C JP4 : Sélection du signal à la broche X du connecteur SPI SV12 SV9 à SV12 : interface SPI (3,3 V/5 V) ou interface I²C Sortie de commutation pour les appareils externes SV1, SV7 : sortie de commutation (maximum +24 V/160 mA, alimentation externe) SV2 : 2x13 connecteurs pour la connexion de modules externes Matrice de 3x3 LED(9 LED rouges) SV3 : Colonnes de la matrice LED 3x3 (sorties D6 ... D8) JP1 : Connexion des lignes avec les GPIOs D3 ... D5 Logiciel Bibliothèque MCCABLib Contrôle des composants matériels (interrupteurs, boutons, DEL, matrice de DEL 3x3, buzzer) sur la carte de formation MCCAB. Température de fonctionnement Jusqu'à +40 °C Dimensions 100 x 100 x 20 mm Spécifications (Arduino Nano) Microcontrôleur ATmega328P Architecture AVR Tension de fonctionnement 5 V Mémoire flash 32 Ko, dont 2 Ko utilisés par le chargeur de démarrage SRAM 2 KB Vitesse d'horloge 16 MHz Connecteurs d'entrée analogique 8 EEPROM 1 KB Courant continu par connecteur d'E/S 40 mA sur un connecteur d'E/S, maximum total de 200 mA sur l'ensemble des connecteurs Tension d'entrée 7-12 V Connecteurs E/S numériques 22 (dont 6 PWM) Sortie PWMt 6 Consommation électrique 19 mA Dimensions 18 x 45 mm Poids 7 g Inclus 1x Elektor Arduino Nano Training Board MCCAB 1x Arduino Nano
€ 69,95
Meilleur prix


