Diese Ausgabe steht allen GOLD- und GREEN-Mitgliedern auf der ElektorMagazine-Website zum Download bereit!
Sie sind noch kein Mitglied? Hier klicken!
Für Augen und Ohren
Videoausgabe mit MikrocontrollernTeil 1: Composite Video
electronica 2022Neues von der Weltleitmesse
ESP32-KameraSo einfach, dass sie nicht einmal WLAN braucht
ATX-Netzteil für Raspberry Pi
32-?-KopfhörerverstärkerEinfache, aber hochqualitative 3-Chip-Lösung
SDR-FunkuhrenFünf Zeitzeichen, sechs Anzeigen
Aller Anfang ...muss nicht schwer sein: Spezielle Dioden
Aus dem Leben gegriffenÜber die Qualität der Dinge
Reverse-Engineering eines LED-Displays mit Bluetooth Low EnergyWie man ein BLE-Gerät mit einem Python-Skript steuert
MakePython ESP32 Development KitAlles in einer Box
THD-Messung mit Oszilloskop und FFTDen Klirrfaktor einfach berechnen
Allsehende MaschinenDie Technologie hinter modernen industriellen Bildverarbeitungssystemen
Infografik
Die Entwicklung der Sprach- und Audiosteuerung für elektronische Geräte
WEEF 2022 im Rückblick
Im Rückblick: FFWD electronica 2022Innovatoren beeindrucken weiterhin!
The TubeEin Röhrenverstärker der anderen Art
Biomaterialien in der Elektronik: Bereit oder nicht?
Opera-Cake-Antennenumschalter für HackRF OneSchließen Sie bis zu acht Antennen an Ihr SDR an
Technik mit Arduino und mehrEin Interview mit Autor Ashwin Pajankar
LiDAR-PräzisionsmetermaßMisst bis zu zwölf Meter
Audio mit dem ESP32Das Framework ESP-ADF in der Praxis
Elektor-Leistungsverstärker-Bausatz Fortissimo-100
Licht für Klangeffekte nutzenLDR-basiertes spannungsgesteuertes 24 dB/Okt.-Synthesizer-Filter
Hochleistungsverstärker GigantDer Lauteste von allen!!
Betreten für Unbefugte verboten!Ein volumetrisches Display Made in Canada
Projekt 2.0Korrekturen, Updates und Leserbriefe
Hexadoku
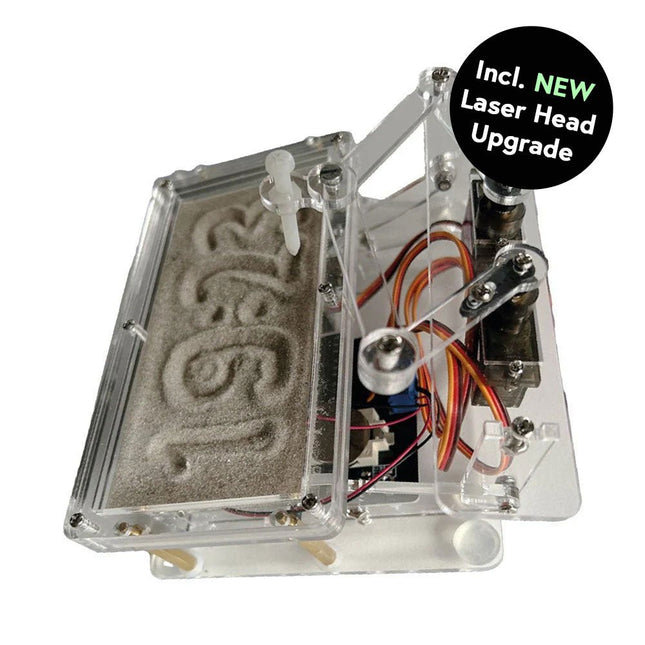
Cette offre groupée contient le populaire horloge de sable Elektor pour Raspberry Pi Pico et la nouvelle upgrade tête laser Elektor, offrant encore plus d'options d'affichage de l'heure. Non seulement vous pouvez « graver » l'heure actuelle dans le sable, mais vous pouvez désormais également l'écrire sur une feuille phosphorescente ou créer des dessins verts.
Contenu de l'offre groupée
Horloge de sable Elektor pour Raspberry Pi Pico (prix normal : 50 €)
Upgrade tête laser Elektor pour horloge de sable (prix normal : 35 €)
Horloge de sable Elektor pour Raspberry Pi Pico (Accroche-regard basé sur le Raspberry Pi)
Une horloge à sable standard ne fait qu'indiquer le temps qui passe. En revanche, cette horloge à sable contrôlée par le Raspberry Pi Pico indique l'heure exacte en 'gravant' les quatre chiffres de l'heure et des minutes dans la couche de sable. Après un temps réglable, le sable est aplati par deux moteurs vibrants et tout recommence.
Au cœur de l'horloge de sable se trouvent deux servomoteurs qui entraînent un stylo dans un mécanisme de pantographe. Un troisième servomoteur soulève le stylo de haut en bas. Le bac à sable est équipé de deux moteurs vibrants qui aplatissent le sable. La partie électronique de l'horloge des sables se compose d'un Raspberry Pi Pico et d'une carte RTC/driver avec une horloge en temps réel, ainsi que des circuits de commande pour les servomoteurs.
Un manuel de construction détaillé peut être téléchargé.
Caractéristiques
Dimensions: 135 x 110 x 80 mm
Temps de construction : environ. 1,5 à 2 heures
Inclus
3x Feuilles acryliques prédécoupées avec toutes les pièces mécaniques
3x Mini servomoteurs
2x moteurs de vibration
1x Raspberry Pi Pico
1x Carte RTC/pilote avec les pièces assemblées
Ecrous, boulons, entretoises et fils pour l'assemblage
Sable blanc à grains fins
Upgrade tête laser Elektor pour horloge de sablee
La nouvelle tête laser Elektor transforme l'horloge de sable dans une horloge qui écrit l'heure sur un film qui brille dans le noir au lieu de sable. En plus d’afficher l’heure, il peut également être utilisé pour créer des dessins éphémères. Le pointeur laser de 5 mW, avec une longueur d'onde de 405 nm, produit des dessins vert vif sur le film qui brille dans le noir. Pour de meilleurs résultats, utilisez le kit dans une pièce faiblement éclairée. Attention : ne regardez jamais directement dans le faisceau laser !
Le kit comprend tous les composants nécessaires, mais la soudure de trois fils est nécessaire.
Remarque : Ce kit est également compatible avec l'horloge de sable d'origine basée sur Arduino de 2017. Pour plus de détails, voir Elektor 1-2/2017 et Elektor 1-2/2018.
Home Information SystemUsing Windows on a Raspberry Pi
Starting with Node-REDAn open-source visual block-based programming tool
Elektor Summer GiveAway
Simple Function Generator: With Reverse-Order Signal Creation
GreatScott! Builds a LoRa Alarm System
Review: Joy-iT RD6006 Benchtop Power Supply Kit
Review: The GreatFET One Interface Board
Small Circuits Revival – XXLEscaped from the Suggestions Box
Poorest Man's External 2.4 GHz Wi-Fi Antenna
Simple On-Off Temperature Controller with Raspberry Pi HAT
How to Take (Successful) Photos of ElectronicsShowing your projects in their best light
Review: The I2CDriver Tool
Review: JOY-iT Joy-View Portable Touchscreen
LED Booster for MicrocontrollersWith just one component
Experimental Ultrasonic Clothes Washer
Review: The Joy-iT JDS2915 Signal GeneratorA 2-Channel Signal Generator and Frequency Counter
Traffic Lights Programmed in PIC Assembly Code
E-E-E-ternal Blinker
Experimental Hall Sensor
Tracing Shorts with the Milli-Ohm or ESR Meter
Review: Elektor SDR Hands-on Kit
Elektor Labs Pipeline
Elektor KickstarterWell, you get the idea.
Do You Really Need All That Stuff???This is where I spend many hours working on electronics projects
Homelab Tours: The Kinetic Clock MakerStargate jigsawed!
Hello, World! We’re Elektor, and We’re Social
M4 + 2x A7 + GPU: An Unbalanced Dream TeamLatest STM32MP1-SoCs can tackle demanding applications
Test Rig for 16F18877 & Similar Big PICs
Inter-Microcontroller Traffic with the SPI Bus and ATmega328p
Six Shades of LF/AF OSC (and the Miller’s Tale)
BBC micro:bit Absolute Minimalist Oscilloscope with LED Display
‘Knight Rider’ LED Chaser with the ESP32
LW/MW AM Signal Generator with ATtiny13
Absolute Minimalist Dip Meter
Photovoltaic Regulator UpdateNew function for measuring battery temperature
Wireless SignallingTransmitting switching signals over LPR
Ultrasonic Reverse Parking Aid with Arduino Uno
Distortion Pedal with Op Amp and Space Charge Tubes
Electronics Workspace Essentials
Hexadoku
Artificial Intelligence for Beginners (2)Neural networks with Linux and Python
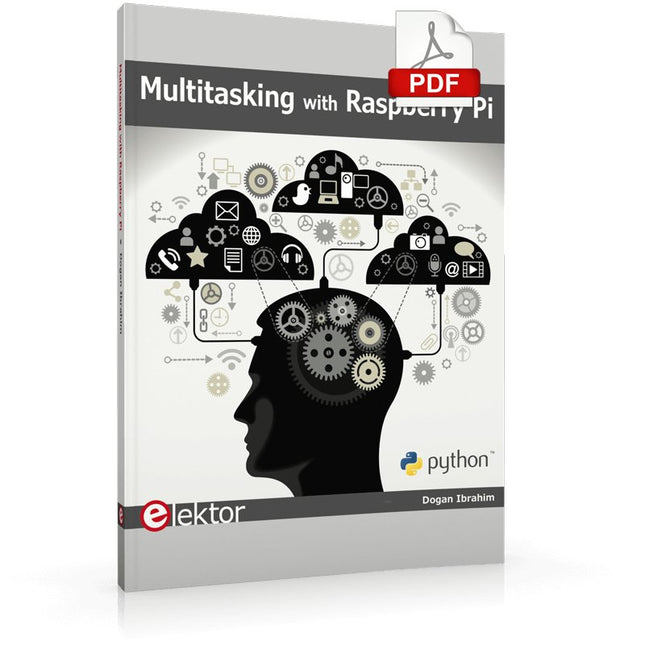
Multitasking and multiprocessing have become a very important topic in microcontroller-based systems, namely in complex commercial, domestic, and industrial automation applications. As the complexity of projects grows, more functionalities are demanded from the projects. Such projects require the use of multiple inter-related tasks running on the same system and sharing the available resources, such as the CPU, memory, and input-output ports. As a result of this, the importance of multitasking operations in microcontroller-based applications has grown steadily over the last few years. Many complex automation projects now make use of some form of a multitasking kernel.
This book is project-based and its main aim is to teach the basic features of multitasking using the Python 3 programming language on Raspberry Pi. Many fully tested projects are provided in the book using the multitasking modules of Python. Each project is described fully and in detail. Complete program listings are given for each project. Readers should be able to use the projects as they are, or modify them to suit their own needs.
The following Python multitasking modules have been described and used in the projects:
Fork
Thread
Threading
Subprocess
Multiprocessing
The book includes simple multitasking projects such as independently controlling multiple LEDs, to more complex multitasking projects such as on/off temperature control, traffic lights control, 2-digit, and 4-digit 7-segment LED event counter, reaction timer, stepper motor control, keypad based projects, car park controller, and many more. The fundamental multitasking concepts such as process synchronization, process communication, and memory sharing techniques have been described in projects concerning event flags, queues, semaphores, values, and so on.
309 Schaltungen – das zehnte Buch innerhalb der „Dreihunderter-Reihe“. 309 Schaltungen und neue Konzepte in einem Buch sind ein (fast) unerschöpflicher Fundus zu allen Bereichen der Elektronik: Audio & Video, Spiel & Hobby, Haus & Hof, Prozessor & Controller, Messen & Testen, PC & Peripherie, Stromversorgung & Ladetechnik sowie zu Themen, die sich nicht katalogisieren lassen.
309 Schaltungen – enthält viele komplette Problemlösungen, zumindest aber die Idee hierzu. Nicht zuletzt sind die 309 Schaltungen der Anstoß zu ganz neuen Überlegungen.
309 Schaltungen – sind eine Zusammenfassung der Beiträge aus den Halbleiterheften 2003 bis 2005. Die Halbleiterhefte sind die jährlichen Doppelausgaben Juli/August der Zeitschrift Elektor.
309 Schaltungen ist das Buch für alle, die kreativ mit der Elektronik umgehen; sei es im Beruf oder als Hobby.
Elektor GREEN en GOLD leden kunnen deze uitgave hier downloaden.
Nog geen lid? Klik hier om een lidmaatschap af te sluiten.
OBD2-sensordashboardOude meters vormden het startpunt van een zoektocht naar echte gegevens
OBD2: voeg een toerenteller en schakelindicator toe aan je autoRetro, maar uiterst nuttig
LiDAR- en Visiesensoren voor Robotica
Sensor+Test 2025 en PCIM 2025
Contactloze E-Veldmetingen (1)Een Trillende Membraan voor het Detecteren van Gelijkspanningen of Statische Elektrische Velden
Draadloze brievenbusmeldervan optische sensoren tot radar: enkele mogelijkheden
Elektor Mini-Wheelieeen zelfbalancerende robot
ZonnecellenVreemde onderdelen, de serie
Aan de slag met een moderne radarsensorStaat een nauwkeurige meting op uw radar?
Uit het leven gegrepenpapierfabriek
CybersecurityZware tijden voor hackers
Infographics: IoT en sensoren 2025
Bluetooth 6.0 brengt verbeterde toepassingen voor afstandsbepalingNieuwe versie biedt betere apparaatpositionerings- en -locatieservices
Draadloze communicatie verkennen met BeagleY-AI
Err-lectronicsCorrecties, updates en lezerspost
Alle begin......sluit het thema opamps af
Een krachtige AI-codeerassistentsneller ontwikkelen met Continue en Visual Studio Code
Zonne-laadregelaar met MPPT (2)Het schema
Ultrasone obstakeldetectoreen eenvoudig project om slechtzienden te helpen
2025: Een AI-odysseeHalfjaaroverzicht
Raspberry Pi Standalone MIDI-synthesizer (3)Het slimmer maken en een gebruikersinterface toevoegen
Meshtastic: een demonstratieprojectEen slim netwerk van LoRa-radio's
Analoge audio-frequentiegeneratorHoogwaardige sinusgenerator met instelbare frequentie
Programmierung in Assembler und C am Beispiel der ATtiny-Familie
Dieses Buch bietet einen eingehenden Blick auf die 8-Bit-AVR-Architektur in ATtiny- und ATmega-Mikrocontrollern, hauptsächlich aus der Sicht der Software und der Programmierung. Erforschen Sie die AVR-Architektur unter Verwendung von C und Assembler in Microchip Studio (früher Atmel Studio) mit ATtiny-Mikrocontrollern.
Lernen Sie die Details der internen Funktionsweise von AVR-Mikrocontrollern kennen, einschließlich der internen Register und des Speicherplans von ATtiny-Bausteinen.
Programmieren Sie ATtiny-Mikrocontroller mit einem Atmel-ICE-Programmiergerät/Debugger oder verwenden Sie ein preiswertes Hobby-Programmiergerät oder sogar einen Arduino Uno als Programmiergerät.
Die meisten Code-Beispiele können mit dem Microchip Studio AVR-Simulator ausgeführt werden.
Lernen Sie, Programme für ATtiny-Mikrocontroller in Assembler zu schreiben.
Erfahren Sie, wie Assemblersprache in Maschinencodebefehle umgewandelt wird.
Finden Sie heraus, wie Programme, die in der Programmiersprache C geschrieben wurden, in Assemblersprache und schließlich in Maschinencode umgewandelt werden.
Verwenden Sie den Microchip Studio Debugger in Kombination mit einem Hardware-USB-Programmierer/Debugger, um Assembler- und C-Programme zu testen oder verwenden Sie den Microchip Studio AVR-Simulator.
ATtiny-Mikrocontroller im DIP-Gehäuse werden verwendet, um eine einfache Nutzung auf Breadboards zu ermöglichen.
Erfahren Sie mehr über Timing und Taktimpuls in AVR-Mikrocontrollern mit ATtiny-Bausteinen.
Werden Sie zu einem AVR-Experten mit fortgeschrittenen Debugging- und Programmierfähigkeiten.
Plot, Cut, Drill, Mill and Laser with the Z99
This book covers the construction, hardware, software, and operation of the Z99 – CNC machine. This is a multifunctional 4-axis machine for home construction.
The capabilities of the Z99 machine include:
large-format schematic plotting
PCB plotting with etch-resist pens
schematic plotting with conductive-ink pens
letter cutting out of vinyl
paper cutting
PCB/substrate drilling
PCB/substrate milling
text milling
laser engraving
laser cutting of solder paste masks
By making the support software available as freeware, readers of the book are challenged and encouraged to develop new applications for the Z99.
The machine would not be of much use if the user has no option to create suitable files for the designs in mind. A large part of this book is dedicated to creating source files in a variety of freeware software packages, including Inkscape, DesignSpark PCB, KiCad, and FlatCAM.
The book is also useful for readers keen to comprehend and then master the basic structure of HPGL, Gerber, Drill, and G-code files, as well as to have a go at deciphering them using software.
If you enjoy DIY electronics, projects, software and robots, you’ll find this book intellectually stimulating and immediately useful. With the right parts and a little guidance, you can build robot systems that suit your needs more than overpriced commercial systems can.
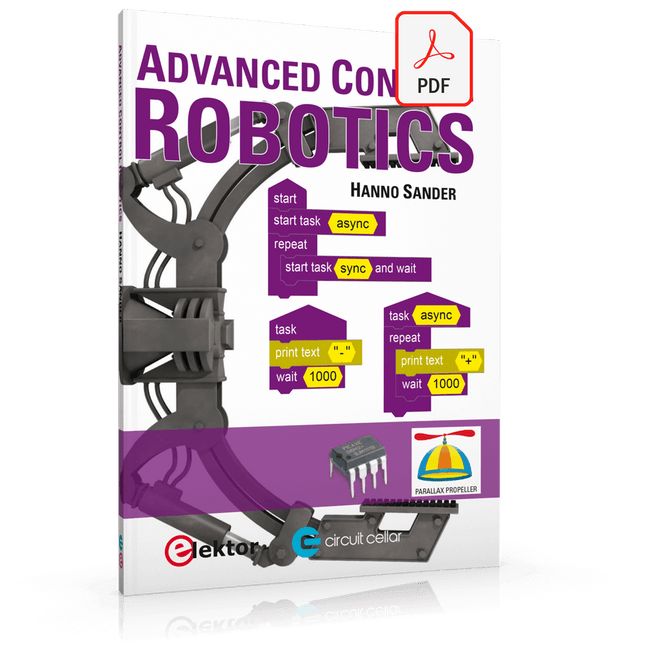
20 years ago, robots based on simple 8-bit processors and touch sensors were the norm. Now, it’s possible to build multi-core robots that can react to their surroundings with intelligence. Today’s robots combine sensor readings from accelerometers, gyroscopes and computer vision sensors to learn about their environments. They can respond using sophisticated control algorithms and they can process data both locally and in the cloud.
This book, which covers the theory and best practices associated with advanced robot technologies, was written to help roboticists, whether amateur hobbyist or professional, take their designs to the next level. As will be seen, building advanced applications does not require extremely costly robot technology. All that is needed is simply the knowledge of which technologies are out there and how best to use each of them.
Each chapter in this book will introduce one of these different technologies and discuss how best to use it in a robotics application. On the hardware side, we’ll cover microcontrollers, servos, and sensors, hopefully inspiring you to design your own awe-inspiring, next-generation systems. On the software side, we’ll cover programming languages, debugging, algorithms, and state machines. We’ll focus on the Arduino, the Parallax Propeller, Revolution Education PICAXE and projects I’ve with which I’ve been involved, including the TBot educational robot, the PropScope oscilloscope, the 12Blocks visual programming language, and the ViewPort development environment. In addition, we’ll serve up a comprehensive introduction to a variety of essential topics, including output (e.g. LEDs, servo motors), and communication technologies (e.g. infrared, audio), that you can use to develop systems that interact to stimuli and communicate with humans and other robots. To make these topics as accessible as possible, handy schematics, sample code and practical tips regarding building and debugging have been included.
Hanno Sander
Christchurch, New Zealand
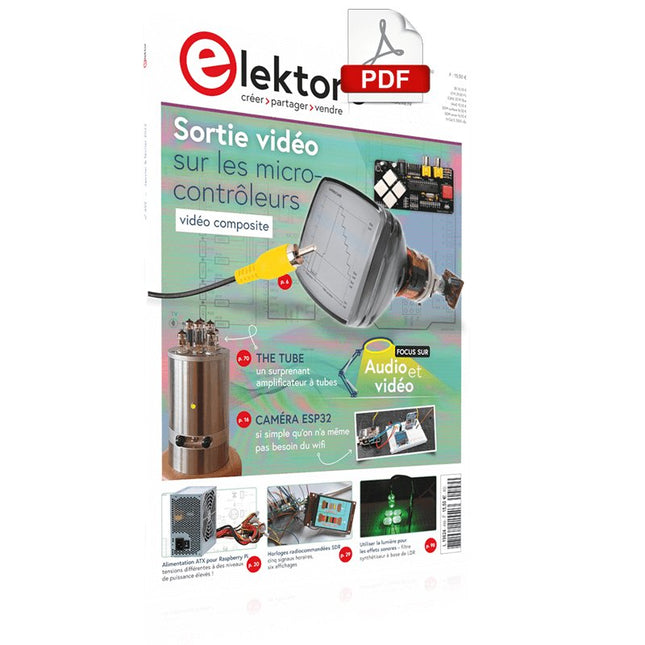
Le téléchargement intégral de ce numéro est disponible pour nos membres GOLD et GREEN sur le site Elektor Magazine !Pas encore membre ? Cliquez ici.Pour les yeux et les oreillessortie vidéo sur les microcontrôleurs (1)vidéo compositeelectronica 2022nouvelles du plus grand salon mondial de l'électroniquecaméra ESP32si simple qu'on n'a même pas besoin du wifialimentation ATX pour Raspberry Piamplificateur pour casque 32 Ωune solution simple mais de qualité à trois CIhorloges radiocommandées SDRcinq signaux horaires, six affichagesdémarrer en électroniquediodes spécialessur le viferrances qualitativesrétro-ingénierie d'un badge LED Bluetooth Low Energycomment commander un appareil BLE avec un script Pythonkit de développement MakePython ESP32tout dans une boîtemesure du THD avec un oscilloscope et une FFTcalculer facilement le facteur de distorsionmachines à vision totalela technologie derrière les systèmes de vision industrielle d'aujourd'huiInfographiesl'évolution de la commande vocale et audio des appareils électroniquesbilan du WEEF 2022bilan du salon electronica 2022les innovateurs n'ont pas manqué d'impressionnerThe Tubeun surprenant amplificateur à tubesà quand des biomatériaux pour l'électronique ?commutateur d'antenne Opera Cake pour HackRF Oneconnectez jusqu'à huit antennes à votre SDRconcevoir avec Arduino et plusentretien avec l'auteur Ashwin Pajankarjauge de longueur à lidarmesure jusqu'à 12 mles signaux audios et l'ESP32l'environnement ESP-ADF en pratiqueKit amplificateur de puissance Fortissimo-100 d'Elektorutiliser la lumière pour les effets sonoresfiltre synthétiseur à base de LDR, contrôlé en tension, 24 dB/octamplificateur Hi-Fi d'Elektorle plus bruyant de tous !visite à domicileafficheur volumétrique made in Canadaprojet 2.0corrections, mises à jour et courriers des lecteursHexadoku
1-Wire ist die Bezeichnung für eine serielle Schnittstelle, die mit nur einer Datenader auskommt. Es ist ein Master-Multi-Slave-Kommunikationsprotokoll. Verfügbar sind integrierte Bausteine zur Temperaturmessung, Akkuüberwachung, Echtzeituhr und beispielsweise Hotelschließanlagen. Eine Besonderheit von 1-Wire-Geräten ist die Spannungsversorgung aus der Gegenstation, hierbei erfolgt die Versorgung der Slaves über die Datenleitung.
Der Leser erhält mit „Das 1-Wire-Praxisbuch“ eine umfassende Einführung in die 1-Wire-Technologie. Das Buch zeigt anhand praktischer Projekte zum Nachbauen, wie man verschiedene verfügbare 1-Wire-Chips in eigene Mikrocontroller-gesteuerte Anwendungen integrieren kann, und zwar mit Assembler-Software-Implementierungen für PIC-Mikrocontroller und mit Sketches für den Arduino.
Die 1-Wire-Technik kommt in dem Buch praxisnah bei einem elektronischen Schloss zum Einsatz, das von einem PIC-Mikrocontroller gesteuert wird. Ein weiteres Praxisprojekt erläutert Schritt für Schritt, wie beispielsweise eine ständige Temperaturmessung mit 1-Wire-Bausteinen möglich ist.