De Formula Flowcode Robot is een combinatie van analoge en digitale elektronica. De robot zit boordevol sensoren en actuatoren, en is grafisch programmeerbaar met Flowcode-software. Hierdoor vormt het een leuk en motiverend platform om kennis te maken met moderne elektronica en technologie.
Via de robot en deze handleiding kun je op uitdagende manier kennis maken met basiselektronica. Onderwerpen die aan bod komen zijn analoog en digitaal, logische poorten, diode, LCD, microcontrollers, frequentie, sensoren, actuatoren, infrarood, meet- en regeltechniek, servomotoren, gelijkrichting, programmeren en nog veel meer.
Plot, Cut, Drill, Mill and Laser with the Z99
This book covers the construction, hardware, software, and operation of the Z99 – CNC machine. This is a multifunctional 4-axis machine for home construction.
The capabilities of the Z99 machine include:
large-format schematic plotting
PCB plotting with etch-resist pens
schematic plotting with conductive-ink pens
letter cutting out of vinyl
paper cutting
PCB/substrate drilling
PCB/substrate milling
text milling
laser engraving
laser cutting of solder paste masks
By making the support software available as freeware, readers of the book are challenged and encouraged to develop new applications for the Z99.
The machine would not be of much use if the user has no option to create suitable files for the designs in mind. A large part of this book is dedicated to creating source files in a variety of freeware software packages, including Inkscape, DesignSpark PCB, KiCad, and FlatCAM.
The book is also useful for readers keen to comprehend and then master the basic structure of HPGL, Gerber, Drill, and G-code files, as well as to have a go at deciphering them using software.
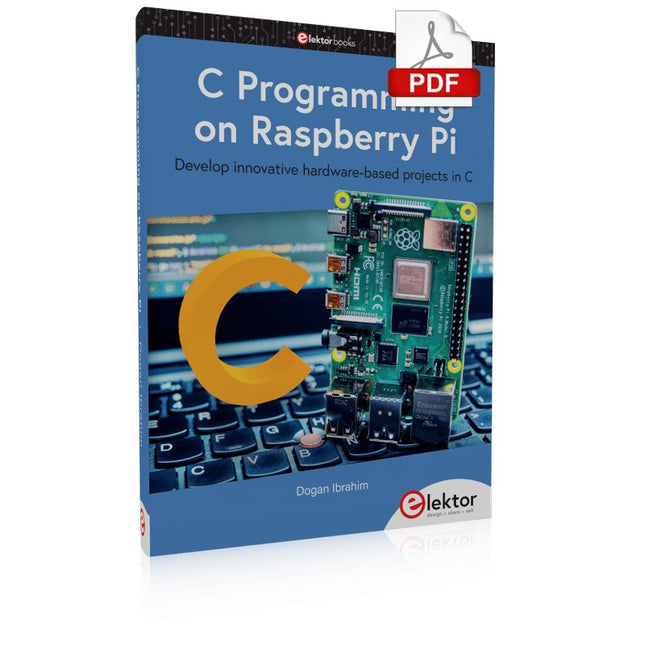
Develop innovative hardware-based projects in C
The Raspberry Pi has traditionally been programmed using Python. Although this is a very powerful language, many programmers may not be familiar with it. C on the other hand is perhaps the most commonly used programming language and all embedded microcontrollers can be programmed using it.
The C language is taught in most technical colleges and universities and almost all engineering students are familiar with using it with their projects. This book is about using the Raspberry Pi with C to develop a range of hardware-based projects. Two of the most popular C libraries, wiringPi and pigpio are used.
The book starts with an introduction to C and most students and newcomers will find this chapter invaluable. Many projects are provided in the book, including using Wi-Fi and Bluetooth to establish communication with smartphones.
Many sensor and hardware-based projects are included. Both wiringPi and pigpio libraries are used in all projects. Complete program listings are given with full explanations. All projects have been fully tested and work.
The following hardware-based projects are provided in the book:
Using sensors
Using LCDs
I²C and SPI buses
Serial communication
Multitasking
External and timer interrupts
Using Wi-Fi
Webservers
Communicating with smartphones
Using Bluetooth
Sending data to the cloud
Program listings of all Raspberry Pi projects developed in this book are available on the Elektor website. Readers can download and use these programs in their projects. Alternatively, they can customize them to suit their applications.
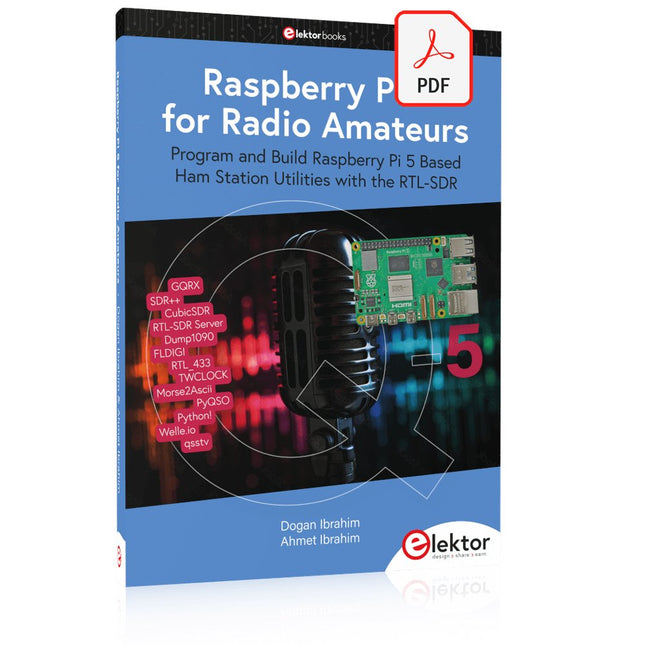
Program and Build Raspberry Pi 5 Based Ham Station Utilities with the RTL-SDR
The RTL-SDR devices (V3 and V4) have gained popularity among radio amateurs because of their very low cost and rich features. A basic system may consist of a USB based RTL-SDR device (dongle) with a suitable antenna, a Raspberry Pi 5 computer, a USB based external audio input-output adapter, and software installed on the Raspberry Pi 5 computer. With such a modest setup, it is possible to receive signals from around 24 MHz to over 1.7 GHz.
This book is aimed at amateur radio enthusiasts and electronic engineering students, as well as at anyone interested in learning to use the Raspberry Pi 5 to build electronic projects. The book is suitable for both beginners through experienced readers. Some knowledge of the Python programming language is required to understand and eventually modify the projects given in the book. A block diagram, a circuit diagram, and a complete Python program listing is given for each project, alongside a comprehensive description.
The following popular RTL-SDR programs are discussed in detail, aided by step-by-step installation guides for practical use on a Raspberry Pi 5:
SimpleFM
GQRX
SDR++
CubicSDR
RTL-SDR Server
Dump1090
FLDIGI
Quick
RTL_433
aldo
xcwcp
GPredict
TWCLOCK
CQRLOG
klog
Morse2Ascii
PyQSO
Welle.io
Ham Clock
CHIRP
xastir
qsstv
flrig
XyGrib
FreeDV
Qtel (EchoLink)
XDX (DX-Cluster)
WSJT-X
The application of the Python programming language on the latest Raspberry Pi 5 platform precludes the use of the programs in the book from working on older versions of Raspberry Pi computers.
Open-Source-Code mit Arduino IDE und PlatformIO
Autonomes Fahren: GPS, Accelerometer, Gyroskop
PS3-Controller
Mikrocontroller wie der Arduino und Einplatinenrechner wie der Raspberry Pi haben sich zu beliebten Komponenten entwickelt. Dritter im Bunde ist der ESP32 der Firma Espressif. Mikrocontroller dieser Baureihe zeichnen sich durch eine Vielzahl implementierter Funktionen aus, die bei einem Arduino konventioneller Prägung mit einem Atmel-AVR-Mikrocontroller erst mit weiterer Hardware möglich sind. Prominentes Beispiel sind hier die WiFi- und Bluetooth-Funktionalitäten. Gegenüber einem Raspberry Pi zeichnen sie sich durch einen deutlich geringeren Preis aus.
Allgemeine Informationen für die Realisierung eines Roboterauto-Projekts mit dem ESP32 sind leicht zu finden. Dabei handelt es sich aber oft nur um Ausführungen zu einem Teilaspekt, ohne inhaltliche oder funktionale Abstimmung. So ist nicht nur die Beschaffung der benötigten Informationen mühselig und zeitaufwändig, sie kann auch außerordentlich fehlerträchtig sein.
Ansatzpunkt dieses Buches ist, diese Lücke zu schließen. Es geht auf verschiedene Möglichkeiten eines Chassis ein, vermittelt nötige Kenntnisse und führt schrittweise von einer einfachen Motorsteuerung zu einem komplexen sensor- und sprachgesteuerten Roboterauto. Hacks rund um GPS und eine PlayStation 3 runden die Sache ab.
Inhalt
Bei der Reihenfolge der Kapitel wurde versucht – beginnend bei der Darstellung von grundlegenden Informationen – über die Lösung einfacher Aufgaben zu etwas anspruchsvolleren Techniken zu führen.
Der Mikrocontroller ESP32
Die Software erstellen
Die Stromversorgung
Rund um die Hardware
Das Chassis
Der Gleichstrommotor
Kabellose Steuerung über WiFi
Mit Sensoren Hindernisse erkennen
Eine eigene Roboterauto-App
Servo und Lichtsensor
GPS
Accelerometer / Gyroskop
PS3-Controller
Roboterauto-App
Hinweis zur Software
Die Dateien haben das Suffix (.cpp). Grund ist die Entwicklung mit PlatformIO. Mit Copy & Paste sollten sie auch in der Arduino-IDE verwendet werden können.
Program, build, and master 60+ projects with the Wireless RP2040
The Raspberry Pi Pico and Pico W are based on the fast, efficient, and low-cost dual-core ARM Cortex M0+ RP2040 microcontroller chip running at up to 133 MHz and sporting 264 KB of SRAM and 2 MB of Flash memory. Besides spacious memory, the Pico and Pico W offer many GPIO pins, and popular peripheral interface modules like ADC, SPI, I²C, UART, PWM, timing modules, a hardware debug interface, and an internal temperature sensor.
The Raspberry Pi Pico W additionally includes an on-board Infineon CYW43439 Bluetooth and Wi-Fi chipset. At the time of writing this book, the Bluetooth firmware was not yet available. Wi-Fi is however fully supported at 2.4 GHz using the 802.11b/g/n protocols.
This book is an introduction to using the Raspberry Pi Pico W in conjunction with the MicroPython programming language. The Thonny development environment (IDE) is used in all of the 60+ working and tested projects covering the following topics:
Installing the MicroPython on Raspberry Pi Pico using a Raspberry Pi or a PC
Timer interrupts and external interrupts
Analogue-to-digital converter (ADC) projects
Using the internal temperature sensor and external sensor chips
Using the internal temperature sensor and external temperature sensor chips
Datalogging projects
PWM, UART, I²C, and SPI projects
Using Bluetooth, WiFi, and apps to communicate with smartphones
Digital-to-analogue converter (DAC) projects
All projects are tried & tested. They can be implemented on both the Raspberry Pi Pico and Raspberry Pi Pico W, although the Wi-Fi-based subjects will run on the Pico W only. Basic programming and electronics experience are required to follow the projects. Brief descriptions, block diagrams, detailed circuit diagrams, and full MicroPython program listings are given for all projects.
Practical Projects and Programs
With Experimenting with Red Pitaya STEMlab Gen 2, Red Pitaya goes beyond a versatile board. It becomes a powerful laboratory instrument for precision measurement, analysis, and control.
From the fundamentals of electronic project development, monitoring, control, and design to testing, this book walks you step-by-step through everything you need to know to harness the full potential of Red Pitaya hardware and software.
The book presents real-time, FPGA-based projects that are developed on a PC using the Vivado environment, then transferred to the Red Pitaya for execution and testing.
You will learn about enhanced performance, expanded I/O capabilities, improved FPGA features, and advanced connectivity options that open up new frontiers for precision measurement, monitoring, and control in your embedded applications.
Inside the book you will discover:
A deep dive into Red Pitaya architecture and hardware design
Electronic experiments using Red Pitaya for measurement and monitoring
Hands-on projects using the Python programming language
Practical guidance for FPGA programming using Red Pitaya
Red Pitaya FPGA projects using the Verilog HDL under Vivado IDE
Practical design of electronic projects including measurement and testing
Step-by-step examples that bridge theory and real-world implementation
Whether you are designing your own electronic circuits, developing signal analysis tools, or creating real-time control or monitoring systems, this book provides you the knowledge and confidence you need to fully learn and customize the Red Pitaya platform.
Ook in deze tijd klinken buizenversterkers nog steeds fantastisch, misschien wel mooier dan ooit. Nu hebben we immers de beschikking over moderne materialen als ringkern uitgangstransformatoren, uiterst hoogwaardige weerstanden en condensatoren en vele soorten goed klinkend draad. Ook de moderne geluidsbronnen als de CD speler en de nieuwste hoogwaardige luidsprekers laten beter dan ooit horen hoe goed de buizenversterker weergeeft.
Dit boek van Menno van der Veen kijkt niet alleen theoretisch naar buizenversterkers, maar vooral ook naar de ontwerpfase waarin besluiten moeten worden genomen over de doelen en eisen van de versterker. Hoe hangen deze samen met subjectieve en objectieve criteria? Welke schakelingen klinken vooral prachtig en waarom doen ze dat? Stel dat je een versterker gaat ontwikkelen en in de handel wilt brengen, tegen welke problemen loop je dan aan? En wat te zeggen van het belang en de betekenis van metingen? Zeggen ze nu iets of zeggen ze niets? Dankzij de grote rekenkracht van de computer kunnen we tegenwoordig dieper meten dan ooit. Hoe pas je deze technieken toe bij buizenversterkers? Tot nu toe waren metingen over frequentiebereik en vermogen en vervorming voldoende om een beeld van de eigenschappen van een versterker te geven. Maar zijn zulke metingen voldoende of moeten we gaan meten zoals ons oor waarneemt, met echte muzieksignalen in plaats van meettoontjes? De auteur schetst een toekomst waarbij meten aan de versterker de eigenschappen van ons horen moet volgen om tot nieuwe inzichten te komen.
Dit boek is meer op de praktijk gericht dan op de theorie en heeft een beschouwend karakter, alsof de auteur van bovenaf naar de buizenversterker kijkt. Kenniselementen worden geïntegreerd en in een breed overzichtelijk kader geplaatst.
Eine Einführung in die Schaltungssimulation
LTspice wurde von Mike Engelhardt entwickelt und gehört inzwischen zu Analog Devices. Es handelt sich dabei um ein Programm zur Schaltplanerstellung – einen leistungsstarken, schnellen und kostenlosen SPICE-Simulator sowie um ein Werkzeug zur Darstellung von Kurvenverläufen. Es bietet eine umfangreiche Bauteildatenbank, die weltweit durch SPICE-Modelle unterstützt wird.
Mit LTspice kann man schnell und einfach Schaltpläne erstellen. Dank der leistungsfähigen grafischen Ausgabefunktionen lassen sich Spannungen und Ströme in einer Schaltung, die Leistungsaufnahme der Bauteile und viele weitere Parameter darstellen.
Ziel dieses Buches ist es, den Entwurf und die Simulation elektronischer Schaltungen mit LTspice zu vermitteln. Es behandelt unter anderem folgende Themen:
DC und AC-Schaltungen
Kleinsignal- und Z-Dioden
Transistorschaltungen inkl. Oszillatoren
Tryristor-, Diac- und Triacschaltungen
Operationsverstärkerschaltungen inkl. Oszillatoren
Der 555 Timer-IC
Filter
Spannungsregler
Optokoppler
Erstellung von Spannungskurven
Simulation von Logikschaltungen mit der 74HC-Familie
SPICE-Modellierung
LTspice ist ein äußerst vielseitiges Werkzeug zur Simulation elektronischer Schaltungen mit zahlreichen Funktionen und Anwendungsmöglichkeiten. Eine vollständige Behandlung aller Details würde jedoch den Rahmen dieses Buches sprengen. Daher konzentriert sich das Buch auf die gängigsten Themen wie DC- und AC-Analyse, Parametersweep, Übertragungsfunktionen, Oszillatoren, Diagramme und weitere grundlegende Anwendungen.
Obwohl es sich um eine Einführung handelt, deckt dieses Buch dennoch die meisten Interessensgebiete all jener ab, die sich mit der Simulation elektronischer Schaltungen beschäftigen.
50 maal 'elektronica van vroeger'. In het januarinummer 2005 van het elektronica-maandblad Elektor zag de rubriek 'Retrotronica' voor het eerst het licht. Onder supervisie van Elektor-redacteur Jan Buiting wordt sindsdien elke maand een stukje 'elektronica van vroeger' opgerakeld.
Tegenwoordig worden de meeste elektronische schakelingen opgebouwd rond een microcontroller die het 'denkwerk' voor zijn rekening neemt. Nog niet zo heel lang geleden echter bestonden die dingen nog niet (of waren ze onbetaalbaar); niettemin slaagden de ontwerpers van toen er (naar huidige maatstaven) verbijsterend goed in om uiterst betrouwbaar en nauwkeurig werkende schakelingen en apparatuur te bouwen.
Veel apparaten blijken, na jaren op een stoffige zolder of in een vochtige kelder te hebben gestaan, na een schoonmaakactie nog perfect te functioneren -- er is dus geen reden om de 'elektronica van vroeger' met een meewarige blik te bekijken; integendeel: het zijn vaak wondertjes van vernuft en vakmanschap!
In dit boek hebben we 50 bijdragen uit de rubriek 'Retrotronica' voor u gebundeld - een must voor iedereen die geïnteresseerd is in 'oude' elektronica of in de geschiedenis van het maandblad Elektor (destijds Elektuur), aangezien enkele 'klassieke' Elektuur-schakelingen prominent aan bod komen!
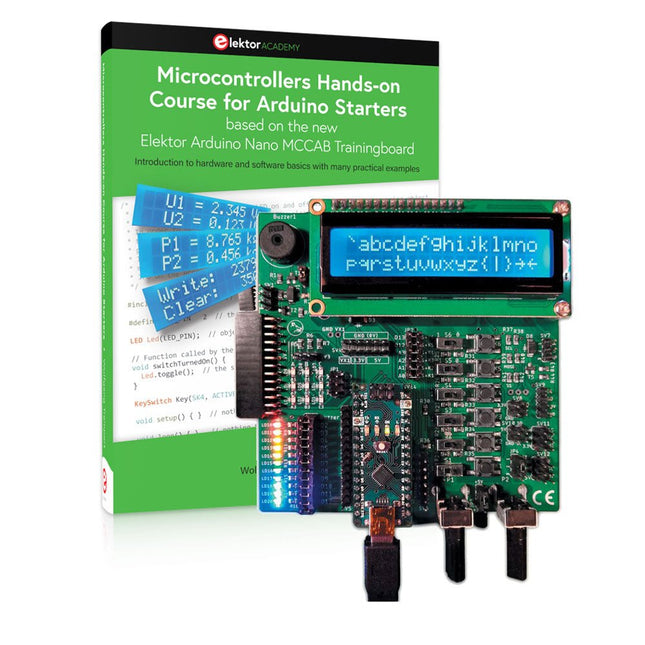
Réalisez vos propres projets avec la carte d'apprentissage Elektor Arduino Nano MCCAB
Le microcontrôleur est probablement le sous-domaine le plus fascinant de l'électronique. Grâce à la multitude de fonctions qu'il combine sur sa puce, il constitue un outil universel permettant aux développeurs de réaliser leurs projets. Pratiquement tous les appareils d'usage quotidien sont aujourd'hui dotés d'un microcontrôleur. Cependant, pour un débutant en électronique, réaliser ses propres idées avec un microcontrôleur est resté jusqu'à présent une chimère en raison de sa complexité. Le concept Arduino a largement simplifié l'utilisation des microcontrôleurs, de sorte que même les débutant peuvent désormais réaliser leurs propres idées électroniques avec un microcontrôleur.
Livre et matériel dans un pack : apprendre par la pratique
Ce livre, qui est inclus dans le pack, montre comment vous pouvez réaliser vos propres projets avec un microcontrôleur, même sans grande expérience en électronique et en langages de programmation. Il s'agit d'un cours pratique sur les microcontrôleurs pour débutants, car après un aperçu des éléments internes du microcontrôleur et une introduction au langage de programmation C, le cours se concentre sur les exercices pratiques. Le lecteur acquiert les connaissances nécessaires en apprenant par la pratique : dans la vaste section pratique comprenant 12 projets et 46 exercices, ce qui est appris dans la première partie du livre est étayé par de nombreux exemples. Les exercices sont structurés de telle sorte que l'utilisateur se voit confier une tâche à résoudre en utilisant les connaissances acquises dans la partie théorique du livre. Chaque exercice est suivi d'un exemple de solution qui est expliqué et commenté en détail, ce qui aide l'utilisateur à résoudre les problèmes et à les comparer avec sa propre solution.
Arduino IDE
L'Arduino IDE est un environnement de développement logiciel qui peut être téléchargé gratuitement sur votre PC et qui contient l'ensemble des logiciels nécessaires à la réalisation de vos propres projets de microcontrôleurs. Vous écrivez vos programmes (sketch) avec l'éditeur de l'IDE dans le langage de programmation C. Vous les traduisez en bits et octets que le microcontrôleur comprend à l'aide du compilateur intégré à l'IDE Arduino, puis vous les chargez dans la mémoire du microcontrôleur sur la carte d'apprentissage Elektor Arduino MCCAB Nano à l'aide d'un câble USB.
Interroger ou contrôler des capteurs, des moteurs ou des ensembles externes
Outre un module microcontrôleur Arduino Nano, la carte d'apprentissage Elektor Arduino Nano MCCAB contient tous les composants nécessaires aux exercices, tels que des diodes électroluminescentes, des interrupteurs, des boutons-poussoirs, des émetteurs de signaux acoustiques, etc. Ce système de formation à microcontrôleur permet également d'interroger ou de commander des capteurs, des moteurs ou des assemblages externes.
Spécifications (Carte de formation Arduino Nano MCCAB)
Alimentation électrique
Via la connexion USB du PC connecté ou un bloc d'alimentation externe (non inclus)
Tension de fonctionnement
+5 Vcc
Tension d'entrée
Toutes les entrées
0 V to +5 V
VX1 and VX2
+8 V to +12 V (uniquement en cas d'utilisation d'une alimentation externe)
Périphérie du matériel
LCD
2x16 caractères
Potentiomètre P1 & P2
JP3 : sélection de la tension de fonctionnement de P1 et P2
Distributeur
SV4 : Distributeur pour les tensions de fonctionnementSV5, SV6 : Distributeur pour les entrées/sorties du microcontrôleur
Interrupteurs et boutons
Bouton RESET sur le module Arduino Nano 6x interrupteurs à bouton poussoir K1 ... K6 6x interrupteurs à glissière S1 ... S6 JP2 : Connexion des interrupteurs avec les entrées du microcontrôleur
Buzzer
Buzzer piézo Buzzer1 avec cavalier sur JP6
Voyants lumineux
11 x LED : Indicateur d'état des entrées/sorties LED L sur le module Arduino Nano, connectée au GPIO D13 JP6 : Connexion des LED LD10 ... LD20 avec les GPIO D2 ... D12
Interfaces sérieSPI ET I²C
JP4 : Sélection du signal à la broche X du connecteur SPI SV12 SV9 à SV12 : interface SPI (3,3 V/5 V) ou interface I²C
Sortie de commutation pour les appareils externes
SV1, SV7 : sortie de commutation (maximum +24 V/160 mA, alimentation externe) SV2 : 2x13 connecteurs pour la connexion de modules externes
Matrice de 3x3 LED(9 LED rouges)
SV3 : Colonnes de la matrice LED 3x3 (sorties D6 ... D8) JP1 : Connexion des lignes avec les GPIOs D3 ... D5
Logiciel
Bibliothèque MCCABLib
Contrôle des composants matériels (interrupteurs, boutons, DEL, matrice de DEL 3x3, buzzer) sur la carte de formation MCCAB.
Température de fonctionnement
Jusqu'à +40 °C
Dimensions
100 x 100 x 20 mm
Spécifications (Arduino Nano)
Microcontrôleur
ATmega328P
Architecture
AVR
Tension de fonctionnement
5 V
Mémoire flash
32 Ko, dont 2 Ko utilisés par le chargeur de démarrage
SRAM
2 KB
Vitesse d'horloge
16 MHz
Connecteurs d'entrée analogique
8
EEPROM
1 KB
Courant continu par connecteur d'E/S
40 mA sur un connecteur d'E/S, maximum total de 200 mA sur l'ensemble des connecteurs
Tension d'entrée
7-12 V
Connecteurs E/S numériques
22 (dont 6 PWM)
Sortie PWMt
6
Consommation électrique
19 mA
Dimensions
18 x 45 mm
Poids
7 g
Inclus
Elektor Arduino Nano MCCAB Training Board
Arduino Nano
Livre : Microcontrollers Hands-on Course for Arduino Starters