50+ Android Apps with Raspberry Pi, ESP32 and Arduino
This book is about developing apps for Android compatible mobile devices using the MIT App Inventor online development environment. MIT App Inventor projects can be in either standalone mode or use an external processor. In standalone mode, the developed application runs only on the mobile device (e.g. Android). In external processor-based applications, the mobile device communicates with an external microcontroller-based processor, such as Raspberry Pi, Arduino, ESP8266, ESP32, etc.
In this book, many tested and fully working projects are given both in standalone mode and using an external processor. Full design steps, block programs, circuit diagrams, QR codes and full program listings are given for all projects.
The projects developed in this book include:
Using the text-to-speech component
Intonating a received SMS message
Sending SMS messages
Making telephone calls using a contacts list
Using the GPS and Pin-pointing our location on a map
Speech recognition and speech translation to another language
Controlling multiple relays by speech commands
Projects for the Raspberry Pi, ESP32 and Arduino using Bluetooth and Wi-Fi
MIT APP Inventor and Node-RED projects for the Raspberry Pi
The book is unique in that it is currently the only book that teaches how to develop projects using Wi-Fi and Node-RED with MIT App Inventor. The book is aimed at students, hobbyists, and anyone interested in developing apps for mobile devices.
All projects presented in this book have been developed using the MIT App Inventor visual programming language. There is no need to write any text-based programs. All projects are compatible with Android-based mobile devices. Full program listings for all projects as well as detailed program descriptions are given in the book. Users should be able to use the projects as they are presented, modifying them to suit their own needs.
Open-Source-Code mit Arduino IDE und PlatformIO
Autonomes Fahren: GPS, Accelerometer, Gyroskop
PS3-Controller
Mikrocontroller wie der Arduino und Einplatinenrechner wie der Raspberry Pi haben sich zu beliebten Komponenten entwickelt. Dritter im Bunde ist der ESP32 der Firma Espressif. Mikrocontroller dieser Baureihe zeichnen sich durch eine Vielzahl implementierter Funktionen aus, die bei einem Arduino konventioneller Prägung mit einem Atmel-AVR-Mikrocontroller erst mit weiterer Hardware möglich sind. Prominentes Beispiel sind hier die WiFi- und Bluetooth-Funktionalitäten. Gegenüber einem Raspberry Pi zeichnen sie sich durch einen deutlich geringeren Preis aus.
Allgemeine Informationen für die Realisierung eines Roboterauto-Projekts mit dem ESP32 sind leicht zu finden. Dabei handelt es sich aber oft nur um Ausführungen zu einem Teilaspekt, ohne inhaltliche oder funktionale Abstimmung. So ist nicht nur die Beschaffung der benötigten Informationen mühselig und zeitaufwändig, sie kann auch außerordentlich fehlerträchtig sein.
Ansatzpunkt dieses Buches ist, diese Lücke zu schließen. Es geht auf verschiedene Möglichkeiten eines Chassis ein, vermittelt nötige Kenntnisse und führt schrittweise von einer einfachen Motorsteuerung zu einem komplexen sensor- und sprachgesteuerten Roboterauto. Hacks rund um GPS und eine PlayStation 3 runden die Sache ab.
Inhalt
Bei der Reihenfolge der Kapitel wurde versucht – beginnend bei der Darstellung von grundlegenden Informationen – über die Lösung einfacher Aufgaben zu etwas anspruchsvolleren Techniken zu führen.
Der Mikrocontroller ESP32
Die Software erstellen
Die Stromversorgung
Rund um die Hardware
Das Chassis
Der Gleichstrommotor
Kabellose Steuerung über WiFi
Mit Sensoren Hindernisse erkennen
Eine eigene Roboterauto-App
Servo und Lichtsensor
GPS
Accelerometer / Gyroskop
PS3-Controller
Roboterauto-App
Hinweis zur Software
Die Dateien haben das Suffix (.cpp). Grund ist die Entwicklung mit PlatformIO. Mit Copy & Paste sollten sie auch in der Arduino-IDE verwendet werden können.
From SRPP and Mu-Follower to OTL Designs
Tube amplifiers suffer from distortion. Fortunately, circuits such as the SRPP amplifier, mu-follower, and beta-follower produce minimal distortion even at output voltages of 50 to 100 Vpeak.
These designs are often published with errors. Without a sound understanding of the theory, it is easy to arrive at a flawed design.
In the first section of this book, we investigate the origin of distortion, while in the second we investigate the design of and SRPP and a mu-follower.
On the internet we can find the most exotic designs. Evaluating them teaches us that these designs often make matters worse rather than better. In the chapter on incorrect SRPPs and mu-followers, we sometimes see bizarre and misguided designs where using a simple single-triode amplifier would perform much better.
Push-pull output stages also exist. A great number of them are examined, and their similarity to the SRPP is discussed. This is done especially with the help of the theory behind the OTL based on the ‘mother’ of all OTLs, the Philips HF303.
Finally, attention is given to frequency characteristics and technical matters such as the supply voltage and the filament power supply.
To illustrate these points, there are a few designs covering the subjects discussed.
This book presents much new theory that has not been published before. It is often an eye-opener, showing that many things have a beautiful and unexpected simplicity.
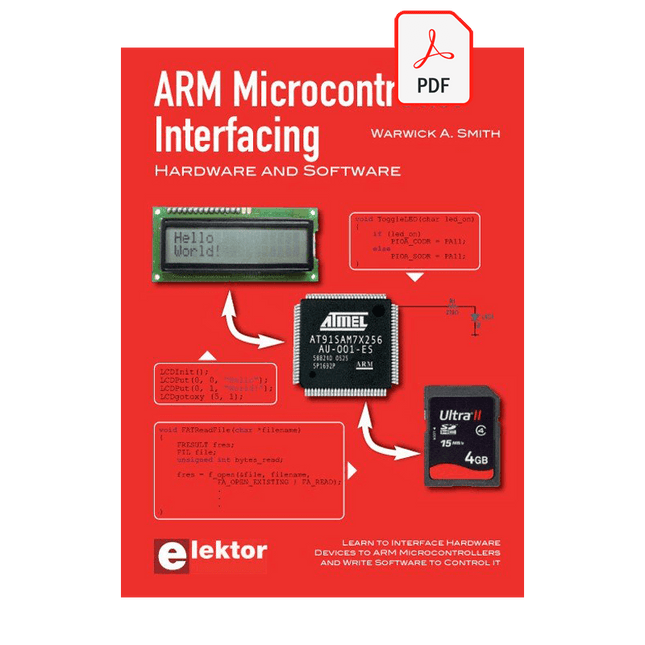
Learn to interface and program hardware devices in a wide range of useful applications, using ARM7 microcontrollers and the C programming language. Examples covered in full detail include a simple LED to a multi-megabyte SD card running the FAT file system.
Features of this book
Build prototype circuits on breadboard or Veroboard and interface to ARM microcontrollers.
A 32-bit ARM7 microcontroller is used in interfacing and software examples.
Interfacing principles apply to other ARM microcontrollers and other non-ARM microcontrollers as well.
Example programs are written in the C programming language.
Use only free or open source software.
Download and install all programming tools from the Internet.
Template project files are provided for easy project creation.
Hardware
Interface to LEDs, transistors, optocouplers, relays, solenoids, switches, keypads, LCD displays, seven segment displays, DC motors, stepper motors, external analogue signals using the ADC, RS232, RS-485, TWI, USB, SPI and SD memory cards.
Software
Once hardware has been interfaced to a microcontroller, software must be written to control the hardware. You will learn how to write programs to operate externally interfaced hardware devices, use timers and interrupts. Also learn how to port FAT file system code for use with an SD memory card, program the PWM to produce an audio sine wave, program the PWM to speed control a DC motor and more.
A chapter on more advanced ARM microcontrollers is included with an overview of some of the newest ARM microcontrollers and their features.
Kit DIY multilingue (avec 27 LED RGB + Raspberry Pi Pico)
Ajoutez une touche d'ingénierie à votre période de Noël avec le sapin de Noël LED « lumineux » d'Elektor. Ce sapin de Noël 3D au design raffiné combine onze circuits imprimés, un Raspberry Pi Pico et 27 LED RVB adressables pour faire briller des messages festifs en sept langues : danois, néerlandais, anglais, français, allemand, italien et espagnol.
Contrairement aux sapins LED classiques, chaque mot à l'intérieur du sapin possède sa propre chambre lumineuse, créant un éclairage raffiné et doux, sans son ni scintillement. Les LED sont entièrement compatibles WS2812 et pilotées par la bibliothèque Adafruit NeoPixel, ce qui facilite la création d'animations personnalisées et d'effets de couleur.
Idéal pour les makers, les bricoleurs et les passionnés d'électronique festive, ce kit offre à la fois un montage agréable et une décoration originale qui ne manquera pas de susciter la conversation. Le sapin de Noël LED Elektor est le projet de bricolage idéal pour les fêtes !
Caractéristiques
Messages d'accueil multilingues (7 langues) gravés sur le panneau avant
Construction 3D à partir de 11 circuits imprimés emboîtables
Alimenté par Raspberry Pi Pico
27 LED RGB adressables individuellement (pré-montées)
Animations d'apparition et de disparition fluides
Entièrement programmable avec l'IDE Arduino
Une alimentation 5 V (avec connecteur micro-USB) capable de fournir au moins 1 A est recommandée pour une luminosité maximale (non fournie)
Dimensions (H x L x P) : 130 x 115 x 75 mm
Inclus
Toutes les cartes de circuits imprimés nécessaires avec LED et autres composants CMS montés
Raspberry Pi Pico (à souder et programmer par l'utilisateur)
Connecteur à 3 broches (à souder par l'utilisateur)
Support à 3 broches (à souder par l'utilisateur)
4x Tampons en caoutchouc autocollants
Page du projet
Elektor Labs
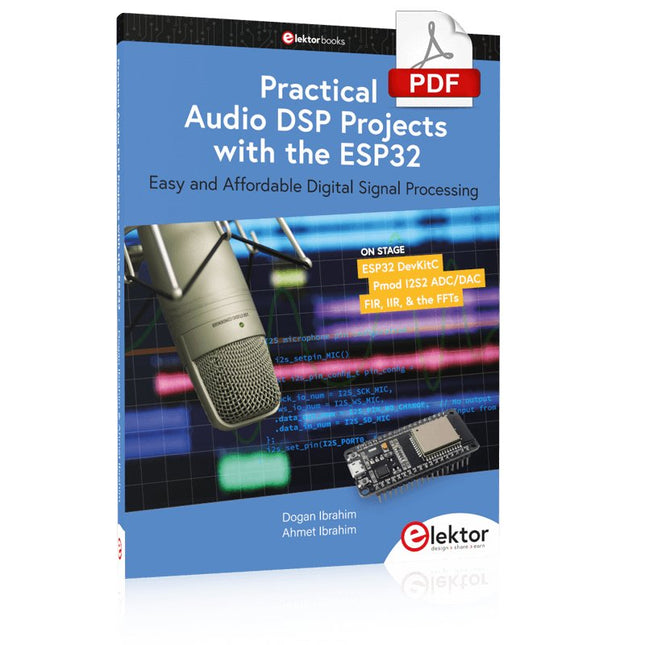
Traitement du signal numérique simple et abordable
Le but de cet ouvrage est d'enseigner les principes de base du Traitement Numérique du Signal (DSP) et de l'introduire d'un point de vue pratique en utilisant le strict minimum de mathématiques. Seul le niveau de base de la théorie des systèmes à temps discret est donné, suffisant pour implémenter des applications DSP en temps réel. Les implémentations pratiques sont décrites en temps réel à l'aide de la très populaire carte de développement de microcontrôleur ESP32 DevKitC. Avec le microcontrôleur ESP32, peu coûteux et extrêmement populaire, vous devriez être en mesure de concevoir des projets DSP élémentaires avec des fréquences d'échantillonnage comprises dans la plage audio. Toute la programmation est effectuée à l'aide du populaire IDE Arduino en conjonction avec le compilateur en langage C.
Après avoir posé une base solide de la théorie DSP et des discussions pertinentes sur les principaux outils logiciels DSP du marché, le livre présente les projets audio et DSP suivants :
Utilisation d'un microphone numérique basé sur I²S pour capturer le son audio
Utilisation d'un amplificateur audio et d'un haut-parleur de classe D basés sur I²S
Lecture de musique MP3 stockée sur une carte SD via un amplificateur et un haut-parleur basés sur I²S
Lecture de fichiers de musique MP3 stockés dans la mémoire flash ESP32 via un amplificateur et un haut-parleur basés sur I²S
Radio Internet mono et stéréo avec amplificateurs et haut-parleurs basés sur I²S
Sortie de synthèse vocale avec un amplificateur et un haut-parleur basés sur I²S
Utilisation du contrôle du volume dans les systèmes d'amplificateurs et de haut-parleurs basés sur I²S
Un compteur d'événements parlants avec un amplificateur et un haut-parleur basés sur I²S
Un générateur d'onde sinusoïdale réglable avec amplificateur et haut-parleur basés sur I²S
Utilisation du module ADC/DAC rapide 24 bits Pmod I²S2
Conception de filtre FIR numérique passe-bas et passe-bande en temps réel avec conversion A/D et D/A externe et interne
Conception de filtre IIR numérique passe-bas et passe-bande en temps réel avec conversion A/D et D/A externe et interne
Transformations de Fourier rapides (FFT)
Met ringkern-uitgangstranformatoren
Buizenversterkers vormen voor velen het neusje van de zalm, wanneer het gaat om de versterking van audiosignalen. De combinatie van klassieke techniek met moderne componenten heeft geleid tot een ware revival van de buizenversterker. De toepassing van de in de afgelopen 15 jaar door de auteur ontwikkelde 'ringkern-uitgangstransformatoren' heeft daar mede toe bijgedragen. Opvallend aan deze transformatoren zijn vooral het extreem grote frequentie bereik en de geringe lineaire en niet-lineaire vervormingen.
Het hoe en waarom van de transformator wordt op verschillende niveaus uitgelegd, beginnend bij inleidende begripsvorming en eindigende bij complete wiskundige beschrijvingen, waarbij ook de samenwerking van de transformator met de buizen en de luidspreker centraal staat. Naast de beschrijving van schematuur en zelfbouw van eenvoudig na te bouwen moderne high-end buizenversterkers met een uitgangsvermogen van 10 tot 100 Watt, worden bijzondere buizenversterkers met ringkerntransformatoren besproken: innovatieve oplossingen voor perfecte audiokwaliteit.
Zowel de zelfbouwer als degene die kennis en inzicht wil verwerven in de complexe materie van transformatoren, buizenversterkers en audiosignaalverwerking zal dit boek met plezier ter hand nemen.
Construisez votre propre émetteur radio vintage
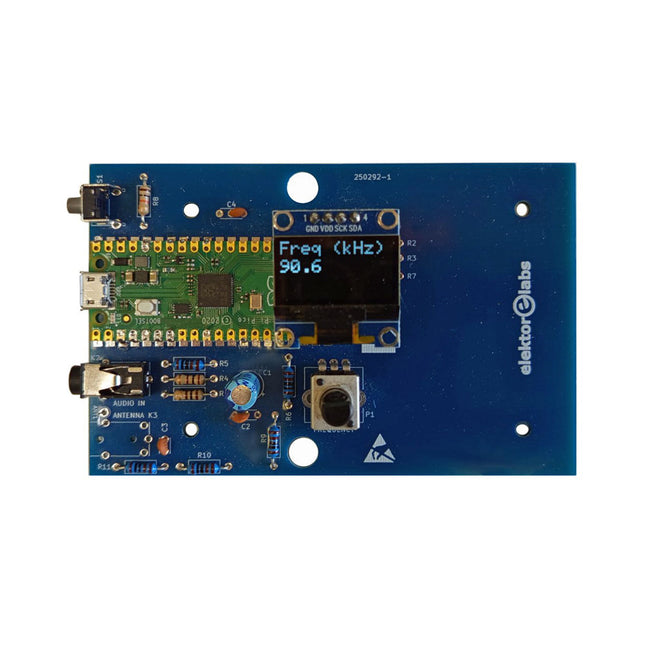
Le kit émetteur AM Elektor permet de diffuser de l’audio vers des récepteurs radio AM vintage. Basé sur un module microcontrôleur Raspberry Pi Pico, l’émetteur AM peut transmettre sur 32 fréquences dans la bande AM, de 500 kHz jusqu’à 1,6 MHz en 32 pas d’environ 35 kHz.
La fréquence est sélectionnée à l’aide d’un potentiomètre et affichée sur un écran OLED de 0,96". Un bouton-poussoir permet de basculer le mode d’émission entre Marche et Arrêt. La portée de l’émetteur dépend de l’antenne. L’antenne intégrée offre une portée de quelques centimètres, nécessitant de placer l’émetteur AM à proximité ou à l’intérieur de la radio. Une antenne boucle externe (non incluse) peut être connectée pour augmenter la portée.
Le kit émetteur AM Elektor est livré en kit de pièces que vous devez souder vous-même sur la carte.
Caractéristiques
La carte est compatible avec un boîtier Hammond 1593N (non inclus).Une alimentation 5 VDC avec connecteur micro-USB (par exemple, un ancien chargeur de téléphone) est nécessaire pour alimenter le kit (non incluse). Consommation de courant : 100 mA.
Le logiciel Arduino (nécessitant le package RP2040 Boards d’Earle Philhower) pour le kit émetteur AM Elektor ainsi que plus d’informations sont disponibles sur la page Elektor Labs de ce projet.
Liste des composants
Résistances
R1, R4 = 100 Ω
R2, R3, R8 = 10 kΩ
R5, R6, R9, R10, R11 = 1 kΩ
R7 = optionnelle (non incluse)
P1 = potentiomètre 100 kΩ, linéaire
Condensateurs
C1 = 22 µF 16V
C2, C4 = 10 nF
C3 = 150 pF
Divers
K1 = barrette 4×1 broches
K2, K3 = prise 3,5 mm
Raspberry Pi Pico
Bouton-poussoir, montage en angle
Afficheur OLED I²C monochrome 0,96"
PCB 150292-1
35 projecten met Raspberry Pi en wireless Arduino
Internet of Things (alles aan het internet) is een trend die zich niet meer laat keren. We willen alles in huis met onze mobiel of tablet doen, van Facebook tot TV kijken, van lichten bedienen tot de temperatuur in de gaten houden.
In dit boek laten we in 35 leuke en handige projecten zien hoe u op eenvoudige wijze zelf een Internet of Things systeem kunt aanleggen. We gaan in op de hardware (de perfecte combinatie van Raspberry Pi en Arduino) en de software om bediening via internet mogelijk te maken.
We maken gebruik van Wi-Fi en radioverbindingen zodat er geen kabels dwars door uw huis hoeven. Wanneer u deze projecten maakt heeft u een compleet Internet of Things systeem waarmee u van alles in uw huis kunt bedienen en bekijken. Bijvoorbeeld of er post in de brievenbus ligt en of de auto in de garage staat. U kunt op vanaf de bank het licht aandoen en het alarm bedienen. Door de heldere uitleg kunt u de projecten eenvoudig aanpassen om bijvoorbeeld uw koffiezetautomaat of tv op afstand aan te zetten. Via de index vindt u gemakkelijk creatieve projecten die als voorbeeld kunnen dienen, zodat u zelfstandig alles met het internet kunt verbinden.