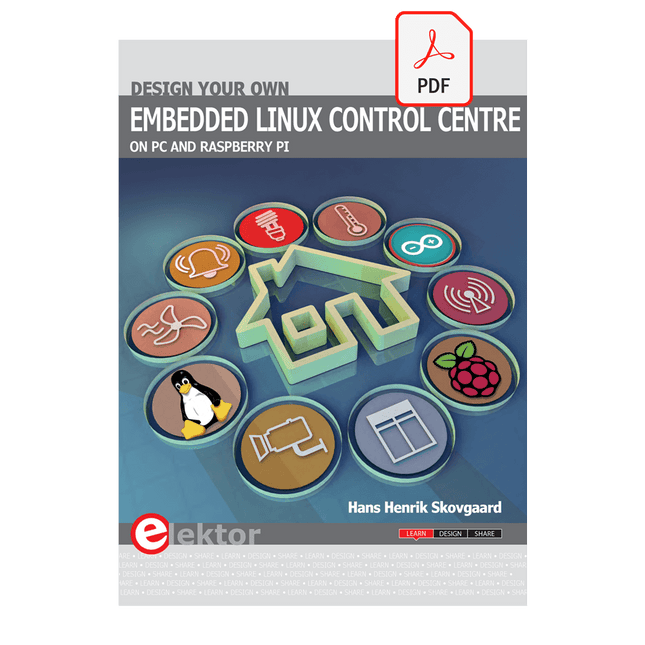
This book is all about building your own DIY home control system. It presents two innovative ways to assemble such a system: By recycling old PC hardware – possibly extending the life of an old PC, or by using Raspberry Pi. In both cases, the main system outlined in this book will consist of a computer platform, a wireless mains outlet, a controller and a USB webcam – All linked together by Linux.
By using the Raspberry Pi in conjunction with Arduino (used as an advanced I/O system board), it is possible to construct a small, compact, embedded control system offering enhanced capacity for USB integration, webcams, thermal monitoring and communication with the outside world.
The experience required to undertake the projects within this book are minimal exposure to PC hardware and software, the ability to surf the internet, burn a CD-ROM and assemble a small PCB.
Dieses Buch ist eine Einführung in das hochaktuelle Gebiet der Robotik. Dabei stehen praktische Anwendungsbeispiele im Vordergrund. Neben den technischen und mechanischen Grundlagen werden die elektronischen Komponenten und Module erläutert. Eine zentrale Rolle spielt dabei der Mikrocontroller.
Für Robotik-Anwendungen haben sich zwei Controller-Boards etabliert: der Arduino und der Raspberry Pi. Dem trägt dieses Buch Rechnung und beschreibt praktische Nachbauprojekte mit diesen beiden populären Boards.
Getreu der Philosophie des „Learning by Doing“ können sich auch ambitionierte, nichtprofessionelle Anwender mit dem Lernmaterial des Buches einen Überblick über den neuesten Stand der Robotertechnik und KI verschaffen. Für praktische Anwendungen können sowohl komplette Bausätze als auch einzelne Komponenten verwendet werden. Dabei wurde stets darauf geachtet, dass die Hardware möglichst universell einsetzbar ist.
Open-Source-Code mit Arduino IDE und PlatformIO
Autonomes Fahren: GPS, Accelerometer, Gyroskop
PS3-Controller
Mikrocontroller wie der Arduino und Einplatinenrechner wie der Raspberry Pi haben sich zu beliebten Komponenten entwickelt. Dritter im Bunde ist der ESP32 der Firma Espressif. Mikrocontroller dieser Baureihe zeichnen sich durch eine Vielzahl implementierter Funktionen aus, die bei einem Arduino konventioneller Prägung mit einem Atmel-AVR-Mikrocontroller erst mit weiterer Hardware möglich sind. Prominentes Beispiel sind hier die WiFi- und Bluetooth-Funktionalitäten. Gegenüber einem Raspberry Pi zeichnen sie sich durch einen deutlich geringeren Preis aus.
Allgemeine Informationen für die Realisierung eines Roboterauto-Projekts mit dem ESP32 sind leicht zu finden. Dabei handelt es sich aber oft nur um Ausführungen zu einem Teilaspekt, ohne inhaltliche oder funktionale Abstimmung. So ist nicht nur die Beschaffung der benötigten Informationen mühselig und zeitaufwändig, sie kann auch außerordentlich fehlerträchtig sein.
Ansatzpunkt dieses Buches ist, diese Lücke zu schließen. Es geht auf verschiedene Möglichkeiten eines Chassis ein, vermittelt nötige Kenntnisse und führt schrittweise von einer einfachen Motorsteuerung zu einem komplexen sensor- und sprachgesteuerten Roboterauto. Hacks rund um GPS und eine PlayStation 3 runden die Sache ab.
Inhalt
Bei der Reihenfolge der Kapitel wurde versucht – beginnend bei der Darstellung von grundlegenden Informationen – über die Lösung einfacher Aufgaben zu etwas anspruchsvolleren Techniken zu führen.
Der Mikrocontroller ESP32
Die Software erstellen
Die Stromversorgung
Rund um die Hardware
Das Chassis
Der Gleichstrommotor
Kabellose Steuerung über WiFi
Mit Sensoren Hindernisse erkennen
Eine eigene Roboterauto-App
Servo und Lichtsensor
GPS
Accelerometer / Gyroskop
PS3-Controller
Roboterauto-App
Hinweis zur Software
Die Dateien haben das Suffix (.cpp). Grund ist die Entwicklung mit PlatformIO. Mit Copy & Paste sollten sie auch in der Arduino-IDE verwendet werden können.
Zeitsteuerung, Scheduler, PIO und Zustandsmaschinen
Multitasking ist der Schlüssel zu leistungsfähigen Embedded-Systemen, und zugleich eine der größten Herausforderungen in der Mikrocontroller-Programmierung. Dieses Buch zeigt Ihnen Schritt für Schritt, wie Sie von einem einfachen Ein-Task-Programm zu einem strukturierten, reaktionsfähigen und skalierbaren System gelangen. Dabei steht nicht nur das Wie, sondern vor allem das Warum im Mittelpunkt.
Sie lernen:
warum scheinbare Parallelität entsteht
weshalb blockierende Programme instabil werden
wie Aufgaben effizient und kontrolliert parallel ablaufen
Ausgehend vom klassischen Superloop vermittelt das Buch moderne Multitasking-Strategien – von nicht-blockierender Programmierung und Tick-Systemen bis zu Task-Schedulern, Zustandsmaschinen und ereignisgesteuerten Konzepten.
Der Fokus liegt auf der Praxis: Sensoren, Displays, Kommunikation und reale Anwendungen werden Schritt für Schritt integriert und mit verständlich kommentierten Beispielprogrammen erklärt.
Fortgeschrittene Themen umfassen:
Multicore-Programmierung mit dem Raspberry Pi Pico
asynchrones Programmieren mit uasyncio
RTOS-Grundlagen mit FreeRTOS
die Kombination aus Multicore und RTOS
Dabei werden auch die Grenzen dieser Techniken, insbesondere unter MicroPython, klar aufgezeigt.
Das Buch richtet sich an ambitionierte Einsteiger und fortgeschrittene Entwickler, die Embedded-Systeme fundiert verstehen und robuste, wartbare Multitasking-Anwendungen entwickeln möchten.
In 35 Projects with the Raspberry Pi and Arduino
The Internet of Things (IoT) is a trend with a strong technological impulse. At home, we want to do everything on our tablets, from browsing Facebook to watching TV, from operating lights to keeping an eye on the temperature.
In 35 fun projects, this book will show you how to build your own Internet of Things system. We'll cover the hardware (primarily the Raspberry Pi and Arduino) and the software that makes control via Internet possible. We employ Wi-Fi and radio links so no requirement any longer to install cabling crisscross through your home.
Assuming the projects in the book are finished, you have a complete Internet of Things system that allows you to control and view of everything in your home. For example, if there's something in the mail box or the car is securely in the garage. Also, you can switch on the lights and the alarm from your couch. The crisp explanations allow the projects to be customized with ease, for example, to turn on your coffee machine or TV remotely. The index gives easy access to creative projects that can serve as an example, enabling you to do all the connecting to the IoT independently. All project software can be downloaded free of charge from the Elektor website.
In this unique book, Raspberry Pi, Arduino and HTML webpages with stylesheets and JavaScript come together in clearly-described, easy-to-build projects. This special book is an essential part of your collection!
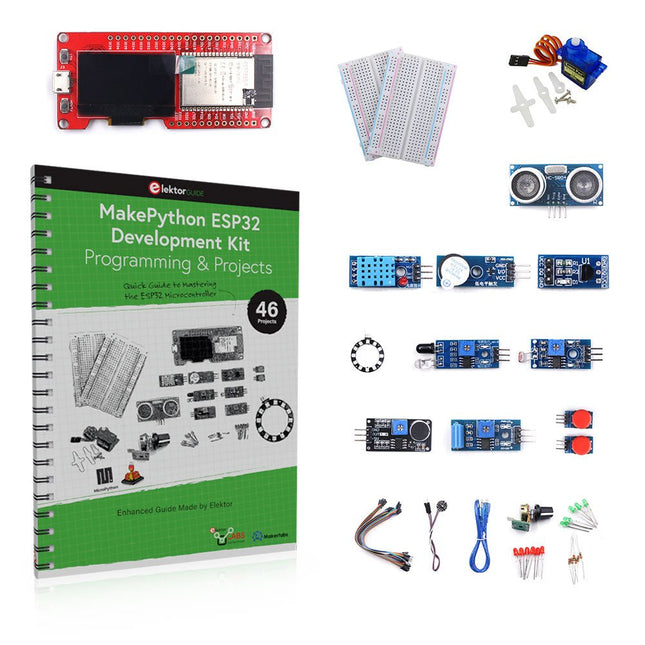
Apprenez à utiliser et programmer le microcontrôleur ESP32 en MicroPython dans vos futurs projets !
Ce livre (en anglais) de projets par Dogan Ibrahim, auteur populaire de livres Elektor contient de nombreux projets logiciels et matériels spécialement développés pour le kit de développement ESP32 de MakePython. Le kit est livré avec plusieurs LED, capteurs et actionneurs. Le kit vous aidera à acquérir les connaissances de base pour créer des projets IdO.
Les projets testés dans le livre sont basés sur les composants fournis. Chaque projet est décrit par un schéma fonctionnel, un schéma de circuit, un listage complet ainsi qu’une description détaillée du programme.
Contenu du kit
1x Carte de développement MakePython ESP32 avec LCD
1x Module de mesure à ultrasons
1x Capteur de température et d'humidité
1x Module buzzer
1x Module DS18B20
1x Module infrarouge
1x Potentiomètre
1x Module WS2812
1x Capteur de son
1x Capteur de vibrations
1x Module de résistance photosensible
1x Capteur de pouls
1x Servomoteur
1x Câble USB
2x Bouton
2x Plaque d'essai
45x Fils de connexion
10x résistances 330R
10x LED (Rouges)
10x LED (Verts)
1x Livre de projets (en anglais, 206 pages)
46 projets dans le livres
Projets à LED
LED clignotante
SOS clignotant
LED clignotante – utilisation d'un timer
LED clignotantes en alternance
Contrôle des boutons
Modification de la fréquence de clignotement des LED à l'aide d'interruptions de boutons-poussoirs
LED de poursuite
Compteur binaire à LED
Lumières de Noël (8 LEDs clignotant de façon aléatoire)
Dés électronique
Jour de chance de la semaine
Projets de modulation de la largeur d'impulsion (PWM)
Génération d'une forme d'onde PWM de 1000 Hz avec un rapport cyclique de 50%
Contrôle de la luminosité des LED
Mesures de la fréquence et du rapport cyclique d'une forme d'onde PWM
Compositeur de mélodies
Orgue électronique simple
Servo motor control
Thermomètre DS18B20 à servomoteur
Projets de convertisseur analogique-numérique (CAN)
Voltmètre
Traçage de la tension d'entrée analogique
Capteur de température interne de l'ESP32
Ohmmètre
Module de résistance photosensible
Projets de convertisseur numérique-analogique (CNA)
Génération de tensions fixes
Génération d'un signal en dents de scie
Génération d'un signal à onde triangulaire
Forme d'onde périodique arbitraire
Génération d'un signal sinusoïdal
Génération d'un signal sinusoïdal précis au moyen d'interruptions du timer
Utilisation de l'afficheur OLED
Compteur de secondes
Compteur d'événements
Thermomètre numérique à base d'OLED DS18B20
Contrôleur de température ON-OFF
Mesure de la température et de l'humidité
Mesure de la distance par ultrasons
Taille d'une personne (stadiomètre)
Mesure de la fréquence cardiaque (pouls)
Autres capteurs fournis dans le kit
Alarme antivol
Lumière activée par le son
Détection d'obstacles par infrarouge avec buzzer
Anneau de LED RVB WS2812
Horodatage des données de température et d'humidité
Programmation réseau
Scanner Wi-Fi
Contrôle à distance depuis le navigateur Internet (à l'aide d'un smartphone ou d'un PC) – Serveur Web
Stockage des données de température et d'humidité dans le cloud
Fonctionnement à faible puissance
Utilisation d'un timer pour activer le processeur
Kit DIY multilingue (avec 27 LED RGB + Raspberry Pi Pico)
Ajoutez une touche d'ingénierie à votre période de Noël avec le sapin de Noël LED « lumineux » d'Elektor. Ce sapin de Noël 3D au design raffiné combine onze circuits imprimés, un Raspberry Pi Pico et 27 LED RVB adressables pour faire briller des messages festifs en sept langues : danois, néerlandais, anglais, français, allemand, italien et espagnol.
Contrairement aux sapins LED classiques, chaque mot à l'intérieur du sapin possède sa propre chambre lumineuse, créant un éclairage raffiné et doux, sans son ni scintillement. Les LED sont entièrement compatibles WS2812 et pilotées par la bibliothèque Adafruit NeoPixel, ce qui facilite la création d'animations personnalisées et d'effets de couleur.
Idéal pour les makers, les bricoleurs et les passionnés d'électronique festive, ce kit offre à la fois un montage agréable et une décoration originale qui ne manquera pas de susciter la conversation. Le sapin de Noël LED Elektor est le projet de bricolage idéal pour les fêtes !
Caractéristiques
Messages d'accueil multilingues (7 langues) gravés sur le panneau avant
Construction 3D à partir de 11 circuits imprimés emboîtables
Alimenté par Raspberry Pi Pico
27 LED RGB adressables individuellement (pré-montées)
Animations d'apparition et de disparition fluides
Entièrement programmable avec l'IDE Arduino
Une alimentation 5 V (avec connecteur micro-USB) capable de fournir au moins 1 A est recommandée pour une luminosité maximale (non fournie)
Dimensions (H x L x P) : 130 x 115 x 75 mm
Inclus
Toutes les cartes de circuits imprimés nécessaires avec LED et autres composants CMS montés
Raspberry Pi Pico (à souder et programmer par l'utilisateur)
Connecteur à 3 broches (à souder par l'utilisateur)
Support à 3 broches (à souder par l'utilisateur)
4x Tampons en caoutchouc autocollants
Page du projet
Elektor Labs
Diese Ausgabe steht allen GOLD- und GREEN-Mitgliedern auf der ElektorMagazine-Website zum Download bereit!
Sie sind noch kein Mitglied? Hier klicken!
Kleine WärmebildkameraRealisiert mit einem Arduino UNO
Projekt-Update #3: Energiemessgerät mit ESP32Integration und Test mit Home Assistant
2024: Eine Odyssee in die KIVerbessern der Objekterkennung: Nutzung verfeinerter Techniken
Raspberry Pi Goes KINeues Kit enthält M.2-HAT mit KI-Beschleuniger
Sensoren für WetterstationenWelchen Sensor sollte man wählen?
KI-gestützter WasserzählerTeil 1: Bringen Sie Ihren alten Zähler ins IoT!
Ein GSM-AlarmNutzung der GSM-Technologie für die Fernüberwachung von Garagen
Low-Power-Thread-Geräte optimiert und getestetNiedriger Energiebedarf ... Niedrige Leistung?
Aus dem Leben gegriffenDer Gender-Gap
Nebelkammer selbstgebautUnsichtbare Strahlung sichtbar machen
SparkFun Thing Plus MatterEin vielseitiges Matter-basiertes IoT-Entwicklungsboard
IoT-RetrofittingRS232-Geräte fit für Industrie 4.0 machen
IoT mit 8-Bit-Mikrocontrollern
Technologie als Motor der NachhaltigkeitNeuerungen führen zu Energieeffizienz in vielen Applikationen
AWS für Arduino und Co.Teil 1: AWS-IoT-ExpressLink in der Praxis
Luftstromdetektor (nur) mit ArduinoKeine externen Sensoren erforderlich!
WasserleckdetektorVerbunden mit der Arduino-Cloud
QuarzeBemerkenswerte Bauteile
Universeller Garten-LoggerEin Schritt auf dem Weg zur KI-gestützten Gartenarbeit
Analoger 1-kHz-GeneratorSinuswellen mit geringen Verzerrungen
Miletus: Web-Apps offline nutzenSystem- und Gerätezugriff inklusive
Von 4G zu 5GIst es wirklich so einfach?
Aller Anfang...muss nicht schwer sein: Der Ausgleich
Ce cours complet de programmation du microcontrôleur ESP32 comprend un manuel, un kit de composants, des projets pratiques ainsi qu’un cours en ligne complet avec simulations. Il est idéal pour apprendre pas à pas la programmation des systèmes embarqués avec MicroPython grâce à une approche pratique.
Une introduction pratique aux systèmes embarqués avec l’ESP32
Ce cours s’adresse aux débutants en systèmes embarqués recherchant une approche structurée et basée sur des exemples.
Un kit de composants comprenant des LED et des résistances, des interrupteurs, des capteurs et actionneurs, des afficheurs, une breadboard et des fils est inclus. Ceux-ci sont utilisés dans le cours pour illustrer des applications concrètes.
Aucune expérience préalable avec Arduino ou le développement embarqué n’est requise. Chaque section propose des exemples pratiques et des mini-projets conçus pour renforcer les concepts clés et encourager l’exploration. À la fin du cours, vous serez capable non seulement de reproduire les exemples, mais aussi de développer vos propres idées et applications.
Que allez-vous apprendre ?
Programmation de microcontrôleurs en MicroPython avec l'ESP32 via l'IDE Thonny
Utilisation des entrées/sorties numériques, lecture de boutons et encodeurs, commande de LED et relais
Lecture des entrées analogiques, tensions et capteurs analogiques
Génération de signaux analogiques et PWM
Utilisation des communications série comme UART, I²C et SPI pour piloter des afficheurs et lire des capteurs numériques et cartes SD
Gestion du temps
Utilisation des interruptions
Entrées capteurs en temps réel et contrôle via boutons, LED et afficheurs
Commande d’actionneurs comme relais et servomoteurs
À qui s’adresse ce cours ?
Étudiants et autodidactes explorant les systèmes embarqués
Makers et passionnés d’IoT souhaitant améliorer leurs compétences en hardware
Formateurs et enseignants à la recherche de matériel pédagogique prêt à l’emploi
Contenu de la boîte
Accès au cours complet sur la plateforme Elektor Academy Pro
Carte microcontrôleur ESP32 + câble USB
Livre : Programming Microcontrollers in MicroPython
Fichiers de projet téléchargeables pour chaque module
Boîte de composants :
2× LED, rouge, 5 mm
LED, verte, 5 mm
3× résistance, 470 Ω, 0,25 W
LDR
Potentiomètre, 10 kΩ, linéaire
Bouton-poussoir
Module encodeur rotatif
Module relais
Capteur DHT22 (température & humidité)
Afficheur 7 segments 4 digits compatible TM1637
MPU-6050 IMU avec connecteurs
Afficheur OLED I²C compatible SSD1306
Adaptateur carte micro SD avec connecteur
Buzzer
Micro servo SG90
Écran TFT SPI 240×320 compatible ILI9341
20× fils jumper
Breadboard
Tous les cours de programmation (et différences de contenu)
Cours
Arduino
Raspberry Pi Pico with Arduino C/C++
ESP32 with Arduino C/C++
Raspberry Pi Pico with MicroPython
ESP32 with MicroPython
Cours en ligne
Access to Arduino Course
Access to Pico with Arduino C/C++ Course
Access to ESP32 with Arduino C/C++ Course
Access to Pico with MicroPython Course
Access to ESP32 with MicroPython Course
Carte
Uno R3
Raspberry Pi Pico
ESP32
Raspberry Pi Pico
ESP32
Livre
Programming Microcontrollers in C/C++ Using Arduino
Programming Microcontrollers in C/C++ Using Arduino
Programming Microcontrollers in C/C++ Using Arduino
Programming Microcontrollers in MicroPython
Programming Microcontrollers in MicroPython
Kit
Boîte de composants (40 pièces)
Boîte de composants (40 pièces)
Boîte de composants (40 pièces)
Boîte de composants (40 pièces)
Boîte de composants (40 pièces)
Programming and Projects for the Minima and WiFi
Based on the low-cost 8-bit ATmega328P processor, the Arduino Uno R3 board is likely to score as the most popular Arduino family member, and this workhorse has been with us for many years. Eleven years later, the long-overdue successor, the Arduino Uno R4, was released. It is built around a 48 MHz, 32-bit Arm Cortex-M4 microcontroller and provides significantly expanded SRAM and Flash memory. Additionally, a higher-precision ADC and a new DAC are added to the design. The Uno R4 board also supports the CAN Bus with an interface.
Two versions of the board are available: Uno R4 Minima, and Uno R4 WiFi. This book is about using these new boards to develop many different and interesting projects with just a handful of parts and external modules. All projects described in the book have been fully tested on the Uno R4 Minima or the Uno R4 WiFi board, as appropriate.
The project topics include the reading, control, and driving of many components and modules in the kit as well as on the relevant Uno R4 board, including
LEDs
7-segment displays (using timer interrupts)
LCDs
Sensors
RFID Reader
4x4 Keypad
Real-time clock (RTC)
Joystick
8×8 LED matrix
Motors
DAC (Digital-to-analog converter)
LED matrix
WiFi connectivity
Serial UART
CAN bus
Infrared controller and receiver
Simulators
… all in creative and educational ways with the project operation and associated software explained in great detail.
Contents
Projects
PicoVoiceVoice alienation and sound effects with the Raspberry Pi Pico
Navigation with Vibration Feedback
POV Display
Pulse Width Modulation (PWM) with the Raspberry Pi Pico
Wi-Fi with the Raspberry Pi Pico
'Hello World' from the Raspberry Pi Pico and RP2040A look at the Raspberry Pi Foundation’s first microcontroller
Simple On-Off Temperature Controller with Raspberry Pi HAT
Multitasking with the Raspberry PiShowcase: a traffic lights controller
The Raspberry Pi Ruler GadgetFun with a time-of-flight sensor
Raspberry Pi Buffer Board (Mk. 1)Never blow up the I/O again
FM radio with RDSA top HAT project for the Raspberry Pi
LoRa with the Raspberry Pi PicoFun with MicroPython!
Tutorials
Qt for the Raspberry Pi
Raspberry Pi Pico Programmingwith MicroPython and Thonny
Raspberry Pi Full StackRPi and RF24 at the heart of a sensor network
Raspberry Pi Bash Command Cheat Sheet
Community
Java on the Raspberry PiAn interview with Frank Delporte
Reviews
Introducing the New Raspberry Pi Pico W, H, and WH
Secure Boot Solution for Raspberry PiRetrofit security at a reasonable price
Review: SmartPi – Smart Meter Extension for Raspberry Pi
Review: The Enviro+ Raspberry Pi HATMeasuring environmental data with Raspberry Pi and the HAT Enviro+
Review: Meet the Raspberry Pi 4All new but still good?
Raspberry Pi Gets a Fast 3.5' Touch DisplayMore power at no extra charge
Book Launch: Raspberry Pi for Radio Amateurs
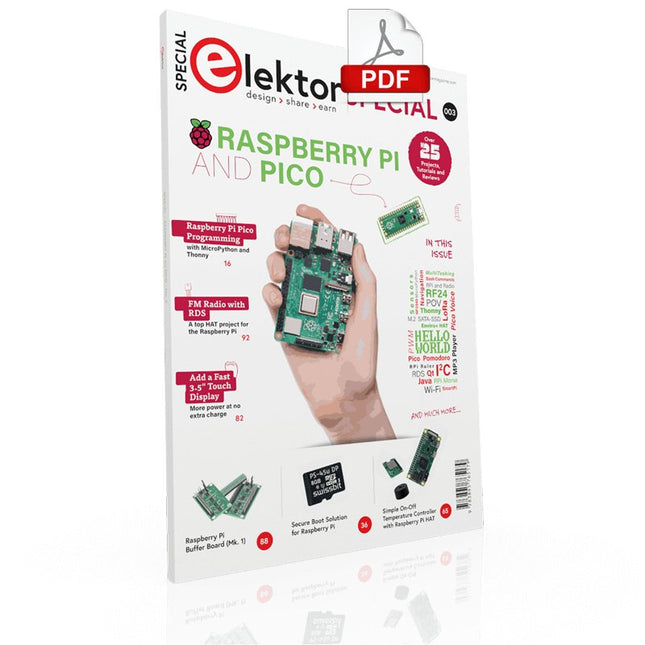
Elektor GREEN and GOLD members can download their digital edition here.
Not a member yet? Click here.
USB Measurement AdapterTesting Current and Signal Quality of USB Ports
4...20 mA Current Output for Arduino UnoA Reliable, EMI-Insensitive Current Loop Interface
Vacuum Cleaner Automatic ControlKeep Your Tools’ Work Area Clean
DDS Generator with ATtiny
Opamp-Tester V2New PCB – Now Also Suitable for SMDs
550-mW “Lamp” Audio AmplifierGet the Warm Sound of Vacuum Tubes With Ease
Fuse GuardMonitoring a Fuse with a Flashing LED
HQ RIAA PreamplifierGet the Most Out of Your Vinyl Records!
Turntable Speed CalibratorAn Arduino-Based 100–120 Hz Strobe Light Generator
Elektor Classics: video buffer/repeater
Infrared Remote-Controlled DimmerControl Your Halogen or LED Floor Lamp Effortlessly and With Style
How to Use switch…case on Strings in C++/Arduino IDE
Magnet FinderWith a Simple Hall-Effect Sensor
Raspberry Pi Smart Power ButtonA Solution for Raspberry Pi Up to Model 4
Essential Maker TipsProfessional Insights for Everyday Making
Practical Projects with the 555 TimerDC Motor Control and Fast Reaction Challenges
Basic AC-Load-On MonitorSave Energy with a Simple Device
Power Banks in ParallelA Three-Day Continuous Power Solution
VFO Up to 15 MHzAn Implementation With Raspberry Pi Pico
Violin Tuner with ATtiny202
Elektor Classics: video amplifier for B/W television sets
Capacitance Meter20 pF to 600 nF
Quasi-Analog Clockwork Mk IITwo LED Rings for Hours and Minutes
You Can Do Anything You Want(with the Arduino Ecosystem at Your Side)
Neon Lamp Dice
Elektor Classics: RTTY calibrator indicator
Inspiring Hardware Designs for Your ESPs
Elektor Classics: variable 3 A power supply
RGB LEDs with Integrated Control CircuitLight with Precision: ICLEDs Set Standards
Experiment: Towards a Mixed-Signal Theremin?Blending Modern Time-of-Flight Sensors With the Timeless XR2206 Analog Generator
ESP32 Audio Transceiver Board (Part 1)SD Card WAV File Player Demo
Infographics: Circuits and Circuit Design 2025
Small Audio MixerA Simple and Versatile Scalable Design
Smart Staircase Light TimerSave More Money on the Energy Bill!
Smarten Up Your ShuttersControlling Velux Hardware With an ESP32 and MQTT
Solid-State Foot WarmerEnergy-Efficient Comfort
Is the M5Stamp Fly Quadcopter the Next Tello?
Boosting Wi-Fi Range of the ESP32-C3 SuperMiniA Simple and Effective Antenna Mod
ZD-8968 Hot-Air Soldering StationA Budget-Friendly Workhorse or Just Hot Air?
Parking Sensor TesterFinding Defects in the PDC System of a Car