Projects Using Arduino IDE and the LVGL Graphics Library
The ESP32 is probably one of the most popular microcontrollers used by many people, including students, hobbyists, and professional engineers. Its low cost, coupled with rich features makes it a popular device to use in many projects. Recently, a board called the ESP32 Cheap Yellow Display (CYD for short) is available from its manufacturers. The board includes a standard ESP32 microcontroller together with a 320x240 pixel TFT display. Additionally, the board provides several connectors for interfaces such as GPIO, serial port (TX/RX), power and Ground. The inclusion of a TFT display is a real advantage as it enables users to design complex graphics-based projects without resorting to an external LCD or graphics displays.
The book describes the basic hardware of the ESP32 CYD board and provides details of its on-board connectors. Many basic, simple, and intermediate-level projects are given in the book based on the ESP32 CYD, using the highly popular Arduino IDE 2.0 integrated development environment. The use of both the basic graphics functions and the use of the popular LVGL graphics library are discussed in the book and projects are given that use both types of approaches.
All the projects given in the book have been tested and are working. The block diagram, circuit diagram, and the complete program listings and program descriptions of all the projects are given with explanations. Readers can use the LVGL graphics library to design highly popular eye-catching full-color graphics projects using widgets such as buttons, labels, calendars, keypads, keyboards, message boxes, spinboxes, sliders, charts, tables, menus, bars, switches, drop-down lists, animations, and many more widgets.
This book covers a series of exciting and fun projects for the Arduino, such as a silent alarm, people sensor, light sensor, motor control, internet and wireless control (using a radio link). Contrary to many free projects on the internet all projects in this book have been extensively tested and are guaranteed to work!
You can use it as a projects book and build more than 45 projects for your own use. The clear explanations, schematics, and pictures of each project make this a fun activity. The pictures are taken of a working project, so you know for sure that they are correct.
You can combine the projects in this book to make your own projects. To facilitate this, clear explanations are provided on how the project works and why it has been designed the way it has That way you will learn a lot about the project and the parts used, knowledge that you can use in your own projects.
Apart from that, the book can be used as a reference guide. Using the index, you can easily locate projects that serve as examples for the C++ commands and Arduino functionality. Even after you’ve built all the projects in this book, it will still be a valuable reference guide to keep next to your PC.
Bauen Sie Ihre perfekte Wetterstation oder forschen Sie zusammen mit der ganzen Welt an Umweltdaten. Mit vielen praktischen Projekten für Arduino, Raspberry Pi, NodeMCU, ESP32 und weiteren Developmentboards.
Wetterstationen erfreuen sich seit Jahrzehnten großer Beliebtheit. Ob in aktuellen oder längst eingestellten Elektronik-Magazinen – regelmäßig finden sich Beiträge zum Eigenbau einer Wetterstation. Im Laufe der Jahre wurden diese Systeme immer ausgefeilter und können heute nahtlos in das Smart Home integriert werden. Allerdings erfordert dies oft die Bindung an einen (teuren) Markenhersteller, der sämtliche Komponenten abdeckt.
Mit Ihrer eigenen Wetterstation können Sie jedoch mühelos mithalten – und sogar Messwerte erfassen, die kommerzielle Geräte nicht bieten. Dabei kommt der Spaß nicht zu kurz: Sie erweitern spielerisch Ihr Wissen über Elektronik, moderne Mikrocontroller-Developmentboards und Programmiersprachen. Schon für weniger als zehn Euro können Sie erste Umweltdaten erfassen und Ihr System Schritt für Schritt mit wachsendem Interesse weiter ausbauen.
Aus dem Inhalt:
Wind und Wetter auf der Spur
Wetterdisplay mit OpenWeatherMap und Vakuum-Fluoreszenzanzeige
Flüchtige organische Verbindungen in der Atemluft
Mit MQ-Sensoren arbeiten: Kohlenmonoxid messen – geruchlos aber extrem giftig
CO2-Ampel mit ThingSpeak-IoT-Anbindung
Ein Gießautomat für Ihre Pflanzen
Gutes Raumklima: Temperatur und Luftfeuchtigkeit sind wichtige Kriterien
Schickes Thermometer mit alter Röhrentechnik
Nostalgisches Wetterhäuschen für die ganze Familie
Luftdruck und Temperatur genau messen
Sonnenbrand-Warngerät
DIY-Sensor für die Sonnenscheindauer
Das Smartphone zeigt’s an: Nebel oder klare Sicht?
Erdbeben erkennen
Pegelstände von Gewässern und Behältern
pH-Wert von Gewässern bestimmen
Radioaktive Strahlung erkennen
Mit GPS wissen Sie weltweit, wo ihr Sensor ist
Logdateien mit Zeitstempel auf SD-Karten speichern
LoRaWAN, The Things Network und ThingSpeak
LoRaWAN-Gateway für TTN betreiben
Mega-Display mit Wettervorhersage
Using the RFID Starter Kit
An Arduino board has now become ‘the’ basic component in the maker community. No longer is an introduction to the world of microcontrollers the preserve of the expert. When it comes to expanding the capabilities of the basic Arduino board however, the developer is still largely on his own. If you really want to build some innovative projects it’s often necessary to get down to component level. This can present many beginners with major problems. That is exactly where this book begins.
This book explains how a wide variety of practical projects can be built using items supplied in a single kit together with the Arduino board. This kit, called the 'RFID Starter Kit for Arduino' (SKU 17240) is not just limited to RFID applications but contains more than 30 components, devices and modules covering all areas of modern electronics.
In addition to more simple components such as LEDs and resistors there are also complex and sophisticated modules that employ the latest technology such as:
A humidity sensor
A multicolor LED
A large LED matrix with 64 points of light
A 4-character 7-segment LED display
An infra red remote-controller unit
A complete LC-display module
A servo
A stepper motor and controller module
A complete RFID reader module and security tag
On top of that you will get to build precise digital thermometers, hygrometers, exposure meters and various alarm systems. There are also practical devices and applications such as a fully automatic rain sensor, a sound-controlled remote control system, a multifunctional weather station and so much more.
All of the projects described can be built using the components supplied in the Elektor kit.
AI in Practice
Dive into the fascinating world of robotics and automation!
This Elektor Special shows you how to build your own robots with creativity, a little know-how, and affordable technology. From your first DIY project with Arduino or Raspberry Pi to intelligent systems with AI – this issue makes modern robotics understandable and accessible.
Discover practical instructions, inspiring projects, and exciting insights into the maker scene. Learn how experimentation, community, and openness give rise to true innovation – and why robotics is so much more than just a technical hobby.
Contents
Imagination turns into reality
Arduino-controlled Drawing Robot
GalaxyRVR Mars Rover Kit for Arduino
YDLIDAR X4Pro Lidar
xHuskyLens AI Camera
DOF Robot Arm with Raspberry Pi Pico
Manufacturing Robots with Fischertechnik
Pneumatic Industrial Robot
Why Do We Keep Building Robot Dogs?
Elektor Mini-Wheelie
Robot Vehicles and Autonomous Driving
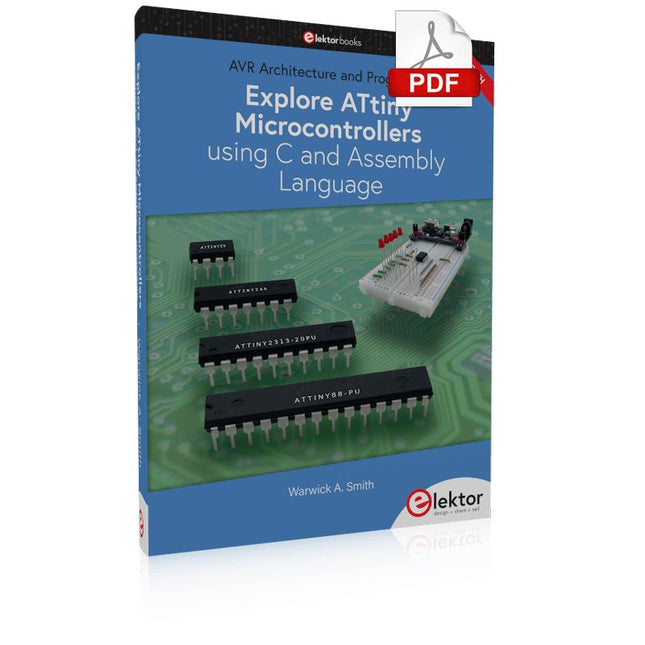
AVR Architecture and Programming An in-depth look at the 8-bit AVR architecture found in ATtiny and ATmega microcontrollers, mainly from a software and programming point of view. Explore the AVR architecture using C and assembly language in Microchip Studio (formerly Atmel Studio) with ATtiny microcontrollers. Learn the details of how AVR microcontrollers work internally, including the internal registers and memory map of ATtiny devices. Program ATtiny microcontrollers using an Atmel-ICE programmer/debugger, or use a cheap hobby programmer, or even an Arduino Uno as a programmer. Most code examples can be run using the Microchip Studio AVR simulator. Learn to write programs for ATtiny microcontrollers in assembly language. See how assembly language is converted to machine code instructions by the assembler program. Find out how programs written in the C programming language end up as assembly language and finally as machine code instructions. Use the Microchip Studio debugger in combination with a hardware USB programmer/debugger to test assembly and C language programs, or use the Microchip Studio AVR simulator. DIP packaged ATtiny microcontrollers are used in this volume for easy use on electronic breadboards, targeting mainly the ATtiny13(A) and ATtiny25/45/85. Learn about instruction timing and clocks in AVR microcontrollers using ATtiny devices. Be on your way to becoming an AVR expert with advanced debugging and programming skills.
Le testeur de diodes Zener Elektor est essentiellement une source de courant constant commutable par paliers de 1 à 50 mA. Il peut être utilisé pour tester des diodes Zener jusqu’à un maximum de 54 V. Grâce à un convertisseur élévateur de 60 V, l’appareil peut être alimenté par une tension courante de 5 à 12 V.
Le principe de ce testeur est simple. Une diode Zener ou un autre DUT (device under test, dispositif sous test, comme une LED) est polarisé par une source de courant réglable. La tension aux bornes du DUT peut être mesurée avec un multimètre. La tension de la plupart des (petites) diodes Zener est spécifiée pour un courant de 5 mA. Selon l’application, la tension à d’autres courants peut également présenter un intérêt. C’est pourquoi six réglages de courant sont disponibles : 1, 2, 5, 10, 20 et 50 mA. Les LED sont souvent spécifiées pour un courant de 20 mA.
Il est possible de tester :
Si une diode Zener est défectueuse (court-circuit ou haute impédance).
Si une diode Zener présente la bonne tension Zener.
Comment une tension Zener évolue avec différents courants.
Quelle tension exacte est présente sur une référence de tension intégrée.
Si des LED montées en série présentent des différences de luminosité (d’où le courant de 20 mA).
Quel est le gain en courant pour différents courants de base dans des transistors (de puissance).
Le kit contient toutes les pièces indiquées dans la nomenclature, y compris le circuit imprimé et le boîtier.
Spécifications
Tension d'alimentation
5…12 V/2 A (USB-C)
Courant d'alimentation (Itest = 50 mA)
1,1 A à 5 V / 412 mA à 12 V
Courants sélectionnables
1, 2, 5, 10, 20 et 50 mA
Tension de test max.
>54 V à Itest ≥1 mA
Tension de sortie max.
60 V à Itest = 0 mA
Limite de tension à 5 V
4,5 V à Itest = 1 mA / 5,18 V à Itest = 50 mA
Dimensions du boîtier
110 x 82 x 44 mm
Dimensions du circuit imprimé
105,4 x 67,3 mm
Connexions
Douilles banane 4 mm pour multimètre
Douilles banane 2 mm pour pinces de test
Connecteur USB-C pour l'alimentation
Inclus
Résistances
R1 = 3.3 kΩ, 600 mW, 1%
R2 = 0.15 Ω, 1 W, 5%, LS 12.7 mm, ø 3.5 mm
R3, R8 = 180 Ω, 600 mW, 1%
R4, R6, R16 = 1 kΩ, 600 mW, 1%
R5, R19 = 47 kΩ, 600 mW, 1%
R7 = 3.9 kΩ, 1 W, 5%, LS 12.7 mm, ø 3.5 mm
R9, R10, R12 = 10 kΩ, 600 mW, 1%
R11, R13 = 100 Ω, 600 mW 1%
R14 = 249 Ω, 600 mW, 1%
R15 = 499 Ω, 600 mW, 1%
R17 = 2.49 kΩ, 250 mW, 1%
R18 = 4.99 kΩ, 250 mW, 1%
Condensateurs
C1 = 470 uF / 35 V, 20%, Ir = 1.86 A, ø 12.5 mm, LS 5 mm, ESR = 0.038 Ω (Panasonic EEUTP1V471)
C2 = 1 uF / 100 V, 10%, X7R, LS 5 mm
C3 = 2.2 nF / 50 V, 10%, X7R, LS 5 mm
C4, C7 = 100 nF / 100 V, 10%, X7R, LS 5 mm
C5 = 100 uF / 100 V, 20%, ø 14 mm max., LS 5 mm
C6 = 1 nF / 100 V, 10%, X7R, LS 5 mm
Inducteur
L1 = 100 uH, Irms = 2.4 A, Isat = 3.5 A, 0.09 Ω, radial, pitch 2.5/5/10 mm, ø 14 mm max. (Kemet SBC8-101-242)
Semi-conducteurs
D1 = MUR120G, DO-41
D2, D4 = STPS3150RL, DO-201AD
D3 = Z-diode, 18 V, 1.3 W (BZX85C18)
D5 = Z-diode, 5.1 V, 0.5 W (1N5231B)
LED1 = LED in pushbutton S1
LED2 = LED, green, 3 mm
IC1 = MC34063, DIP-8
IC2 = LM4040BIZ-5.0/NOPB, TO-92 (TO-226AA-3)
IC3 = TL051CP, DIP-8
T1 = BC327.25, TO-92
T2 = STP40NF10L, TO-220
T3 = IRF9510PBF, TO-220
T4 = 2N7000, TO-92
Autres
K1, K2, S1, S3 = 2-way screw terminal block, LS 3.5 mm, max. 1.5 mm²
connected to K1 = USB-C socket, 30 V/3 A, chassis mounted, wired, 9 x 16 mm
connected to K2 = Banana Connector, 2 mm, Socket, 60 VDC, Panel Mount, red (Multicomp 24.102.1)
connected to K2 = Banana Connector, 2 mm, Socket, 60 VDC, Panel Mount, black (Multicomp 24.102.2)
Test clip, red, 30 VAC/60 VDC (Hirschmann 931467101)
Test clip, black, 30 VAC/60 VDC (Hirschmann 931467100)
S1 = Pushbutton, panel mount, SPST-NO, 30 DC/100 mA, with red LED
S2 = Rotary Switch, 6 position, 2 pole, 30°, 250 V/150 mA
S3 = Toggle switch, panel mount, SPDT, solder lugs, 28 VDC
T2, T3 = Heat sink, 15°C/W, FK 214 SA-CB
Enclosure Hammond 1591XXSSBK, ABS, 110 x 82 x 44 mm
Knob for S2, round shaft 6 mm, ø 21 mm, with indicator line (Multicomp CP-LB21-6-6D)
4 x Self-tapping screw #4-1/4", carbon steel, pan head
Banana plug, red, 2 mm, 60 VDC (Multicomp 25.205.1)
Banana plug, black, 2 mm, 60 VDC (Multicomp 25.205.2)
Banana socket, black 4 mm, panel mount
Banana socket, red 4 mm, panel mount
for LED1, LED2 = Pin header, 1 x 2, vertical, pitch 2.54 mm
for LED1, LED2 = Pin socket, 1 x 2, vertical, pitch 2.54 mm
for T2, T3 = M3 screw, 10 mm, steel, pan head
2 x M3 washer, plain, steel
4 x M3 nut
for IC1, IC3 = DIP-8 socket
Wire, black, 0.25 mm² (24 AWG), stranded 14 x 0.15 mm, 1 m
Wire, red, 0.25 mm² (24 AWG), stranded 14 x 0.15 mm, 1 m
PCB 250772-1 v1.1
Liens
Article
Elektor Labs
Diese Ausgabe steht allen GOLD- und GREEN-Mitgliedern auf der ElektorMagazine-Website zum Download bereit!
Sie sind noch kein Mitglied? Hier klicken!
Arduino Portenta Machine Control und Arduino Potenta H7Ein CAN-zu-MQTT Gateway Demo Projekt
Ausgepackt: Der Elektor-LCR-Meter-Bausatz von Elektor
MicroPython hält Einzug in die Arduino-Welt
Vernetzte Projekte, einfach eingerichtetIhr Weg in die Arduino-Cloud
Einführung in TinyMLGroß ist nicht immer besser
Arduino K-Way
Komfortableres Schreiben von Arduino-Sketches
Lernen Sie Arduino kennen!
Erste Schritte mit Portenta X8Sichere Softwareverwaltung mit Containern
Skalierbare, sichere Anwendungen erstellen, in Betrieb nehmen und pflegenArduino Portenta X8 mit dem i.MX 8M Mini-Anwendungsprozessor von NXP und dem EdgeLock Secure Element SE050
Wie ich mein Haus automatisiert habeArduino-CEO Fabio Violante entwickelt und teilt Lösungen
Altair-8800-EmulatorHardware-Simulation eines alten Computers
MS-DOS auf dem Portenta-H7-BoardAlte Software auf moderner Hardware ausführen
Grow It YourselfEine digital gesteuerte Anzuchtbox für Indoor-Farming
Kann Hausautomatisierung den Planeten retten?MQTT auf dem Arduino Nano RP2040 Connect
Professionelle Anwendungen mit Arduino Pro
Intelligente Backöfen der nächsten Generation
Tagvance sorgt mit Arduino für sicherere Baustellen
Santagostino atmet auf!mit einer Fernüberwachung, die KI für vorausschauende Wartung nutzt
Höchste Sicherheit mit der MKR-basierten Lösung von RIoT Secure
Eine neue Generation des Wassermanagements mit Open-Source
SensoAbholzung mit Schallanalyse aufspüren
Die Arduino-Bibliothek Mozzi für KlangsyntheseEinblicke von Tim Barrass
Das neue Portenta-X8-Board (mit Linux!) und Max Carrier machen es möglich!
Wie Arduino Schülern hilft, zukünftige Fähigkeiten zu entwickeln
Must-Haves für Ihren Elektronik-Arbeitsplatz
Die Bedeutung der Robotik in der Ausbildung
Ein zuverlässiges IoT auf Basis von LoRa
Ausgepackt: die Portenta-Maschinensteuerung
8-Bit-Gaming mit Arduboy
Reduzierung des Wasserverbrauchs auf der PferderennbahnEin IoT zur ständigen Überwachung von Bodenfeuchtigkeit und Temperaturen
Das Panettone-ProjektEin Robotsystem zur Verwaltung von Sauerteigstartern
Unterstützung durch Arduino-Reseller
Space Invaders mit Arduino
Kunst mit ArduinoInspirierende Einblicke von Künstlern und Designern
Arduino-Produktkatalog
Die Zukunft von ArduinoDavid und Fabio orakeln
Verwirklichen Sie Ihre Projekt-Träume: Der Kilometerzähler fürs Hamsterrad, eine vollautomatische Steuerung Ihrer Ameisenfarm mit Webinterface, oder den Sandwich-O-Mat – eine Maschine, die Sandwich-Toasts nach Wahl belegt und überbackt.
Mit dem Arduino und der DIY- oder Maker-Bewegung wurde nicht nur der Einstieg in die Mikrocontroller-Programmierung kinderleicht, auch eine zweite Entwicklung fand statt: Findige Entwickler brachten kleine Boards – sogenannte Shields oder Module – auf den Markt, die den Einsatz von zusätzlicher Hardware stark vereinfachten. Die kleinen Baugruppen enthalten alle wichtigen elektronischen Teile, um mit ein paar Steckkabeln an den Mikrocontroller angeschlossen zu werden, so dass ein frickeliger und aufwändiger Aufbau auf dem Steckboard entfällt. Zudem ist es so möglich, auch winzig kleine Bauteile zu handhaben, die keine Anschlussbeinchen mehr haben (sogenannte SMDs).
Enthaltene Projekte
Arduino sucht Anschluss
BMP, Einführung in Bibliotheken und I²C
Mit dem Mehrzweck-Shield I/O-Grundlagen kennenlernen
I²C-LCD-Adapter und Punktmatrixanzeigen
LCD Keypad Shield
Level-Konverter
W5100: Internetanbindung
I/O-Erweiterungs-Shields
Relais und Solid-State-Relais
Das Multi-Funktions-Shield: eine universelle Bedieneinheit
SD-Kartenleser über SPI anbinden
Tasten und 7-Segmentanzeigen
16-Bit ADC
DAC MCP4725
16-fach PWM Servo-Treiber
MP3-Player
GPS-Datenlogger mit SD-Karte
Touch-Sensor
Joystick
SHT31: Temperatur und Luftfeuchtigkeit
UV A-Sensor VEML6070
VL53L0X Time-of-Flight
Ultraschallsensor-Entfernungsmesser
LED-Punktmatrixanzeige mit MAX7219
RTC DS3231
Port-Expander MCP23017
433 MHz Funk
MPU-650: Gyroskop
Beschleunigungssensor ADXL345
WS2812 RGB-LEDs
Spannungsversorgung
MQ-xx Gassensoren
CO2-Gassensor
ACS712 Stromstärkesensor
INA219 Stromstärkesensor
L298 Motortreiber
MFRC522 RFID
28BYJ-48 Stepper-Motor
TMC2209 Silent-Step-Stick
X9C10x Digitales Poti
Farb-TFT-Display mit ST7735
e-Paper Display
Bluetooth
Geigerzähler
SIM800L GSM-Modul
I²C-Multiplexer
Controller Area Network
Open-Source-Code mit Arduino IDE und PlatformIO
Autonomes Fahren: GPS, Accelerometer, Gyroskop
PS3-Controller
Mikrocontroller wie der Arduino und Einplatinenrechner wie der Raspberry Pi haben sich zu beliebten Komponenten entwickelt. Dritter im Bunde ist der ESP32 der Firma Espressif. Mikrocontroller dieser Baureihe zeichnen sich durch eine Vielzahl implementierter Funktionen aus, die bei einem Arduino konventioneller Prägung mit einem Atmel-AVR-Mikrocontroller erst mit weiterer Hardware möglich sind. Prominentes Beispiel sind hier die WiFi- und Bluetooth-Funktionalitäten. Gegenüber einem Raspberry Pi zeichnen sie sich durch einen deutlich geringeren Preis aus.
Allgemeine Informationen für die Realisierung eines Roboterauto-Projekts mit dem ESP32 sind leicht zu finden. Dabei handelt es sich aber oft nur um Ausführungen zu einem Teilaspekt, ohne inhaltliche oder funktionale Abstimmung. So ist nicht nur die Beschaffung der benötigten Informationen mühselig und zeitaufwändig, sie kann auch außerordentlich fehlerträchtig sein.
Ansatzpunkt dieses Buches ist, diese Lücke zu schließen. Es geht auf verschiedene Möglichkeiten eines Chassis ein, vermittelt nötige Kenntnisse und führt schrittweise von einer einfachen Motorsteuerung zu einem komplexen sensor- und sprachgesteuerten Roboterauto. Hacks rund um GPS und eine PlayStation 3 runden die Sache ab.
Inhalt
Bei der Reihenfolge der Kapitel wurde versucht – beginnend bei der Darstellung von grundlegenden Informationen – über die Lösung einfacher Aufgaben zu etwas anspruchsvolleren Techniken zu führen.
Der Mikrocontroller ESP32
Die Software erstellen
Die Stromversorgung
Rund um die Hardware
Das Chassis
Der Gleichstrommotor
Kabellose Steuerung über WiFi
Mit Sensoren Hindernisse erkennen
Eine eigene Roboterauto-App
Servo und Lichtsensor
GPS
Accelerometer / Gyroskop
PS3-Controller
Roboterauto-App
Hinweis zur Software
Die Dateien haben das Suffix (.cpp). Grund ist die Entwicklung mit PlatformIO. Mit Copy & Paste sollten sie auch in der Arduino-IDE verwendet werden können.
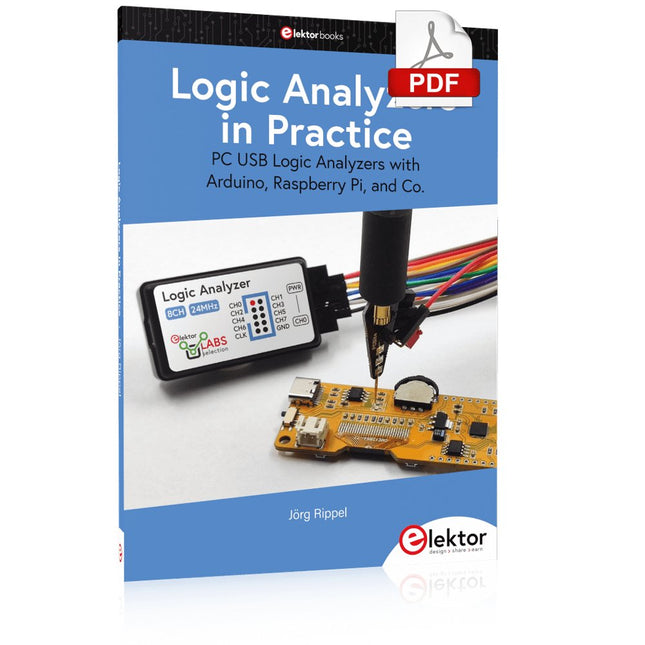
PC USB Logic Analyzers with Arduino, Raspberry Pi, and Co.
Step-by-step instructions guide you through the analysis of modern protocols such as I²C, SPI, UART, RS-232, NeoPixel, WS28xx, HD44780 and 1-Wire. With the help of numerous experimental circuits based on the Raspberry Pi Pico, Arduino Uno and the Bus Pirate, you will learn the practical application of popular USB logic analyzers.
All the experimental circuits presented in this book have been fully tested and are fully functional. The necessary program listings are included – no special programming or electronics knowledge is required for these circuits. The programming languages used are MicroPython and C along with the development environments Thonny and Arduino IDE.
This book uses several models of flexible and widely available USB logic analyzers and shows the strengths and weaknesses of each price range.
You will learn about the criteria that matter for your work and be able to find the right device for you.
Whether Arduino, Raspberry Pi or Raspberry Pi Pico, the example circuits shown allow you to get started quickly with protocol analysis and can also serve as a basis for your own experiments.
After reading this book, you will be familiar with all the important terms and contexts, conduct your own experiments, analyze protocols independently, culminating in a comprehensive knowledge set of digital signals and protocols.
A Project-Based Introduction to Microcontrollers and Drone Control
A Practical Introduction to Embedded Systems with the ESP32
This book is intended for readers who are new to embedded systems and looking for a structured, example-driven way to begin. If you’ve explored general-purpose electronics or Arduino-based resources but found them too broad or lacking in practical application, this guide offers a more focused alternative.
With a small, affordable set of components – such as LEDs, sensors, an OLED screen and a motion sensor – you’ll build and work with the same hardware setup throughout the book. This allows you to focus on learning and experimenting without constant reconfiguration.
Topics include:
Understanding and programming the ESP32 microcontroller
Using the Arduino IDE to write and deploy code
Exploring cyber-physical systems, culminating in basic drone control
No prior experience with Arduino or embedded development is required. Each section includes hands-on examples and mini-projects designed to reinforce core concepts and encourage deeper exploration. By the end, you’ll be equipped not only to reproduce the book’s examples, but also to extend them toward your own ideas and applications.
Whether your interest is in learning embedded programming, building interactive systems, or exploring educational drone control, this book provides a clear and practical path to getting started.