Cours complet sur le microcontrôleur ESP32, comprenant une carte d’extension MCU spécialement conçue, des projets pratiques et un guide en ligne complet – idéal pour apprendre le matériel, la programmation et la connectivité étape par étape.
Introduction pratique aux systèmes embarqués avec l'ESP32
Ce cours est conçu pour les débutants en systèmes embarqués qui recherchent une approche structurée et concrète pour se lancer. Si vous avez déjà exploré l'électronique générale ou les ressources basées sur Arduino, mais que vous les avez trouvées trop générales ou manquant de conseils pratiques, ce cours offre une alternative plus ciblée.
Grâce au kit « ESP32 by Example » (EEK) – un ensemble de composants compacts et abordables comprenant des LED, des capteurs, un écran OLED et un processeur de mouvement – vous travaillerez avec une configuration matérielle cohérente tout au long du cours. Une fois assemblé, l'EEK reste quasiment inchangé, ce qui vous permet de vous concentrer sur l'apprentissage et l'expérimentation sans reconfiguration constante.
Sujets abordés :
Comprendre et programmer le microcontrôleur ESP32
Écrire et déployer du code avec l’IDE Arduino
Explorer les systèmes cyberphysiques, jusqu’au pilotage de drones de base
Aucune expérience préalable avec Arduino ou le développement embarqué n’est requise. Chaque section propose des exemples pratiques et des mini-projets conçus pour consolider les concepts clés et encourager une exploration plus approfondie. À la fin de ce cours, vous serez capable non seulement de reproduire les exemples du livre, mais aussi de les enrichir avec vos propres idées et applications.
Que vous soyez intéressé par la programmation embarquée, les systèmes interactifs ou le pilotage de drones, ce cours vous offre une approche claire et pratique pour débuter.
Ce que vous apprendrez ?
Programmation embarquée avec l'ESP32 à l'aide de l'IDE Arduino
Acquisition et contrôle en temps réel des données de capteurs via boutons, LED et écrans
Interaction gestuelle grâce au capteur de mouvement MPU6050
Intégration d'une manette de jeu Bluetooth et simulation de contrôle de drone
Réseaux Wi-Fi et UDP, serveurs web locaux et NTP
Communication MQTT avec des plateformes cloud telles qu'AWS et Arduino IoT
Comment concevoir et déployer des systèmes IoT complets
Idéal pour
Étudiants et autodidactes explorant les systèmes embarqués
Créateurs et passionnés d'IoT souhaitant perfectionner leurs compétences en matériel
Enseignants et formateurs à la recherche de ressources pédagogiques prêtes à l'emploi
Développeurs souhaitant aller au-delà des bases de Raspberry Pi ou Arduino
Une assistance en cas de besoin
Accès aux formateurs via Elektor Academy
Forums communautaires utiles et documentation essentielle
Que contient la boîte (cours) ?
Nouveau livre de 384 pages : « ESP32 by Example » (valeur : 45 €)
Kit Elektor ESP32 by Example (EEK) : Carte d’extension pour microcontrôleur avec 6 LED et 6 boutons intégrés + écran OLED, module accéléromètre et gyroscope 3 axes MPU6050 (valeur : 40 €)
Carte Adafruit HUZZAH32 – ESP32 Feather MCU (valeur : 30 €)
Carte ESP32 Cheap Yellow Display (valeur : 25 €)
Capteur d’humidité et de température DHT11
Plaque d'essai
Câbles de connexion
Câble USB-C
Accès au cours complet sur la plateforme d'apprentissage Elektor Academy Pro
Vidéos pédagogiques
Fichiers de projet Arduino téléchargeables pour chaque module
Matériel pédagogique (de cette boîte/ce cours)
▶ Cliquez ici pour ouvrir
Module 1 – Getting Started with the ESP32 & EEK
Module 2 – Digital Output – LEDs and GPIO
Module 3 – Switches and Input Handling
Module 4 – EEK and PWM
Module 5 – OLED and Display Output
Module 6 – Motion Sensing with the MPU6050
Module 7 – Capstone Project (EEK in Action)
Module 8 – WiFi and Web Control with ESP32
Module 9 – Cloud Concepts using EEK
Module 10 – Hands-on: Arduino IoT Cloud and EEK
Module 11 – BlueTooth and EEK GamePad Integration
Module 12 – Why Drones?
Module 13 – Drone Simulator Concepts
Module 14 – Simple Drone Flight Control
Module 15 – Real-Time Drone Flight Control
Module 16 – Drone Control Mini-Projects
Module 17 – Middleware and Python Scripting
Module 18 – Python Applications for Drone Control
Module 19 – Capstone EEK Control Project and Presentation
À propos de l'auteur
Jim Solderitsch est un enseignant, architecte logiciel, développeur de systèmes et chercheur en cybersécurité spécialisé dans les systèmes cyberphysiques. Il est actuellement professeur associé en sciences informatiques à l'Villanova University en Pennsylvanie.
Qu'est-ce qu'Elektor Academy Pro ?
Elektor Academy Pro propose des solutions d’apprentissage spécialisées, conçues pour les professionnels, les équipes d’ingénieurs et les experts techniques du secteur de l’électronique et des systèmes embarqués. Elle permet aux individus et aux organisations d’approfondir leurs connaissances pratiques, de perfectionner leurs compétences et de garder une longueur d’avance grâce à des ressources de haute qualité et des outils de formation concrets.
Des projets réels aux formations animées par des spécialistes, en passant par des analyses techniques approfondies, Elektor donne aux ingénieurs les moyens de relever les défis actuels du secteur. Notre offre de formation inclut des livres Academy, des coffrets Pro, des webinaires, des conférences et des magazines B2B spécialisés – tous conçus pour favoriser le développement professionnel.
Que vous soyez ingénieur, expert R&D ou décideur technique, Elektor Academy Pro fait le lien entre la théorie et la pratique, vous aide à maîtriser les technologies émergentes et à faire progresser l’innovation dans votre entreprise.
Clever Tricks with ATmega328 Pro Mini Boards
With a simple Pro Mini board and a few other components, projects that 20 or 30 years ago were unthinkable (or would have cost a small fortune) are realized easily and affordably in this book: From simple LED effects to a full battery charging and testing station that will put a rechargeable through its paces, there’s something for everyone.
All the projects are based on the ATmega328 microcontroller, which offers endless measuring, switching, and control options with its 20 input and output lines. For example, with a 7-segment display and a few resistors, you can build a voltmeter or an NTC-based thermometer. The Arduino platform offers the perfect development environment for programming this range of boards.
Besides these very practical projects, the book also provides the necessary knowledge for you to create projects based on your own ideas. How to measure, and what? Which transistor is suitable for switching a certain load? When is it better to use an IC? How do you switch mains voltage? Even LilyPad-based battery-operated projects are discussed in detail, as well as many different motors, from simple DC motors to stepper motors.
Sensors are another exciting topic: For example, a simple infrared receiver that can give disused remote controls a new lease on life controlling your home, and a tiny component that can actually measure the difference in air pressure between floor and table height!
Projects Using Arduino IDE and the LVGL Graphics Library
The ESP32 is probably one of the most popular microcontrollers used by many people, including students, hobbyists, and professional engineers. Its low cost, coupled with rich features makes it a popular device to use in many projects. Recently, a board called the ESP32 Cheap Yellow Display (CYD for short) is available from its manufacturers. The board includes a standard ESP32 microcontroller together with a 320x240 pixel TFT display. Additionally, the board provides several connectors for interfaces such as GPIO, serial port (TX/RX), power and Ground. The inclusion of a TFT display is a real advantage as it enables users to design complex graphics-based projects without resorting to an external LCD or graphics displays.
The book describes the basic hardware of the ESP32 CYD board and provides details of its on-board connectors. Many basic, simple, and intermediate-level projects are given in the book based on the ESP32 CYD, using the highly popular Arduino IDE 2.0 integrated development environment. The use of both the basic graphics functions and the use of the popular LVGL graphics library are discussed in the book and projects are given that use both types of approaches.
All the projects given in the book have been tested and are working. The block diagram, circuit diagram, and the complete program listings and program descriptions of all the projects are given with explanations. Readers can use the LVGL graphics library to design highly popular eye-catching full-color graphics projects using widgets such as buttons, labels, calendars, keypads, keyboards, message boxes, spinboxes, sliders, charts, tables, menus, bars, switches, drop-down lists, animations, and many more widgets.
Mit Arduino – Schaltungsprojekte für Profis wird der Leser umfassend in die Hardware und Software der Arduino-Plattform eingeführt. Einfache, leicht verständliche Projekte am Anfang des Buches führen Schritt für Schritt in die Open-Source-Plattform ein. Die Projekte werden dann zunehmend komplexer, um dem Leser möglichst viele konkrete Lösungsmöglichkeiten aufzuzeigen, die mit dem Arduino-Mikrocontroller auch für angehende Profis zur Verfügung stehen.
Dabei wird neben den erforderlichen theoretischen Grundlagen stets größter Wert auf eine praxisorientierte Ausrichtung gelegt. So werden wichtige Techniken wie AD-Wandlung, Timer oder Interrupts stets in Praxisprojekte eingebettet. Es entstehen Lauflichteffekte, ein Aufwachlicht, voll funktionsfähige Voltmeter, präzise Digitalthermometer, Uhren in allen Variationen, Reaktionszeitmesser oder mausgesteuerte Roboterarme. Und ganz nebenbei hat der Leser die Grundlagen der zugehörigen Controller-Technik verstanden und im wahrsten Sinne des Wortes begriffen.
STM32 Nucleo family of processors are manufactured by STMicroelectronics. These are low-cost ARM microcontroller development boards. This book is about developing projects using the popular Nucleo development board. In the early chapters of the book, the architecture of the Nucleo family is briefly described.
Software development tools that can be used with the Nucleo boards such as the Mbed, Keil MDK, TrueSTUDIO, and the System Workbench are described briefly in later Chapters.
The book covers many projects using most features of the STM32 Nucleo development boards where the full software listings for Mbed and System Workbench are given for every project. The projects range from simple flashing LEDs to more complex projects using modules and devices such as GPIO, ADC, DAC, I²C, LCD, analog inputs and others.
In addition, several projects are given using the Nucleo Expansion Boards, including popular expansion boards such as solid-state relay, MEMS and environmental sensors, DC motor driver, Wi-Fi, and stepper motor driver.
These Expansion Boards plug on top of the Nucleo development boards and simplify the task of project development considerably.
Features of this book
Learn the architecture of the STM32 microcontrollers
Learn how to use the Nucleo development board in projects using Mbed and System Workbench Toolchains
Learn how to use the Nucleo Expansion Boards with the Nucleo development boards
Update
The Mbed compiler has been replaced with two software packages: The Mbed Studio and Keil Studio Cloud. Both of these software packages are free of charge and are available on the Internet. If you need assistance using the Keil Studio Cloud, please download the Guide below.
Using the RFID Starter Kit
An Arduino board has now become ‘the’ basic component in the maker community. No longer is an introduction to the world of microcontrollers the preserve of the expert. When it comes to expanding the capabilities of the basic Arduino board however, the developer is still largely on his own. If you really want to build some innovative projects it’s often necessary to get down to component level. This can present many beginners with major problems. That is exactly where this book begins.
This book explains how a wide variety of practical projects can be built using items supplied in a single kit together with the Arduino board. This kit, called the 'RFID Starter Kit for Arduino' (SKU 17240) is not just limited to RFID applications but contains more than 30 components, devices and modules covering all areas of modern electronics.
In addition to more simple components such as LEDs and resistors there are also complex and sophisticated modules that employ the latest technology such as:
A humidity sensor
A multicolor LED
A large LED matrix with 64 points of light
A 4-character 7-segment LED display
An infra red remote-controller unit
A complete LC-display module
A servo
A stepper motor and controller module
A complete RFID reader module and security tag
On top of that you will get to build precise digital thermometers, hygrometers, exposure meters and various alarm systems. There are also practical devices and applications such as a fully automatic rain sensor, a sound-controlled remote control system, a multifunctional weather station and so much more.
All of the projects described can be built using the components supplied in the Elektor kit.
Open-Source-Code mit Arduino IDE und PlatformIO
Autonomes Fahren: GPS, Accelerometer, Gyroskop
PS3-Controller
Mikrocontroller wie der Arduino und Einplatinenrechner wie der Raspberry Pi haben sich zu beliebten Komponenten entwickelt. Dritter im Bunde ist der ESP32 der Firma Espressif. Mikrocontroller dieser Baureihe zeichnen sich durch eine Vielzahl implementierter Funktionen aus, die bei einem Arduino konventioneller Prägung mit einem Atmel-AVR-Mikrocontroller erst mit weiterer Hardware möglich sind. Prominentes Beispiel sind hier die WiFi- und Bluetooth-Funktionalitäten. Gegenüber einem Raspberry Pi zeichnen sie sich durch einen deutlich geringeren Preis aus.
Allgemeine Informationen für die Realisierung eines Roboterauto-Projekts mit dem ESP32 sind leicht zu finden. Dabei handelt es sich aber oft nur um Ausführungen zu einem Teilaspekt, ohne inhaltliche oder funktionale Abstimmung. So ist nicht nur die Beschaffung der benötigten Informationen mühselig und zeitaufwändig, sie kann auch außerordentlich fehlerträchtig sein.
Ansatzpunkt dieses Buches ist, diese Lücke zu schließen. Es geht auf verschiedene Möglichkeiten eines Chassis ein, vermittelt nötige Kenntnisse und führt schrittweise von einer einfachen Motorsteuerung zu einem komplexen sensor- und sprachgesteuerten Roboterauto. Hacks rund um GPS und eine PlayStation 3 runden die Sache ab.
Inhalt
Bei der Reihenfolge der Kapitel wurde versucht – beginnend bei der Darstellung von grundlegenden Informationen – über die Lösung einfacher Aufgaben zu etwas anspruchsvolleren Techniken zu führen.
Der Mikrocontroller ESP32
Die Software erstellen
Die Stromversorgung
Rund um die Hardware
Das Chassis
Der Gleichstrommotor
Kabellose Steuerung über WiFi
Mit Sensoren Hindernisse erkennen
Eine eigene Roboterauto-App
Servo und Lichtsensor
GPS
Accelerometer / Gyroskop
PS3-Controller
Roboterauto-App
Hinweis zur Software
Die Dateien haben das Suffix (.cpp). Grund ist die Entwicklung mit PlatformIO. Mit Copy & Paste sollten sie auch in der Arduino-IDE verwendet werden können.
Dit is een ideaal boek voor hobbyisten, studenten en ingenieurs die op een leuke manier C en het gebruik van een mbed ARM microcontroller willen leren, rechtstreeks op internet zonder ingewikkelde software-installatie.
De projecten in dit boek zijn bedoeld voor gevorderden op het gebied van ARM microcontrollers of de programmeertaal C. Dat wil zeggen dat de kennis uit deel 1 van deze serie bekend verondersteld wordt.
Cloud technologie
De in dit boek gebruikte mbed NXP LPC1768 maakt gebruik van cloud-technologie, een revolutionair concept voor software-ontwikkeling. Dit houdt in dat u geen software hoeft te installeren om de mbed te kunnen programmeren!
Het enige dat u nodig heeft, is een internet-browser zoals Microsoft Internet Explorer, en een USB-poort op uw PC. U kunt vanaf elke willekeurige PC waar dan ook ter wereld toegang krijgen tot uw project en er aan verder werken. Wanneer u klaar bent, kunt u met een paar eenvoudige klikjes met uw muis het programma overzetten naar uw mbed-hardware. Uiteraard kunt u de projecten ook downloaden en op uw eigen PC opslaan wanneer u dat liever heeft.
In een deel van de projecten wordt Visual Basic gebruikt; dit gratis pakket is nog niet in de cloud beschikbaar en moet wel op uw PC geïnstalleerd worden.
Onderwerpen die aan de orde komen
Leer het programmeren van een ARM microcontroller via cloud-technologie. Geen ARM ontwikkelsoftware-installatie op uw eigen PC.
Leer hoe u een ARM microcontroller met internet kunt verbinden, hoe u via internet uw ARM kunt bedienen en hoe u vanaf de ARM microcontroller tweets kunt versturen.
Leer hoe u een CMUcam camera kunt aansturen en toepassen in uw applicaties, bijvoorbeeld als alarm.
Leer hoe u met behulp van de gratis PC programmeertaal Visual Basic met uw ARM microcontroller kunt communiceren met gebruik van multi-threading.
Voorbeelden van projecten in dit boek: internet-server, automatisch twitteren, digitaal naar analoog conversie, USB HID, automatisch metingen in een spreadsheet plaatsen, met een camera bewegingen waarnemen, seriële communicatie met een zelfgeschreven PC-programma, gebruik van een LCD en SPI en I²C communicatie.
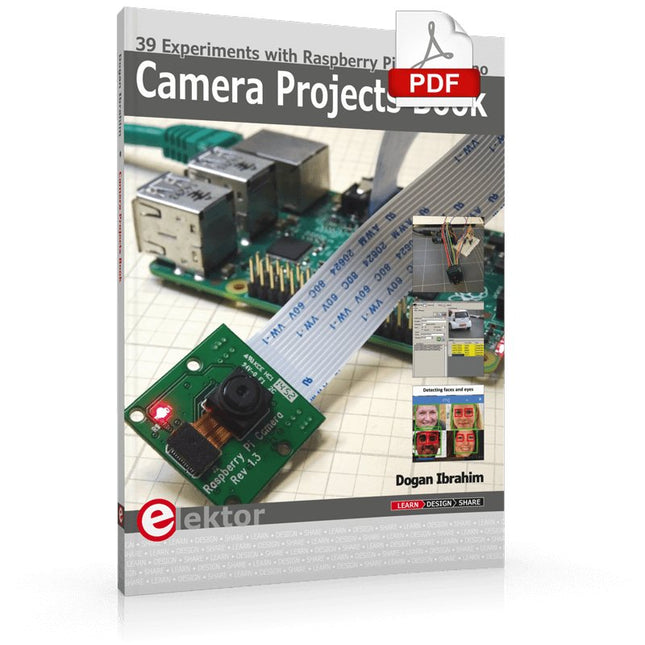
39 Experiments with Raspberry Pi and Arduino
This book is about Raspberry Pi 3 and Arduino camera projects.
The book explains in simple terms and with tested and working example projects, how to configure and use a Raspberry Pi camera and USB based webcam in camera-based projects using a Raspberry Pi.
Example projects are given to capture images, create timelapse photography, record video, use the camera and Raspberry Pi in security and surveillance applications, post images to Twitter, record wildlife, stream live video to YouTube, use a night camera, send pictures to smartphones, face and eye detection, colour and shape recognition, number plate recognition, barcode recognition and many more.
Installation and use of popular image processing libraries and software including OpenCV, SimpleCV, and OpenALPR are explained in detail using a Raspberry Pi. The book also explains in detail how to use a camera on an Arduino development board to capture images and then save them on a microSD card.
All projects given in this book have been fully tested and are working. Program listings for all Raspberry Pi and Arduino projects used in this book are available for download on the Elektor website.
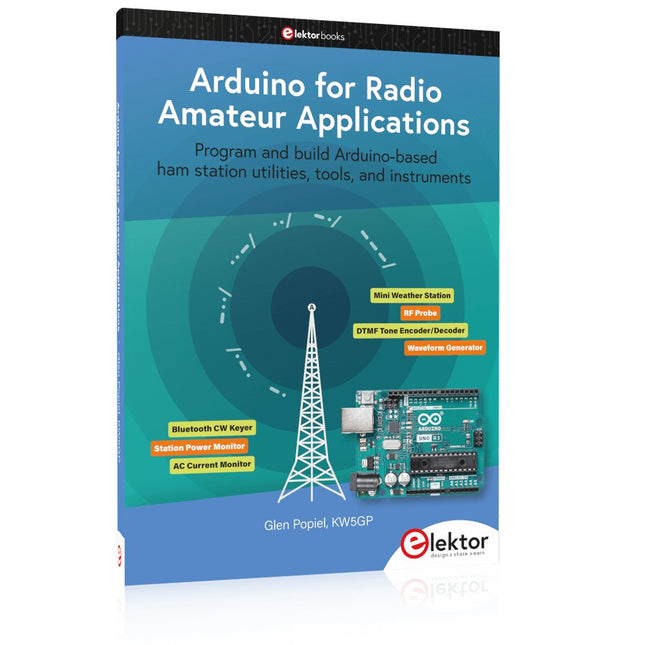
Program and build Arduino-based ham station utilities, tools, and instruments
In addition to a detailed introduction to the exciting world of the Arduino microcontroller and its many variants, this book introduces you to the shields, modules, and components you can connect to the Arduino. Many of these components are discussed in detail and used in the projects included in this book to help you understand how these components can be incorporated into your own Arduino projects. Emphasis has been placed on designing and creating a wide range of amateur radio-related projects that can easily be built in just a few days.
This book is written for ham radio operators and Arduino enthusiasts of all skill levels, and includes discussions about the tools, construction methods, and troubleshooting techniques used in creating amateur radio-related Arduino projects. The book teaches you how to create feature-rich Arduino-based projects, with the goal of helping you to advance beyond this book, and design and build your own ham radio Arduino projects.
In addition, this book describes in detail the design, construction, programming, and operation of the following projects:
CW Beacon and Foxhunt Keyer
Mini Weather Station
RF Probe with LED Bar Graph
DTMF Tone Encoder
DTMF Tone Decoder
Waveform Generator
Auto Power On/Off
Bluetooth CW Keyer
Station Power Monitor
AC Current Monitor
This book assumes a basic knowledge of electronics and circuit construction. Basic knowledge of how to program the Arduino using its IDE will also be beneficial.
Mikrocontroller haben sich in den letzten Jahren in praktisch allen Bereichen der modernen Technik etabliert. In zunehmendem Maße dringen sie auch in die Gebiete der Künstlichen Intelligenz und der Robotertechnik vor. Das vorliegende Buch gibt eine umfassende Einführung in die Welt der Controller-Technik mit all ihren Facetten, von der einfachen Steuerung über die Sensor-Technik bis hin zur Datenübertragung in das Internet.
Als Basis dafür dient das von Elektor entwickelte AVR-Playground-Board. Das Board kann mit Controllern der ATmega-Familie bestückt werden und ist mit dem bekannten Arduino-System kompatibel, so dass auch die verschiedenen Arduino-Hardware-Erweiterungen verwendet werden können.
Für die Programmierung kommt die Sprache „C“ zum Einsatz. Auch hier wird im Buch auf das Arduino-System zurückgegriffen. Die frei verfügbare Arduino-Entwicklungsumgebung erlaubt den leichten Einstieg, ohne dass später Einschränkungen in Kauf genommen werden müssen. Die Hardware-nahe Programmierung steht dabei besonders im Fokus. Nach der Erläuterung von grundlegenden Anwendungen wird auf die anspruchsvolleren Themen wie Interrupts, Timer und Counter, Pulsweitenmodulation und Analog-Digital-Wandlung eingegangen.
Praktische Anwendungen können sowohl mit einem Arduino als auch mit dem AVR-Playground-Board durchgeführt werden. Da das AVR-Playground-Board bereits über eine Vielzahl von Peripherie-Einheiten verfügt, sind nur noch wenige externe Bauteile erforderlich. Das Board kann im Elektor-Shop hier bezogen werden.