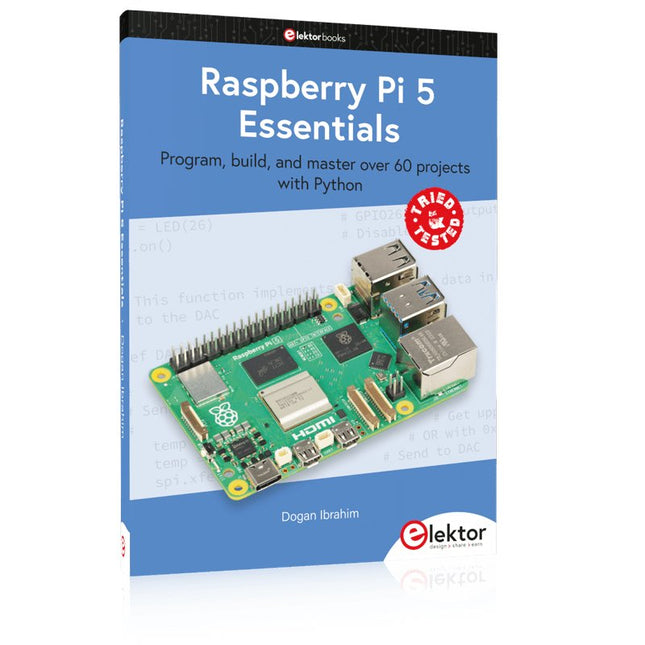
Program, build, and master over 60 projects with Python
The Raspberry Pi 5 is the latest single-board computer from the Raspberry Pi Foundation. It can be used in many applications, such as in audio and video media centers, as a desktop computer, in industrial controllers, robotics, and in many domestic and commercial applications. In addition to the well-established features found in other Raspberry Pi computers, the Raspberry Pi 5 offers Wi-Fi and Bluetooth (classic and BLE), which makes it a perfect match for IoT as well as in remote and Internet-based control and monitoring applications. It is now possible to develop many real-time projects such as audio digital signal processing, real-time digital filtering, real-time digital control and monitoring, and many other real-time operations using this tiny powerhouse.
The book starts with an introduction to the Raspberry Pi 5 computer and covers the important topics of accessing the computer locally and remotely. Use of the console language commands as well as accessing and using the desktop GUI are described with working examples. The remaining parts of the book cover many Raspberry Pi 5-based hardware projects using components and devices such as
LEDs and buzzers
LCDs
Ultrasonic sensors
Temperature and atmospheric pressure sensors
The Sense HAT
Camera modules
Example projects are given using Wi-Fi and Bluetooth modules to send and receive data from smartphones and PCs, and sending real-time temperature and atmospheric pressure data to the cloud.
All projects given in the book have been fully tested for correct operation. Only basic programming and electronics experience are required to follow the projects. Brief descriptions, block diagrams, detailed circuit diagrams, and full Python program listings are given for all projects described.
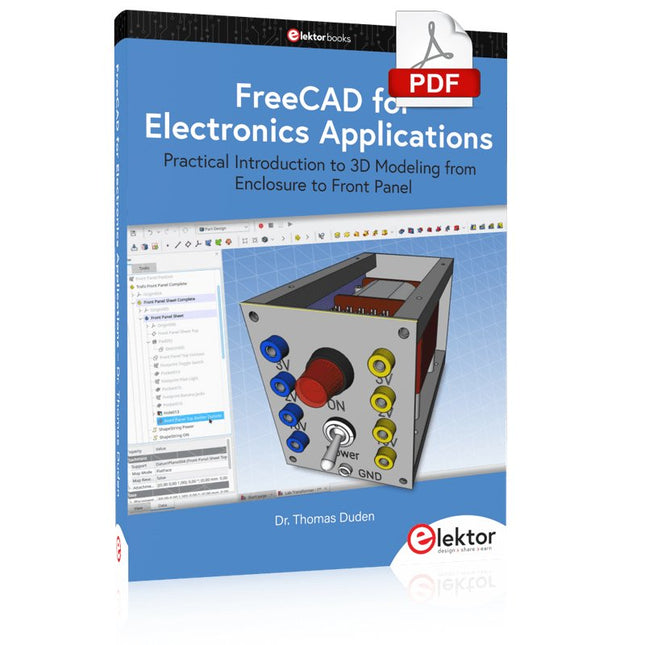
Practical Introduction to 3D Modeling from Enclosure to Front Panel
Embedding a vintage component, creating a professional looking home for a circuit board, or even designing a complex apparatus complete with a chassis – these and many other challenges turn into a stimulating pleasure with FreeCAD. Once you have internalized the basic processes, there are virtually no limits to your imagination.
Starting to use a new software is never straightforward – especially with a tool as versatile as FreeCAD. Manageable, but at the same time easily usable individual components provide the starting point in this book. Putting these components together later results in assemblies.
In the FreeCAD universe, a workable trajectory is demonstrated. The described procedure is illustrative so the examples are easily applied to custom tasks. The devices were made by the author and illustrated with photos.
Creating a 3D design is requiring some effort but the initial investment pays off soon. Besides the impressive spatial representation of the projects, the extracted drawings yield a solid base for documentation and production. Extended FreeCAD capabilities like the unfolding of sheet metal parts enormously add to efficiency and pushes models forward into practical assembly.
Soon you will definitely not want to do without FreeCAD!
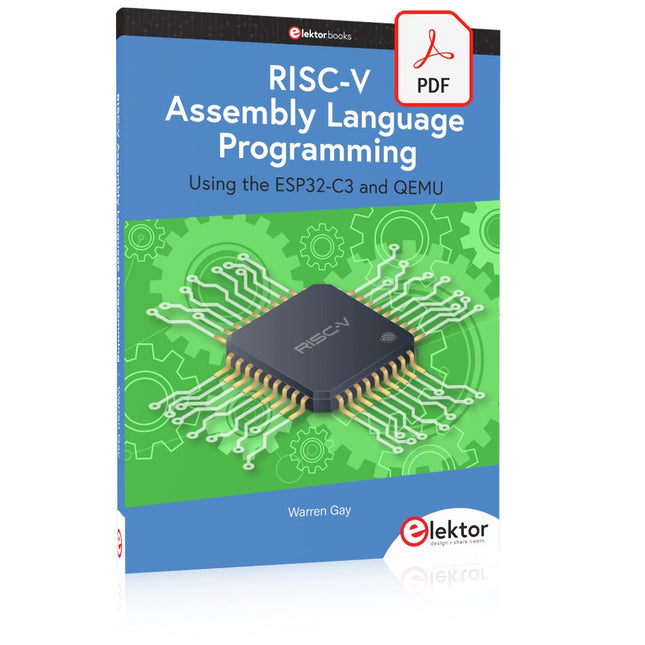
With the availability of free and open source C/C++ compilers today, you might wonder why someone would be interested in assembler language. What is so compelling about the RISC-V Instruction Set Architecture (ISA)? How does RISC-V differ from existing architectures? And most importantly, how do we gain experience with the RISC-V without a major investment? Is there affordable hardware available?
The availability of the Espressif ESP32-C3 chip provides a way to get hands-on experience with RISC-V. The open sourced QEMU emulator adds a 64-bit experience in RISC-V under Linux. These are just two ways for the student and enthusiast alike to explore RISC-V in this book.
The projects in this book are boiled down to the barest essentials to keep the assembly language concepts clear and simple. In this manner you will have “aha!” moments rather than puzzling about something difficult. The focus in this book is about learning how to write RISC-V assembly language code without getting bogged down. As you work your way through this tutorial, you’ll build up small demonstration programs to be run and tested. Often the result is some simple printed messages to prove a concept. Once you’ve mastered these basic concepts, you will be well equipped to apply assembly language in larger projects.
Practical Low-Cost Methods for Reliable PCB Production
This book explains how to carry out reliable SMD assembly using affordable tools and small-scale equipment. It follows the complete workflow step by step, including tool selection, solder paste handling, stencil use, component placement, reflow methods, inspection, and rework.
The focus is on bench-level and small-lab production rather than industrial assembly lines. It shows practical methods for building single and double-sided SMD boards with repeatable results.
Topics include solder paste and flux, temperature profiles, hot air and hotplate techniques, small reflow ovens, inspection methods, and defect correction. Checklists and example workflows are included to help reduce errors and improve consistency.
Key features:
Tools and supplies for SMD assembly and rework
Solder paste types, storage, and handling
Stencils and paste application methods
Pick and place workflow and component orientation
Temperature profiles and reflow methods
Hot air, hotplate, and reflow oven processes
Inspection and quality control
Common defects such as tombstoning and solder bridges
Practical rework and component replacement
Bench-level professional workflows and checklists
This book is designed as a practical bench reference for anyone who wants to assemble and troubleshoot their own SMD boards with reliable results.
Mastering Surface Mount Technology takes you on a crash course in techniques, tips and know-how to successfully introduce surface mount technology in your workflow. Even if you are on a budget you too can jumpstart your designs with advanced fine pitch parts.
Besides explaining methodology and equipment, attention is given to SMT parts technologies and soldering methods. In a step by step way, several projects introduce you to handling surface mount parts and the required skills to successfully build SMT assemblies. Many practical tips and tricks are disclosed that bring surface mount technology into everyone's reach without breaking the bank.
From SRPP and Mu-Follower to OTL Designs
Tube amplifiers suffer from distortion. Fortunately, circuits such as the SRPP amplifier, mu-follower, and beta-follower produce minimal distortion even at output voltages of 50 to 100 Vpeak.
These designs are often published with errors. Without a sound understanding of the theory, it is easy to arrive at a flawed design.
In the first section of this book, we investigate the origin of distortion, while in the second we investigate the design of and SRPP and a mu-follower.
On the internet we can find the most exotic designs. Evaluating them teaches us that these designs often make matters worse rather than better. In the chapter on incorrect SRPPs and mu-followers, we sometimes see bizarre and misguided designs where using a simple single-triode amplifier would perform much better.
Push-pull output stages also exist. A great number of them are examined, and their similarity to the SRPP is discussed. This is done especially with the help of the theory behind the OTL based on the ‘mother’ of all OTLs, the Philips HF303.
Finally, attention is given to frequency characteristics and technical matters such as the supply voltage and the filament power supply.
To illustrate these points, there are a few designs covering the subjects discussed.
This book presents much new theory that has not been published before. It is often an eye-opener, showing that many things have a beautiful and unexpected simplicity.
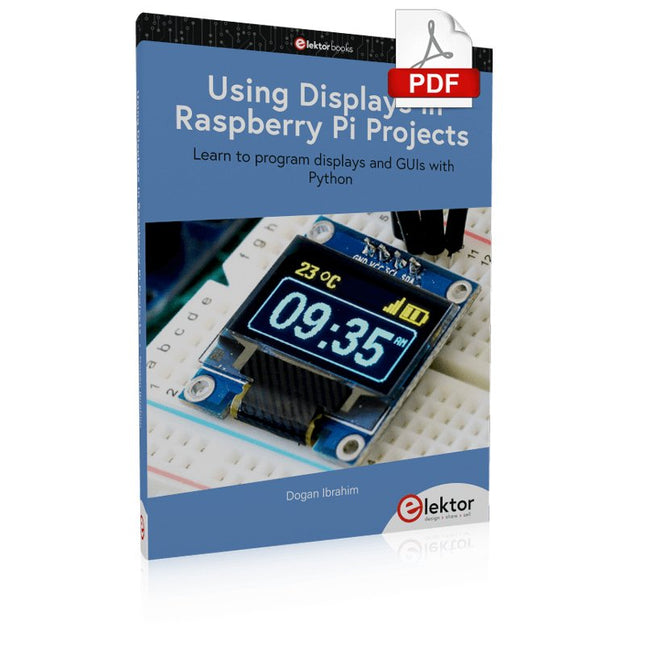
Learn to program displays and GUIs with Python
This book is about Raspberry Pi 4 display projects. The book starts by explaining how to install the latest Raspbian operating system on an SD card, and how to configure and use the GPIO ports.
The core of the book explains the following topics in simple terms with fully tested and working example projects:
Simple LED projects
Bar graph LED projects
Matrix LED projects
Bitmap LED projects
LED strips
LCDs
OLED displays
E-paper displays
TFT displays
7-inch touch screen
GUI Programming with Tkinder
One unique feature of this book is that it covers almost all types of display that readers will need to use in their Raspberry Pi based projects. The operation of each project is fully given, including block diagrams, circuit diagrams, and commented full program listings. It is therefore an easy task to convert the given projects to run on other popular platforms, such as Arduino or PIC microcontrollers.
Python program listings of all Raspberry Pi projects developed in this book are available for download at Elektor.com. Readers can use these programs in their projects. Alternatively, they can modify the programs to suit their applications.
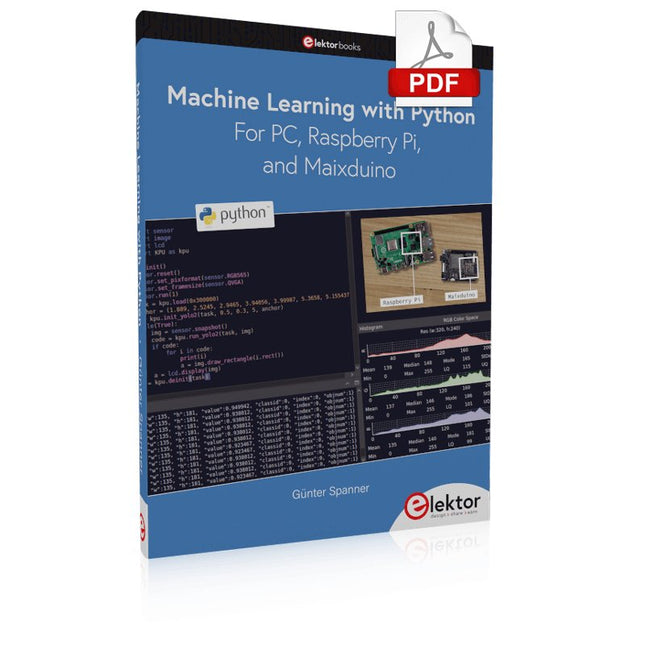
La plupart des gens sont de plus en plus confrontés aux applications de l’intelligence artificielle (IA). Les classements de musique ou de vidéo, les systèmes de navigation, les conseils d'achat, etc. reposent sur des méthodes qui peuvent être attribuées à ce domaine.
Le terme intelligence artificielle a été inventé en 1956 lors d’une conférence internationale connue sous le nom de Dartmouth Summer Research Project. Une approche fondamentale consistait à modéliser le fonctionnement du cerveau humain et à construire des systèmes informatiques avancés sur cette base. Bientôt, le fonctionnement de l’esprit humain devrait être clair. Le transférer sur une machine n’était considéré qu’une petite étape. Cette notion s'est avérée un peu trop optimiste. Néanmoins, les progrès de l’IA moderne, ou plutôt de sa sous-spécialité appelée Machine Learning (ML), ne peuvent plus être niés.
Dans ce livre, plusieurs systèmes différents seront utilisés pour connaître plus en détail les méthodes d’apprentissage automatique. En plus du PC, le Raspberry Pi et le Maixduino démontreront leurs capacités dans les différents projets. Outre des applications telles que la reconnaissance d'objets et de visages, des systèmes pratiques tels que des détecteurs de bouteilles, des compteurs de personnes ou un « œil qui parle » seront également créés.
Ce dernier est capable de décrire acoustiquement des objets ou des visages détectés automatiquement. Par exemple, si un véhicule se trouve dans le champ de vision de la caméra connectée, l'information « Je vois une voiture ! est émis via une parole générée électroniquement. De tels appareils sont des exemples très intéressants de la manière dont, par exemple, les personnes aveugles ou gravement malvoyantes peuvent également bénéficier des systèmes d’IA.
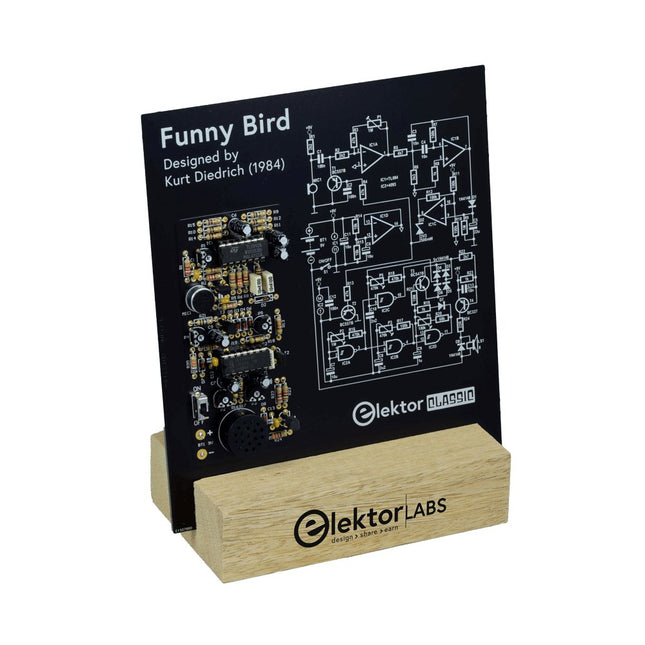
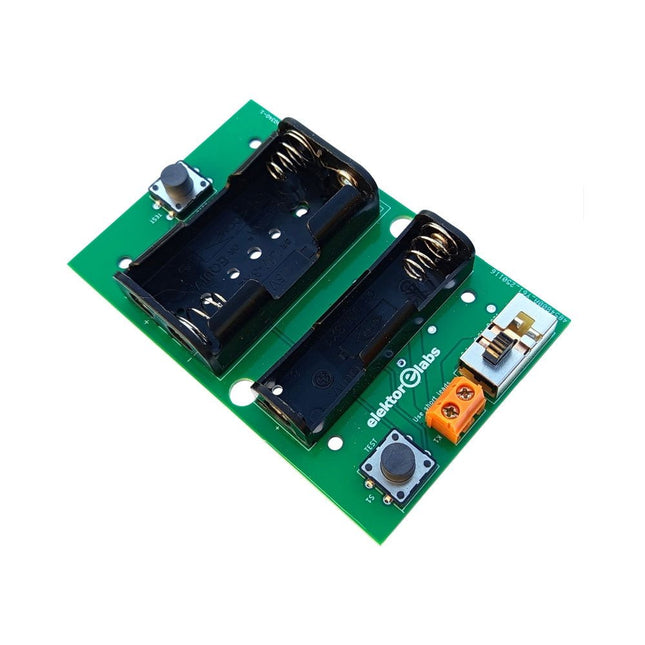
Sifflez et il vous répondra en gazouillant ! Même si de nombreuses personnes possèdent et observent avec amour des oiseaux de toutes sortes, malheureusement la plupart d'entre eux n'ont pas encore appris à communiquer avec nous. Cet oiseau entièrement électronique fait un pas dans la bonne direction : lorsque vous sifflez, il vous répond en gazouillant ! Caractéristiques Réagit au Sifflement Sons d'Oiseaux Réglables (Ton et Durée) Symboles de Circuit Patrimoine d'Elektor Testé et Approuvé par les Laboratoires Elektor Projet Éducatif et Geek Pièces Montage Traditionnel Seulement Inclus Carte de Circuit Imprimé Tous les Composants Socle en Bois Liste des Composants Résistances R1,R2 = 2.2kΩ R3,R4,R13 = 47kΩ R5 = 4.7kΩ R6 = 3.3kΩ R7,R10,R11,R12,R17 = 100kΩ R8,R19,R23 = 1kΩ R9 = 1MΩ R14,R15 = 10kΩ R16,R18 = 470kΩ R20 = 68kΩ R21 = 10MΩ R22 = 2.7kΩ R24 = 22Ω P1,P2 = 1MΩ P3,P5 = 470kΩ P4 = 100kΩ Condensateurs C1,C2,C12 = 100nF C3,C4 = 10nF C5 = 22μF, 16V C6,C7,C11 = 10μF, 16V C8 = 2.2μF, 100V C9 = 1μF, 50V C10 = 2.2nF C13 = 10nF Semi-conducteurs D1,D3,D4,D5,D6,D7,D8 = 1N4148 D2 = Diode zener 3V3 T1,T2 = BC557B T3 = BC547B T4 = BC327-40 IC1 = TL084CN IC2 = 4093 Divers BT1 = Pince de batterie câblée pour 6LR61/PP3 LS1 = Haut-parleur miniature, 8Ω, 0.5W S1 = Interrupteur, glissière, SPDT MIC1 = Microphone électret PCB 230153-1 v1.1
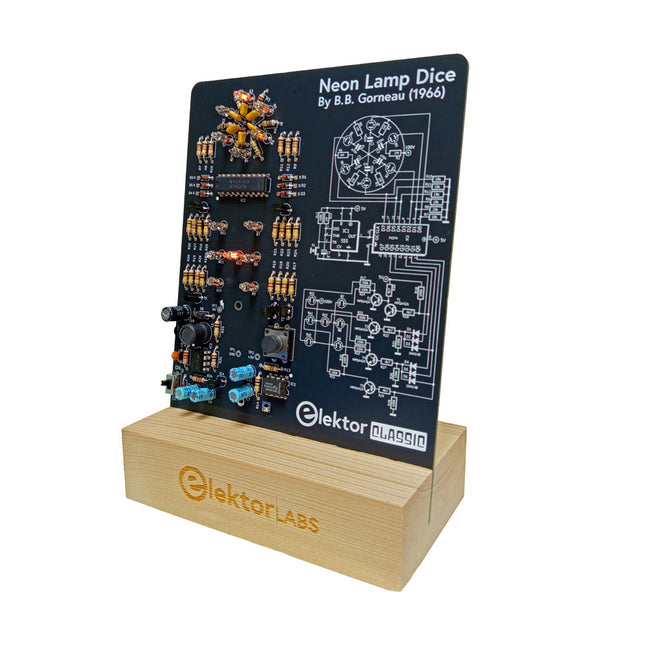
Un dé rétro à l'âme néon
Les dés à LED sont courants, mais leur lumière est froide. Ce dé électronique néon affiche sa valeur grâce à la lueur chaleureuse des néons. Il est idéal pour jouer lors des froides et sombres soirées d'hiver. Les points du dé sont des néons et le générateur de nombres aléatoires est équipé de six néons pour indiquer son fonctionnement.
Même si le dé est équipé d'une alimentation 100 V intégrée, il est totalement sûr. Comme tous les produits Elektor Classic, le schéma du circuit est imprimé sur la face avant du dé, tandis qu'une explication du fonctionnement du circuit se trouve au dos.
Le dé néon est livré sous forme de kit de pièces traversantes faciles à souder. L'alimentation est assurée par une pile 9 V (non fournie).
Caractéristiques
Lumière vintage chaleureuse
Symboles du circuit Elektor Heritage
Essayé et testé par Elektor Labs
Projet éducatif et geek
Pièces traversantes uniquement
Inclus
Carte de Circuit Imprimé
Tous les Composants
Socle en Bois
Requis
Pile 9 V
Liste des composants
Résistances (THT, 150 V, 0.25 W)
R1, R2, R3, R4, R5, R6, R14 = 1 MΩ
R7, R8, R9, R10, R11, R12 = 18 kΩ
R13, R15, R16, R17, R18, R21, R23, R24, R25, R26, R28, R30, R33 = 100 kΩ
R32, R34 = 1.2 kΩ
R19, R20, R22, R27, R29 = 4.7 kΩ
R31 = 1 Ω
Condensateurs
C1, C2, C3, C4, C5, C6 = 470 nF, 50 V, 5 mm pitch
C7, C9, C11, C12 = 1 µF, 16 V, 2 mm pitch
C8 = 470 pF, 50 V, 5 mm pitch
C10 = 1 µF, 250 V, 2.5 mm pitch
Inductances
L1 = 470 µH
Semi-conducteurs
D1, D2, D3, D4, D5, D6, D7 = 1N4148
D8 = STPS1150
IC1 = NE555
IC2 = 74HC374
IC3 = MC34063
IC4 = 78L05
T1, T2, T3, T4, T5 = MPSA42
T6 = STQ2LN60K3-AP
Divers
K1 = Support pile PP3 9 V
NE1, NE2, NE3, NE4, NE5, NE6, NE7, NE8, NE9, NE10, NE11, NE12, NE13 = néon
S2 = interrupteur à glissière miniature
S1 = Bouton-poussoir (12 x 12 mm)
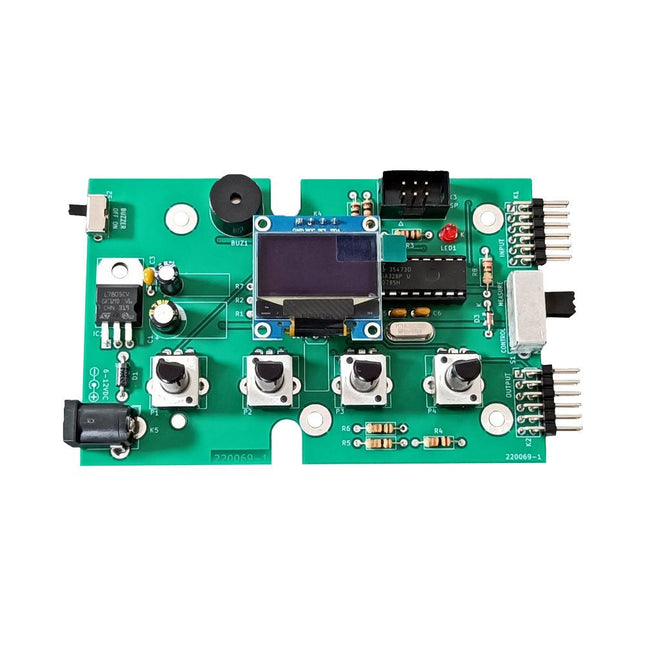
Le kit de test Super Servo Elektor permet le contrôle des servomoteurs et la mesure de leurs signaux. Il permet le test simultané de quatre servomoteurs.
Le testeur est fourni en kit. Tous les composants nécessaires à l'assemblage du dispositif sont fournis dans le kit. Une expérience basique de soudure électronique est nécessaire pour réaliser l'assemblage du kit. Le microcontrôleur est préprogrammé.
Le testeur Super Servo est doté de deux modes de fonctionnement: Control/Manual et Measure/Inputs :
Dans le mode Control/Manual, le Testeur Super Servo délivre à ses sorties , les signaux de contrôle pour quatre servomoteurs, ou pour un contrôleur de vol ou un contrôleur de vitesse ESC (Electronic Speed Controller) pour moteur sans balai (brushless). Les signaux sont contrôlés par quatre potentiomètres.
Dans le mode Measure/Inputs le Testeur Super Servo mesure les signaux des servomoteurs reliés à ses entrées. Ces signaux peuvent par exemple provenir d'un ESC, d'un contrôleur de vol, d'un récepteur ou de tout autre dispositif. Les signaux sont également dirigés vers ses sorties afin de contrôler les servomoteurs, l'ESC ou le contrôleur de vol. Les résultats sont visualisés sur l'écran.
Spécifications
Modes de fonctionnement
Control/Manual et Measure/Inputs (Contrôle manuel et mesures)
Nombre de canaux
3
Entrées des signaux des servomoteurs
4
Sorties des signaux vers les servomoteurs
4
Alarme
Buzzer & LED
Affichage
Écran OLED de 0,96' (128 x 32 pixels)
Tension d'entrée K5
7-12 V CC
Tension d'entrée K1
5-7,5 V CC
Courant d'entrée
30 mA (9 VDC sur K5, K1 et K2 non reliés)
Dimensions
113 x 66 x 25 mm
Poids
60 g
Inclus
Résistances (0,25 W)
R1, R3
1 kΩ, 5%
R2, R4, R5, R6, R7, R9, R10
10 kΩ, 5%
R8
22 Ω, 5%
P1, P2, P3, P4
10 kΩ, potentiomètre vertical linéaire/B
Condensateurs
C1
100 µF 16 V
C2
10 µF 25 V
C3, C4, C7
100 nF
C5, C6
22 pF
Semiconducteurs
D1
1N5817
D2
LM385Z-2.5
D3
BZX79-C5V1
IC1
7805
IC2
ATmega328P-PU, programmé
LED1
LED, 3 mm, rouge
T1
2N7000
Divers
BUZ1
Buzzer Piezo avec oscillateur
K1, K2
Connecteur à 2 rangées de 12 broches à 90°
K5
Connecteur jack
K4
Connecteur à 1 rangée de 4 broches
K3
Connecteur à 2 rangées de 6 broches
S1
Interrupteur à glissière 2P2T
S2
Interrupteur à glissière 1P2T
X1
Quartz, 16 MHz
Support DIP 28 broches pour IC2
Circuit imprimé Elektor
Afficheur OLED de 0,96', 128 x 32 pixels, interface I²C à 4 broches
Liens
Elektor Magazine
Elektor Labs
Learn to Build Intelligent Embedded Systems
Build smarter embedded systems with Arduino UNO Q. This book gives you the tools, knowledge, and confidence to turn ideas into intelligent, working solutions using the Arduino UNO Q platform. Discover how to build intelligent embedded systems with the Arduino UNO Q and AI.
Unlock the full potential of the Arduino UNO Q, a next-generation platform that combines the real-time power of the STM32U585 microcontroller with the flexibility of a Qualcomm Dragonwing QRB2210 microprocessor.
Learn how to rapidly prototype real-world applications using the Arduino IDE for low-level embedded control and Python in Arduino App Lab for high-level development.
Build confidence through hands-on projects that guide you step by step from basic board features to complete working systems.
Explore ready-to-use, AI based Arduino App Lab examples and see how they can jump-start your development and reduce time to deployment.
Step into the world of Edge AI with a clear, practical introduction to Edge Impulse Studio—no prior AI experience required.
Follow a complete, real-world workflow to create a Keyword Spotting AI application, covering data collection, model training, optimization, and on-device inference using the Edge Impulse Studio.
Bridge the gap between embedded systems and machine learning and learn how to bring intelligence directly onto your hardware.
Perfect for embedded engineers, educators, students, and makers looking to stay ahead in AI-enabled product development.
Projects with Thonny-IDE, uPyCraft-IDE, and ESP32
The 'Python' programming language has enjoyed an enormous upswing in recent years. Not least, various single-board systems such as the Raspberry Pi have contributed to its popularity. But Python has also found widespread use in other fields, such as artificial intelligence (AI) or machine learning (ML). It is obvious, therefore, to use Python or the 'MicroPython' variant for use in SoCs (Systems on Chip) as well.
Powerful controllers such as the ESP32 from Espressif Systems offer excellent performance as well as Wi-Fi and Bluetooth functionality at an affordable price. With these features, the Maker scene has been taken by storm. Compared to other controllers, the ESP32 has a significantly larger flash and SRAM memory, as well as a much higher CPU speed. Due to these characteristics, the chip is not only suitable for classic C applications, but also for programming with MicroPython.
This book introduces the application of modern one-chip systems. In addition to the technical background, the focus is on MicroPython itself. After the introduction to the language, the programming skills learned are immediately put into practice. The individual projects are suitable for use in the laboratory as well as for everyday applications. So, in addition to the actual learning effect, the focus is also on the joy of building complete and useful devices. By using laboratory breadboards, circuits of all kinds can be realized with little effort, turning the testing and debugging of the 100% homebrew projects into an instructive pleasure.
The various applications, such as weather stations, digital voltmeters, ultrasound range finders, RFID card readers or function generators, make the projects presented ideally suited for practical courses or subject and study work in the natural sciences, or in science and technology classes.
Example projects with Node-RED, MQTT, WinCC SCADA, Blynk, and ThingSpeak
This comprehensive guide unlocks the power of Modbus TCP/IP communication with Arduino. From the basics of the Modbus protocol right up to full implementation in Arduino projects, the book walks you through the complete process with lucid explanations and practical examples.
Learn how to set up Modbus TCP/IP communication with Arduino for seamless data exchange between devices over a network. Explore different Modbus functions and master reading and writing registers to control your devices remotely. Create Modbus client and server applications to integrate into your Arduino projects, boosting their connectivity and automation level.
With detailed code snippets and illustrations, this guide is perfect for beginners and experienced Arduino enthusiasts alike. Whether you‘re a hobbyist looking to expand your skills or a professional seeking to implement Modbus TCP/IP communication in your projects, this book provides all the knowledge you need to harness the full potential of Modbus with Arduino.
Projects covered in the book:
TCP/IP communication between two Arduino Uno boards
Modbus TCP/IP communication within the Node-RED environment
Combining Arduino, Node-RED, and Blynk IoT cloud
Interfacing Modbus TCP/IP with WinCC SCADA to control sensors
Using MQTT protocol with Ethernet/ESP8266
Connecting to ThingSpeak IoT cloud using Ethernet/ESP8266
L'adaptateur milliohmmètre Elektor utilise la précision d'un multimètre pour mesurer des valeurs de résistance très faibles. Il convertit une résistance en tension mesurable avec un multimètre standard.
L'adaptateur milliohmmètre Elektor permet de mesurer des résistances inférieures à 1 mΩ grâce à la méthode 4 fils (Kelvin). Il est utile pour localiser les courts-circuits sur les circuits imprimés.
L'adaptateur dispose de trois plages de mesure : 1 mΩ, 10 mΩ et 100 mΩ, sélectionnables via un interrupteur à glissière. Il intègre également des résistances d'étalonnage. L'adaptateur milliohmmètre Elektor est alimenté par trois piles AA de 1,5 V (non fournies).
Spécifications
Gammes de mesure
1 mΩ, 10 mΩ, 100 mΩ, 0,1%
Alimentation
3x piles AA 1,5 V (non fournies)
Dimensions
103 x 66 x 18 mm (compatible avec le boîtier de type Hammond 1593N, non fourni)
Spécificité
Résistances d'étalonnage intégrées
Téléchargements
Documentation
An 8-in-1 test & measurement instrument for the electronics workbench
A well-equipped electronics lab is crammed with power supplies, measuring devices, test equipment and signal generators. Wouldn‘t it be better to have one compact device for almost all tasks? Based on the Arduino, a PC interface is to be developed that’s as versatile as possible for measurement and control. It simply hangs on a USB cable and – depending on the software – forms the measuring head of a digital voltmeter or PC oscilloscope, a signal generator, an adjustable voltage source, a frequency counter, an ohmmeter, a capacitance meter, a characteristic curve recorder, and much more.
The circuits and methods collected here are not only relevant for exactly these tasks in the "MSR" electronics lab, but many details can also be used within completely different contexts.
Resonances From Aether Days
A Pictorial and Technical Analysis from WWII to the Internet Age
From the birth of radio to the late 1980s, much of real life unfolded through shortwave communication. World War II demonstrated—beyond a shadow of a doubt—that effective communications equipment was a vital prerequisite for military success. In the postwar years, shortwave became the backbone on which many of the world's most critical services depended every day.
All the radio equipment—through whose cathodes, grids, plates, and transistors so much of human history has flowed—is an exceptional subject of study and enjoyment for those of us who are passionate about vintage electronics. In this book, which begins in the aftermath of World War II, you’ll find a rich collection of information: descriptions, tips, technical notes, photos, and schematics that will be valuable for anyone interested in restoring—or simply learning about—these extraordinary witnesses to one of the most remarkable eras in technological history.
My hope is that these pages will help preserve this vast treasure of knowledge, innovation, and history—a heritage that far transcends the purely technical.
Concrétisez vos rêves, réalisez les projets les plus fous : un odomètre pour la roue de votre hamster, la surveillance complètement automatisée de votre fourmilière avec interface web, ou le Sandwich-O-Mat – une machine qui grille les sandwichs de votre choix.Avec les cartes Arduino et le mouvement DIY (« fais-le toi-même ») ou maker, se mettre à programmer des microcontrôleurs est devenu un jeu d'enfant. Une deuxième révolution a eu lieu : des développeurs ingénieux ont mis sur le marché de petites cartes – appelées « shields » ou modules – qui simplifient considérablement l'utilisation d'autres dispositifs. Ces petits modules contiennent tous les composants électroniques nécessaires pour la connexion au microcontrôleur ; quelques fils avec des fiches suffisent pour le raccordement, ce qui évite d'avoir à câbler et fait gagner du temps. En outre, il est également possible de manipuler de minuscules composants dépourvus de pattes de connexion (ceux de type CMS).ProjetsArduino et le monde extérieurCapteur BMP180, introduction aux bibliothèques et à l'I²CInitiation aux entrées/sorties avec un shield polyvalentAdaptateur I²C pour LCD et afficheurs à matrice de pointsShield clavier & LCDConvertisseur de niveauW5100 : connexion à internetShields d'extension des entrées/sortiesRelais et relais statiquesShield multifonction : unité de commande universelleConnexion d'un lecteur de carte SD par SPITouches et afficheurs à 7 segmentsConvertisseur analogique/numérique à 16 bitsConvertisseur numérique/analogique MCP4725Pilote de servomoteurs à 16 voies PWMLecteur MP3Enregistreur de données GPS avec stockage sur carte SDCapteur tactileJoystickSHT31 : température et humiditéCapteur d'UV-A VEML6070Temps de vol VL53L0XMesure de distance à ultrasonsAfficheur matriciel à LED à base de MAX7219Horloge en temps réel DS3231Circuit d'extension de port MCP23017Communication radio à 433 MHzGyroscope MPU-6050Accéléromètre ADXL345LED RVB WS2812Cartes d'alimentationCapteurs de gaz MQ-xxCapteur de dioxyde de carbone (CO2)Capteur de courant ACS712Capteur de courant INA219Pilote de moteur L298Kit RFID MFRC522Moteur pas à pas 28BYJ-48Carte avec pilote de moteur ultra-silencieux TMC2209Potentiomètre numérique X9C10xÉcran couleur TFT avec contrôleur/pilote ST7735Écran à encre électroniqueModule BluetoothCompteur GeigerModule GSM SIM800LMultiplexeur I²CModule CAN (Controller Area Network)
From Simple Ciphers to Secure Systems
Understanding how to apply cryptography on modern microcontrollers is essential for building secure, reliable, and trustworthy systems. This book explains cryptography in the context of embedded hardware, from classical ciphers that illustrate core principles to modern techniques such as AES for practical high-security applications.
By combining mathematical theory with real-world microcontroller implementations, readers learn not only how cryptography works, but also how to implement it effectively on systems with limited processing power and memory. The book is intended for students starting out in cryptography, hobbyists securing personal projects, and engineers looking for a structured guide to embedded security.
The book covers these key topics in applied cryptography:
Classical ciphers on Arduino Uno and Raspberry Pi Pico, with full programs: Spartan Scytale, Hebrew Atbash, Caesar, ROT13, Alberti Disk, Vigenère, Affine, Polybius, Playfair, Beaufort, Ottoman Codebook, and One-Time Pad.
Hacking classical ciphers using microcontrollers, with examples.
Pseudo-random (PRNG) and true random number generation (TRNG) on microcontrollers.
Symmetric-key cryptography with full programs: DES and AES-128/256.
Memory and speed constraints of cryptography on microcontrollers.
Asymmetric cryptography: public/private keys, digital signatures, key distribution and derivation (KDF), RSA, and SHA-256 implementations.
A complete secure communication program using RSA and AES-256.
A glossary of commonly used cryptography terms.
Kick off with the MAX1000 and VHDPlus
Ready to Master FPGA Programming? In this guide, we’re diving into the world of Field Programmable Gate Arrays (FPGAs) – a configurable integrated circuit that can be programmed after manufacturing. Imagine bringing your ideas to life, from simple projects to complete microcontroller systems!
Meet the MAX1000: a compact and budget-friendly FPGA development board packed with features like memory, user LEDs, push-buttons, and flexible I/O ports. It’s the ideal starting point for anyone wanting to learn about FPGAs and Hardware Description Languages (HDLs).
In this book, you’ll get hands-on with the VHDPlus programming language – a simpler version of VHDL. We’ll work on practical projects using the MAX1000, helping you gain the skills and confidence to unleash your creativity.
Get ready for an exciting journey! You’ll explore a variety of projects that highlight the true power of FPGAs. Let’s turn your ideas into reality and embark on your FPGA adventure – your journey starts now!
Exciting Projects You’ll Find in This Book
Arduino-Driven BCD to 7-Segment Display Decoder
Use an Arduino Uno R4 to supply BCD data to the decoder, counting from 0 to 9 with a one-second delay
Multiplexed 4-Digit Event Counter
Create an event counter that displays the total count on a 4-digit display, incrementing with each button press
PWM Waveform with Fixed Duty Cycle
Generate a PWM waveform at 1 kHz with a fixed duty cycle of 50%
Ultrasonic Distance Measurement
Measure distances using an ultrasonic sensor, displaying the results on a 4-digit 7-segment LED
Electronic Lock
Build a simple electronic lock using combinational logic gates with push buttons and an LED output
Temperature Sensor
Monitor ambient temperature with a TMP36 sensor and display the readings on a 7-segment LED
Téléchargements
Software
Understanding and Using Them Effectively
What happens in electronics is invisible to the naked eye. The instrument that allows to accurately visualize electrical signals, the one through which the effects of electronics become apparent to us, is the oscilloscope.
Alas, when one first ventures into electronics, it is often without an oscilloscope. And one is left fumbling, both physically and mentally. Observing an electrical signal on a screen for the first time is a revelation. Nobody wishes to forgo that marvel again. There is no turning back.
In electronics, if one wishes to progress with both enjoyment and understanding, an oscilloscope is essential. This marks the beginning of a period of questioning: how to choose one? And no sooner is that question answered than a whole string of others arises, which can be summed up in just one: how does one use the oscilloscope in such a way that what it displays truly reflects the reality of the signals?
Rémy Mallard is a passionate communicator with a gift for making complex technical subjects understandable and engaging. In this book, he provides clear answers to essential questions about using an oscilloscope and offers a wealth of guidance to help readers explore and understand the electrical signals behind electronic systems. With his accessible style and practical insights, this book is a valuable tool for anyone eager to deepen their understanding of electronics.
Arduino Uno est une plaque de développement de microcontrôleur, avec superposition de code source (matériel, EDI et bibliothèques). Arduino est l'une des plus grandes communautés de programmeurs, d'ingénieurs et d'électroniciens, de passionnés et d'étudiants universitaires. Merci pour vos bibliothèques, le programme devient adapté à votre jeune enfant et la rapidité. Les bibliothèques entièrement testées et fonctionnelles facilitent le test des programmes.
Le Raspberry Pi 4, une version récente du système nano-ordonné, est utilisé pour les appareils multimédias, ainsi que pour les applications industrielles, robotiques, domestiques et commerciales. Grâce à la connectivité Wi-Fi et Bluetooth, votre Raspberry Pi 4 est parfait pour la commande et la surveillance à distance via Internet.
Ce livre avec une œuvre de Raspberry Pi 4 et de l'Arduino Uno dans des applications de régulation avec l'algorithme PID. Après avoir examiné la théorie des systèmes de régulation et des systèmes intégrés, l'évaluation des fonctions du projet et les tests de pilotage des systèmes de régulation PID en temps réel. Le timing et la structure des paramètres PID et le timing et la structure des systèmes détaillés et détaillés (schémas fonctionnels, schémas de circuits, algorithmes de régulation PID, liste complète des cartes).
Ces projets s'appuient constamment sur la théorie et les applications des régulateurs PID. C'est un simple modificateur pour d'autres applications. Les projets pour le Raspberry Pi 4 sont adaptables selon les différents modèles de la famille Raspberry Pi.
Le livre couvre les sujets suivants :
Systèmes de régulation et systèmes ouverts et fermés
Capteurs analogiques et numériques
Fonctions de transfert et de système en continu
Enregistrements temporels des systèmes du 1er et du 2ème ordre
Systèmes discrets (nombres)
Les régulateurs PID sont des systèmes à température continue
Numéros PID des régulateurs
Régulation de température selon Raspberry Pi et Arduino Uno
Régulation de température PID à l'aide de Raspberry Pi et Arduino Uno
Pilotage continu de moteurs utilisant Raspberry Pi et Arduino Uno
Régulation PID pour surveiller le niveau du Raspberry Pi et de l'Arduino Uno
Régulation PID pour piloter une LED avec Raspberry Pi et Arduino Uno
Master the software tools behind the STM32 microcontroller
This book is project-based and aims to teach the software tools behind STM32 microcontroller programming. Author Majid Pakdel has developed projects using various different software development environments including Keil MDK, IAR Embedded Workbench, Arduino IDE and MATLAB. Readers should be able to use the projects as they are, or modify them to suit to their own needs. This book is written for students, established engineers, and hobbyists. STM32 microcontroller development boards including the STM32F103 and STM32F407 are used throughout the book. Readers should also find it easy to use other ARM-based development boards.
Advanced Programming with STM32 Microcontrollers includes:
Introduction to easy-to-use software tools for STM32
Accessing the features of the STM32
Practical, goal oriented learning
Complete code available online
Producing practical projects with ease
Topics cover:
Pulse Width Modulation
Serial Communication
Watchdog Timers
I²C
Direct Memory Access (DMA)
Finite State Machine Programming
ADCs and DACs
External Interupts
Timers and Counters
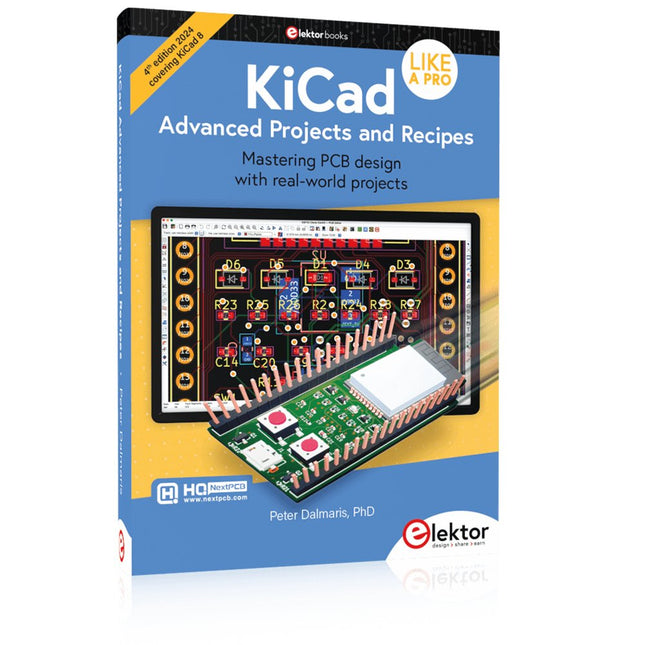
Mastering PCB design with real-world projects
This book builts on KiCad Like a Pro – Fundamentals and Projects and aims to help you practice your new KiCad skills by challenging you in a series of real-world projects. The projects are supported by a comprehensive set of recipes with detailed instructions on how to achieve a variety of simple and complex tasks. Design the PCBs for a solar power supply, an LED matrix array, an Arduino-powered datalogger, and a custom ESP32 board. Understand the finer details of the interactive router, how to manage KiCad project teams with Git, how to use an autorouter on 2 and 4-layer PCBs, and much more.
KiCad 8 is a modern, cross-platform application suite built around schematic and design editors. This stable and mature PCB tool is a perfect fit for electronic engineers and makers. With KiCad 8, you can create PCBs of any complexity and size without the constraints associated with the commercial packages.
Here are the most significant improvements and features in KiCad 8, both over and under the hood:
Modern user interface, completely redesigned from earlier versions
Improved and customizable electrical and design rule checkers
Theme editor allowing you to fully customize the look of KiCad on your screen
Ability to import projects from Eagle, CADSTART, and more
An improved and tightly integrated SPICE circuit simulator
Autorouting with the Freerouting plugin
Filters define which elements of a layout are selectable
Enhanced interactive router helps you draw single tracks and differential pairs with precision
New or enhanced tools to draw tracks, measure distances, tune track lengths, etc.
Enhanced tool for creating filled zones
A customizable coordinate system facilitates data exchange with other CAD applications
Realistic ray-tracing capable 3D viewer
Differential pair routing
Rich repositories of symbol, footprint, and 3D shape libraries
Python scripting API for programmatic customization and extensions
Improved footprint wizard for fast custom footprints