
Meilleures ventes
-

Elektor Publishing Elektronenröhren in der Praxis
Grundlagen, Schaltungen und sichere Anwendungen für Einsteiger und Fortgeschrittene Elektronenröhren üben bis heute eine besondere Faszination aus. Ihre langlebige Funktion, ihre Robustheit und ihr charakteristisches Verhalten unterscheiden sie grundlegend von moderner Halbleitertechnik. Trotz ihres Alters sind Röhren keineswegs nur historische Bauteile, sondern finden auch heute noch Anwendung in Audiotechnik, Messtechnik und vor allem im Hobbybereich. Dieses Buch richtet sich an Elektronikinteressierte und Bastler, die Elektronenröhren nicht nur in der Theorie kennenlernen und verstehen, sondern auch in der Praxis einsetzen möchten. Es vermittelt die Grundlagen der Röhrentechnik, erklärt die unterschiedlichen Bauformen und Bezeichnungen, zeigt typische Schaltungen und geht außerdem auf Spannungsversorgung und Netzteile sowie auf Messungen und sicherheitsrelevante Aspekte ein. Der Schwerpunkt liegt auf praxisnahen Erklärungen und realistischen Beispielen aus der Werkstatt. Zahlreiche Hinweise helfen, typische Fehler zu vermeiden, Schaltungen aufzubauen und Röhrengeräte sowie deren Aufbau zu verstehen. Grundkenntnisse der Elektronik werden vorausgesetzt. „Elektronenröhren in der Praxis“ bietet einen verständlichen und fundierten Einstieg in die Röhrentechnik – sachlich, nachvollziehbar und mit klarem Fokus auf die praktische Anwendung.
€ 34,80
Meilleur prix
-
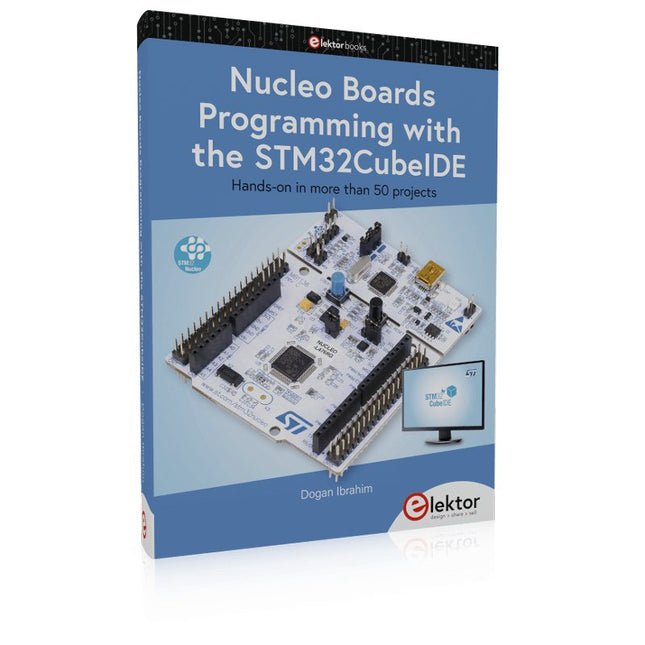
Elektor Publishing Nucleo Boards Programming with the STM32CubeIDE
Hands-on in more than 50 projects STM32 Nucleo family of processors are manufactured by STMicroelectronics. These are low-cost ARM microcontroller development boards. This book is about developing projects using the popular STM32CubeIDE software with the Nucleo-L476RG development board. In the early Chapters of the book the architecture of the Nucleo family is briefly described. The book covers many projects using most features of the Nucleo-L476RG development board where the full software listings for the STM32CubeIDE are given for each project together with extensive descriptions. The projects range from simple flashing LEDs to more complex projects using modules, devices, and libraries such as GPIO, ADC, DAC, I²C, SPI, LCD, DMA, analogue inputs, power management, X-CUBE-MEMS1 library, DEBUGGING, and others. In addition, several projects are given using the popular Nucleo Expansion Boards. These Expansion Boards plug on top of the Nucleo development boards and provide sensors, relays, accelerometers, gyroscopes, Wi-Fi, and many others. Using an expansion board together with the X-CUBE-MEMS1 library simplifies the task of project development considerably. All the projects in the book have been tested and are working. The following sub-headings are given for each project: Project Title, Description, Aim, Block Diagram, Circuit Diagram, and Program Listing for the STM32CubeIDE. In this book you will learn about STM32 microcontroller architecture; the Nucleo-L476RG development board in projects using the STM32CubeIDE integrated software development tool; external and internal interrupts and DMA; DEBUG, a program developed using the STM32CubeIDE; the MCU in Sleep, Stop, and in Standby modes; Nucleo Expansion Boards with the Nucleo development boards. What you need a PC with Internet connection and a USB port; STM32CubeIDE software (available at STMicroelectronics website free of charge) the project source files, available from the book’s webpage hosted by Elektor; Nucleo-L476RG development board; simple electronic devices such as LEDs, temperature sensor, I²C and SPI chips, and a few more; Nucleo Expansion Boards (optional).
€ 49,95
Membres : € 44,96
-

Elektor Digital LEDs, Lasers, and Sunlight (E-book)
Principles, Design, and Real-World Applications of Modern Photonics Light shapes our world—from the glow of a simple LED to the precision of a laser beam and the immense power of the sun. LEDs, Lasers, and Sunlight – Principles, Design, and Real-World Applications of Modern Photonics is your comprehensive guide to understanding, designing, and applying modern light technologies. This book takes you on a journey from the fundamentals of photonics—covering the nature of light, optical laws, and color theory—to real-world engineering with today’s most important light sources. You’ll explore how LEDs work, how to design efficient lighting systems, and how to tackle practical challenges such as thermal management, power supply design, and optical performance. Beyond illumination, the book opens doors to specialized applications: horticultural lighting for plant growth, infrared and ultraviolet technologies, modern display systems from LCD to MicroLED, and the fascinating world of lasers—from their physics to their use in medicine, industry, and communication. It also connects light engineering to sustainability through solar energy and thermal radiation. Written with a strong practical focus, this book bridges theory and application. Whether you are an engineer, student, or advanced hobbyist, you’ll gain the tools to turn concepts into working solutions—from selecting components to building complete systems. If you want to understand light not just as a phenomenon, but as a powerful engineering tool, this book will illuminate the way.
€ 49,95
Membres : € 44,96
-

Elektor Digital Mastering FPGA Chip Design (E-book)
For Speed, Area, Power, and Reliability This book teaches the fundamentals of FPGA operation, covering basic CMOS transistor theory to designing digital FPGA chips using LUTs, flip-flops, and embedded memories. Ideal for electrical engineers aiming to design large digital chips using FPGA technology. Discover: The inner workings of FPGA architecture and functionality. Hardware Description Languages (HDL) like Verilog and VHDL. The EDA tool flow for converting HDL source into a functional FPGA chip design. Insider tips for reliable, low power, and high performance FPGA designs. Example designs include: Computer-to-FPGA UART serial communication. An open-source Sump3 logic analyzer implementation. A fully functional graphics controller. What you need: Digilent BASYS3 or similar FPGA eval board with an AMD/Xilinx FPGA. Vivado EDA tool suite (available for download from AMD website free of charge). Project source files available from author’s GitHub site.
€ 32,95
Membres : € 29,66
-
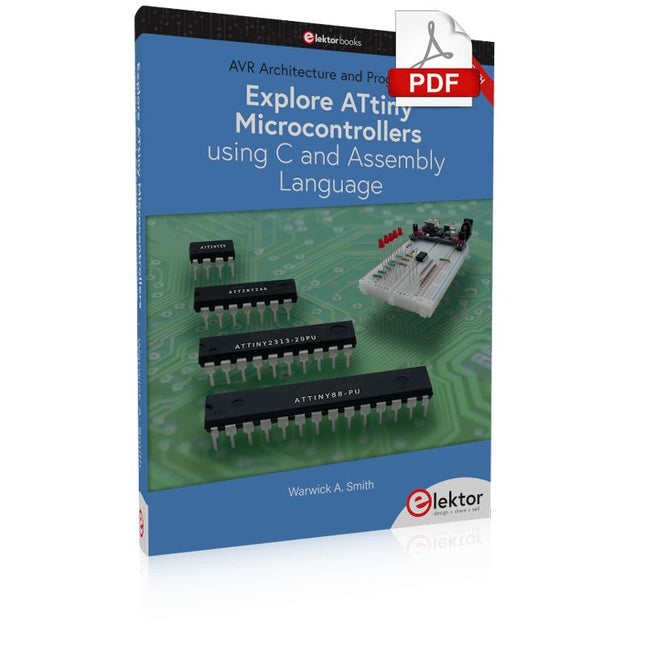
Elektor Digital Explore ATtiny Microcontrollers using C and Assembly Language (E-book)
Un aperçu approfondi de l'architecture AVR 8 bits présente dans les microcontrôleurs ATtiny et ATmega, principalement d'un point de vue logiciel et programmation. Explorez l'architecture AVR en utilisant le langage C et le langage assembleur dans Microchip Studio (anciennement Atmel Studio) avec les microcontrôleurs ATtiny. Apprenez les détails du fonctionnement interne des microcontrôleurs AVR, notamment les registres internes et la carte mémoire des microcontrôleur ATtiny. Programmez les microcontrôleurs ATtiny en utilisant un programmateur/débogueur Atmel-ICE, ou utilisez un programmateur "maison" bon marché, ou même un Arduino Uno comme programmateur. La plupart des exemples de code peuvent être exécutés à l'aide du simulateur AVR de Microchip Studio. Apprenez à écrire des programmes pour les microcontrôleurs ATtiny en langage assembleur. Découvrez comment le langage assembleur est converti en instructions de code machine par le programme assembleur. Découvrez comment les programmes écrits en langage de programmation C se traduitsent en langage assembleur et finalement en instructions de code machine. Utiliser le débogueur Microchip Studio en combinaison avec un programmateur/débogueur USB matériel pour tester les programmes en langage assembleur et langage C ou utiliser le simulateur AVR Microchip Studio. Les microcontrôleurs ATtiny en boîtier DIP sont utilisés dans ce volume pour une exploitation facile sur des platine d'essai électroniques, en ciblant principalement les ATtiny13(A) et ATtiny25/45/85. Comprenez la synchronisation des instructions et les horloges des microcontrôleurs AVR en utilisant les microcontrôleurs ATtiny. Devenez un expert AVR avec des compétences avancées en débogage et en programmation.
€ 34,95
Membres : € 31,46
-

Elektor Digital Arduino UNO Q and AI (E-book)
Learn to Build Intelligent Embedded Systems Build smarter embedded systems with Arduino UNO Q. This book gives you the tools, knowledge, and confidence to turn ideas into intelligent, working solutions using the Arduino UNO Q platform. Discover how to build intelligent embedded systems with the Arduino UNO Q and AI. Unlock the full potential of the Arduino UNO Q, a next-generation platform that combines the real-time power of the STM32U585 microcontroller with the flexibility of a Qualcomm Dragonwing QRB2210 microprocessor. Learn how to rapidly prototype real-world applications using the Arduino IDE for low-level embedded control and Python in Arduino App Lab for high-level development. Build confidence through hands-on projects that guide you step by step from basic board features to complete working systems. Explore ready-to-use, AI based Arduino App Lab examples and see how they can jump-start your development and reduce time to deployment. Step into the world of Edge AI with a clear, practical introduction to Edge Impulse Studio—no prior AI experience required. Follow a complete, real-world workflow to create a Keyword Spotting AI application, covering data collection, model training, optimization, and on-device inference using the Edge Impulse Studio. Bridge the gap between embedded systems and machine learning and learn how to bring intelligence directly onto your hardware. Perfect for embedded engineers, educators, students, and makers looking to stay ahead in AI-enabled product development.
€ 29,95
Membres : € 26,96
-

Elektor Publishing Introduction to Electronic Filters
Learn RC and RL Filters with Hands-On Circuits and Simulation Introduction to Electronic Filters is your comprehensive guide to understanding, designing, and applying first-order electronic filters using resistors, capacitors, and inductors. Whether you are a student, maker, or educator, this book demystifies the theory behind RC and RL filters and bridges the gap between concepts and real-world applications through simulation and experimentation. From the basics of frequency response and phase shift to hands-on breadboard builds and Python-based simulations, this book offers a deeply practical learning experience. You will learn to analyse filters using Bode plots and phasors, and explore applications in audio tone shaping, sensor signal conditioning, noise reduction, and power supply filtering. As you progress, you’ll build, measure, simulate, and tune filters using modern tools like CircuitLab, Python, and the Analog Discovery 3. Each chapter includes thoughtfully crafted activities that reinforce learning by doing – designing filters for specific tasks, simulating dynamic behaviour, and observing how theory translates into performance. Inside you’ll find: A clear introduction to the fundamentals of electronic filters Detailed explanations of RC and RL filters, cutoff frequency, and phase Guided activities using both simulation and hardware tools Real-life applications in audio, sensors, power supplies, and more A beginner-friendly primer on Python and algebra for electronics Whether you’re working through simulations or experimenting with real components on your workbench, this book will help you develop a solid understanding of electronic filters and their role in practical circuits.
€ 39,95
Membres : € 35,96
-

Elektor Digital Professional SMD Assembly (E-book)
Practical Low-Cost Methods for Reliable PCB Production This book explains how to carry out reliable SMD assembly using affordable tools and small-scale equipment. It follows the complete workflow step by step, including tool selection, solder paste handling, stencil use, component placement, reflow methods, inspection, and rework. The focus is on bench-level and small-lab production rather than industrial assembly lines. It shows practical methods for building single and double-sided SMD boards with repeatable results. Topics include solder paste and flux, temperature profiles, hot air and hotplate techniques, small reflow ovens, inspection methods, and defect correction. Checklists and example workflows are included to help reduce errors and improve consistency. Key features: Tools and supplies for SMD assembly and rework Solder paste types, storage, and handling Stencils and paste application methods Pick and place workflow and component orientation Temperature profiles and reflow methods Hot air, hotplate, and reflow oven processes Inspection and quality control Common defects such as tombstoning and solder bridges Practical rework and component replacement Bench-level professional workflows and checklists This book is designed as a practical bench reference for anyone who wants to assemble and troubleshoot their own SMD boards with reliable results.
€ 19,95
Membres : € 17,96
-

Elektor Labs Analyseur logique USB (8 voies, 24 MHz)
Cet analyseur logique USB est un analyseur logique à 8 voies avec chaque entrée à double usage pour l'enregistrement de données analogiques. Idéal pour le débogage et l'analyse de signaux tels que I²C, UART, SPI, CAN et 1-Wire. Il fonctionne en échantillonnant une entrée numérique connectée à un dispositif en test (DUT) à une fréquence d'échantillonnage élevée. La connexion au PC se fait via USB. Spécifications Voies 8 voies numériques Fréquence d'échantillonnage maximale 24 MHz Tension d'entrée maximale 0 V ~ 5 V Température de fonctionnement 0°C ~ 70°C Impédance d'entrée 1 MΩ || 10 pF Protocoles pris en charge I²C, SPI, UART, CAN, 1-Wire, etc. Connexion au PC USB Dimensions 55 x 28 x 14 mm Inclus Analyseur logique USB (8 voies, 24 MHz) Câble USB Nappe de fils de liaison Téléchargements Logiciel
€ 19,95
Membres : € 17,96
-
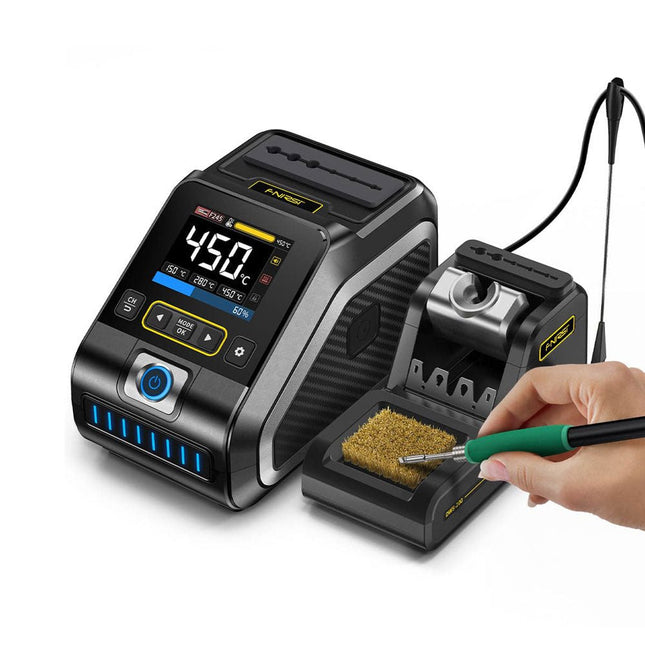
FNIRSI FNIRSI DWS-200 Station de soudure intelligente (avec poignée F245 + 6 pointes de soudure)
La FNIRSI DWS-200 est une puissante station de soudage intelligente de 200 W, idéale pour les applications de soudage électronique. Alimenté par une alimentation à découpage, il fonctionne sans problème avec une large plage de tension d'entrée de 100 à 240 V. La station offre une plage de température réglable de 100°C à 450°C et permet de basculer facilement entre °C et °F. Pour améliorer l'efficacité, il prend en charge jusqu'à trois valeurs de température prédéfinies et peut se connecter à un support de fer à souder pour l'activation du mode veille. La station dispose également d'un mode de courbe de température dynamique pour la surveillance des données en temps réel, garantissant des performances précises et cohérentes dans les tâches de soudage exigeantes. Features Puissance de sortie maximale de 200 W, permettant un chauffage rapide Large entrée de tension adaptative de 100 à 240 V Écran TFT couleur HD de 2,8 pouces avec contrôle intelligent Plusieurs groupes prédéfinis pour basculer rapidement entre différents paramètres Prend en charge les types de poignées à souder F245 et F210, offrant ainsi une flexibilité pour différentes applications de soudage Mode veille en temps réel pour prolonger la durée de vie de la panne à souder Surveillance multimode en temps réel de l'état de l'alimentation et de la température, améliorant ainsi la sécurité et la précision Spécifications Puissance maximale 200 W (maximum) Plage de température 100°C~450°C Écran Écran couleur TFT HD de 2,8 pouces Temps de chauffage 1 seconde Temps de fusion 3 secondes Tension d'entrée 100-240 V (CA) Fusible d'entrée 3A Type de poignée à souder F245 Dimensions (station) 156 x 96 x 103 mm Poids (station) 475 g Inclus 1x FNIRSI DWS-200 station de soudage 1x Poignée à souder F245 6x Pannes à souder (B, KU, K, C2, I, JS) 1x Câble de connexion 2x Coups de main 1x Câble d'alimentation (UE) Téléchargements Manual Firmware V1.3
€ 177,52
-
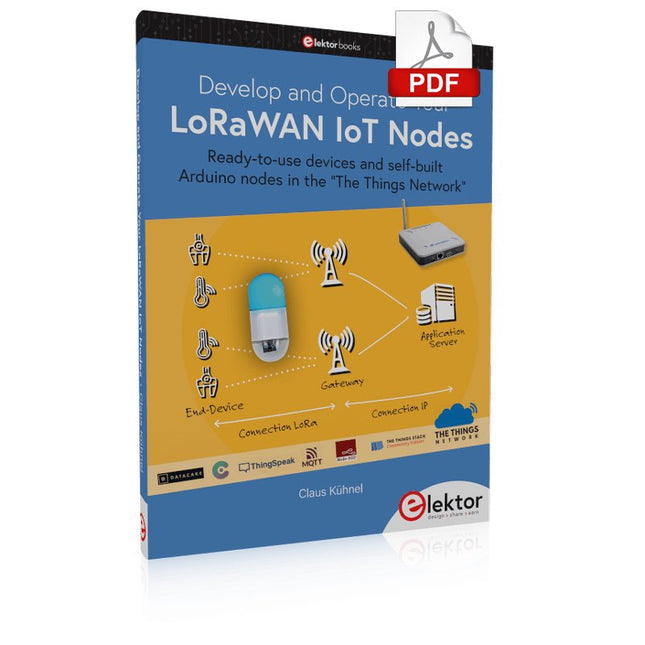
Elektor Digital Develop and Operate Your LoRaWAN IoT Nodes (E-book)
Ready-to-use devices and self-built Arduino nodes in the 'The Things Network' LoRaWAN has developed excellently as a communication solution in the IoT. The Things Network (TTN) has contributed to this. The Things Network was upgraded to The Things Stack Community Edition (TTS (CE)). The TTN V2 clusters were closed towards the end of 2021. This book shows you the necessary steps to operate LoRaWAN nodes using TTS (CE) and maybe extend the network of gateways with an own gateway. Meanwhile, there are even LoRaWAN gateways suitable for mobile use with which you can connect to the TTN server via your cell phone. The author presents several commercial LoRaWAN nodes and new, low-cost and battery-powered hardware for building autonomous LoRaWAN nodes. Registering LoRaWAN nodes and gateways in the TTS (CE), providing the collected data via MQTT and visualization via Node-RED, Cayenne, Thingspeak, and Datacake enable complex IoT projects and completely new applications at very low cost. This book will enable you to provide and visualize data collected with battery-powered sensors (LoRaWAN nodes) wirelessly on the Internet. You will learn the basics for smart city and IoT applications that enable, for example, the measurement of air quality, water levels, snow depths, the determination of free parking spaces (smart parking), and the intelligent control of street lighting (smart lighting), among others.
€ 32,95
Membres : € 29,66
-

Elektor Publishing Regelungstechnik mit Fuzzy Logic
Praktische Anwendungen und Projekte mit Arduino, ESP32 und RP2040 Tauchen Sie ein in die faszinierende Welt der Regelungstechnik mit Arduino und ESP32! Dieses Buch bietet Ihnen einen praxisnahen Einstieg in die klassischen und modernen Methoden der Regelung, darunter PID-Regler, Fuzzy-Logik und Sliding-Mode-Regler. Im ersten Teil lernen Sie die Grundlagen der beliebten Arduino-Controller, wie den Arduino Uno und den ESP32, sowie die Integration von Sensoren für Temperatur- und pH-Messung (NTC, PT100, PT1000, pH-Sensor). Sie erfahren, wie diese Sensoren in verschiedenen Projekten eingesetzt werden und wie Sie Daten auf einem Nextion TFT-Display visualisieren. Weiter geht es mit der Einführung in Stellglieder wie MOSFET-Schalter, H-Brücken und Solid-State-Relais, die zur Steuerung von Motoren und Aktoren verwendet werden. Sie lernen, Regelstrecken zu analysieren und zu modellieren, einschließlich PT1- und PT2-Regelungen. Der Schwerpunkt des Buches liegt auf der Implementierung von Fuzzy- und PID-Reglern zur Regelung von Temperatur und DC-Motoren. Dabei werden sowohl der Arduino Uno als auch der ESP32 eingesetzt. Zudem wird der Sliding-Mode-Regler vorgestellt. Im vorletzten Kapitel erkunden Sie die Grundlagen neuronaler Netze und lernen, wie maschinelles Lernen auf einem Arduino eingesetzt werden kann. Im letzten Kapitel gibt es noch ein praktisches Beispiel für einen Fuzzy-Regler zur Stromeinspeisung ins Hausnetz. Dieses Buch ist die perfekte Wahl für Ingenieure, Studierende und Elektroniker, die ihre Projekte mit innovativen Regelungstechniken erweitern möchten.
€ 44,80
Meilleur prix
-
Elektor Digital Motor Control - Projects with Arduino & Raspberry Pi (E-book)
This book is about DC electric motors and their use in Arduino and Raspberry Pi Zero W based projects. The book includes many tested and working projects where each project has the following sub-headings: Title of the project Description of the project Block diagram Circuit diagram Project assembly Complete program listing of the project Full description of the program The projects in the book cover the standard DC motors, stepper motors, servo motors, and mobile robots. The book is aimed at students, hobbyists, and anyone else interested in developing microcontroller based projects using the Arduino Uno or the Raspberry Pi Zero W. One of the nice features of this book is that it gives complete projects for remote control of a mobile robot from a mobile phone, using the Arduino Uno as well as the Raspberry Pi Zero W development boards. These projects are developed using Wi-Fi as well as the Bluetooth connectivity with the mobile phone. Readers should be able to move a robot forward, reverse, turn left, or turn right by sending simple commands from a mobile phone. Full program listings of all the projects as well as the detailed program descriptions are given in the book. Users should be able to use the projects as they are presented, or modify them to suit to their own needs.
€ 29,95
Membres : € 26,96
-

Elektor Publishing Tube Amplifier Circuits
From SRPP and Mu-Follower to OTL Designs Tube amplifiers suffer from distortion. Fortunately, circuits such as the SRPP amplifier, mu-follower, and beta-follower produce minimal distortion even at output voltages of 50 to 100 Vpeak. These designs are often published with errors. Without a sound understanding of the theory, it is easy to arrive at a flawed design. In the first section of this book, we investigate the origin of distortion, while in the second we investigate the design of and SRPP and a mu-follower. On the internet we can find the most exotic designs. Evaluating them teaches us that these designs often make matters worse rather than better. In the chapter on incorrect SRPPs and mu-followers, we sometimes see bizarre and misguided designs where using a simple single-triode amplifier would perform much better. Push-pull output stages also exist. A great number of them are examined, and their similarity to the SRPP is discussed. This is done especially with the help of the theory behind the OTL based on the ‘mother’ of all OTLs, the Philips HF303. Finally, attention is given to frequency characteristics and technical matters such as the supply voltage and the filament power supply. To illustrate these points, there are a few designs covering the subjects discussed. This book presents much new theory that has not been published before. It is often an eye-opener, showing that many things have a beautiful and unexpected simplicity.
€ 44,95
Membres : € 40,46
-
Elektor Publishing Electric Guitar (2nd Edition)
Sound Secrets and Technology What would today’s rock and pop music be without electric lead and bass guitars? These instruments have been setting the tone for more than sixty years. Their underlying sound is determined largely by their electrical components. But, how do they actually work? Almost no one is able to explain this to the true musician with no technical background. This book answers many questions simply, in an easily-understandable manner. For the interested musician (and others), this book unveils, in a simple and well-grounded way, what have, until now, been regarded as manufacturer secrets. The examination explores deep within the guitar, including pickups and electrical environment, so that guitar electronics are no longer considered highly secret. With a few deft interventions, many instruments can be rendered more versatile and made to sound a lot better – in the most cost-effective manner. The author is an experienced electronics professional and active musician. He has thoroughly tested everything described here, in practice.
€ 39,95
Membres : € 35,96
-

Elektor Digital Build Your Own Software-Defined Radio (E-book)
Practical Guide to Modular RF Design Build Your Own Software-Defined Radio combines RF circuitry with hardware programming and PC-based signal processing. The e-book presents a modular approach to building a complete SDR system using RF Bricks – from the mechanical framework and RF modules to measurement tools, PC software, and FPGA implementations. Practical explanations guide readers through real signal paths, construction steps, and measurement routines, linking hardware and software into a flexible SDR platform. Key topics include: Mechanical setup: RF Brick template, chassis, and 19-inch module carrier Bridges: USB isolator, I²C level shifter, I²C power switch, and practical examples Signal-chain design with RF Bricks: antennas, band filters, NanoVNA work, preamplifiers, PLLs, demodulators, direct-conversion chains, multiband options, and narrowband bricks RF measurement Bricks: single- and dual-tone sources, NPR methods, noise generators, notch filters, broadband amplifiers, and impedance bridges Useful accessories: ATU-100 tuner, X-Phase QRM eliminator, and firmware notes PC host software: SoapyAudio adjustments, GQRX, SDR++, and added functionality GnuRadio elements: control blocks, SSB demodulation, GUI components, messaging, and filter handling FPGA-based SDR: VHDL, toolchains, ADC/DAC blocks, oversampling, and a complete SSB/CW signal chain With its modular structure and detailed working examples, this e-book offers a practical path to building and extending modern SDR systems. Downloads Software
€ 32,95
Membres : € 29,66
-

Elektor Digital Build Your Own Multifunctional 4-Axis CNC Machine (E-book)
Plot, Cut, Drill, Mill and Laser with the Z99 This book covers the construction, hardware, software, and operation of the Z99 – CNC machine. This is a multifunctional 4-axis machine for home construction. The capabilities of the Z99 machine include: large-format schematic plotting PCB plotting with etch-resist pens schematic plotting with conductive-ink pens letter cutting out of vinyl paper cutting PCB/substrate drilling PCB/substrate milling text milling laser engraving laser cutting of solder paste masks By making the support software available as freeware, readers of the book are challenged and encouraged to develop new applications for the Z99. The machine would not be of much use if the user has no option to create suitable files for the designs in mind. A large part of this book is dedicated to creating source files in a variety of freeware software packages, including Inkscape, DesignSpark PCB, KiCad, and FlatCAM. The book is also useful for readers keen to comprehend and then master the basic structure of HPGL, Gerber, Drill, and G-code files, as well as to have a go at deciphering them using software.
€ 29,95
Membres : € 26,96
-

Peak Peak Atlas ESR70 gold (ESR et Capacitance Meter)
Le Peak Atlas ESR70 gold est une version améliorée du précédent Peak Atlas ESR70 Plus. Il fait tout ce que l’ESR70 Plus a fait mais en mieux. Il mesure désormais la capacité jusqu'à 10 fois plus rapidement et sur une plage plus large, grâce à de nouveaux algorithmes de test. La mesure de capacité est également beaucoup moins influencée par les résistances parallèles ou les courants de fuite grâce à notre nouveau système de mesure Triple-Slope. À l'aide des sondes plaquées or fournies (amovibles), l'Atlas ESR70 gold peut mesurer l'ESR jusqu'à une résolution de 0,01 ohms, jusqu'à 40 ohms. Il peut même mesurer l'ESR pour les condensateurs en circuit. Les sondes sont amovibles, permettant d'installer des sondes compatibles de 2 mm. Des alertes sonores sont produites pour différents niveaux ESR, vous permettant d'effectuer de nombreux tests successivement sans avoir à regarder l'écran. L'ESR70 prend automatiquement en compte la réactance capacitive, de sorte que même les condensateurs de faible valeur (jusqu'à 0,3 uF) peuvent mesurer l'ESR avec précision. Caractéristiques Utilise une seule pile alcaline AAA (incluse). LCD alphanumérique avec rétroéclairage. Analyse automatique - démarrez lorsque vous appliquez les sondes. Décharge automatique du condensateur grâce à la fonction de décharge contrôlée. Mesure ESR (et faible résistance CC) (même en circuit). Réactance capacitive automatiquement prise en compte pour garantir une ESR précise. Mesure de capacité (si test hors circuit). Alertes sonores pour différents niveaux ESR. Plage de mesure ESR étendue jusqu'à 40 Ohms. Alternatives de sonde en option faciles à installer. Nouvelles fonctionnalités gold Écran LCD amélioré avec un meilleur rétroéclairage. Mesure de capacité 10 fois plus rapide pour les gros condensateurs. Système d'options utilisateur amélioré. Nouveau système de mesure à triple pente pour réduire considérablement l'influence de la résistance parallèle et/ou du courant de fuite sur les mesures de capacité. Plage de mesure de capacité beaucoup plus large, désormais de 0,3 uF à 90 000 uF (au lieu de 1 uF à 22 000 uF). Caractéristiques Type d'analyseur ESR et capacité Types de composants Condensateurs (>0,3 uF) Gamme ESR 0,00 Ohm à 40,0 Ohm Résolution ESR À partir de 0,01 Ohm Utilisation en circuit ESR uniquement Plage de capacité 0,3 uF à 90 000 uF Type de batterie Pile alcaline AAA 1,5 V (fournie). Durée de vie typique de 1 500 opérations Type d'affichage LCD alphanumérique (avec rétroéclairage) Inclus Peak Atlas ESR70 gold Câbles de test extra longs et extra flexibles (450 mm ou câble recouvert de silicone) Fiches et prises plaquées or 2 mm avec pinces crocodiles plaquées or amovibles Guide d'utilisation illustré et complet Pile alcaline AAA Téléchargements Fiche technique (EN) Guide de l'utilisateur (FR) Guide de l'utilisateur (FR) Guide de l'utilisateur (informatique)
€ 142,80
-
Elektor Publishing Raspberry Pi 5 for Radio Amateurs
Program and Build Raspberry Pi 5 Based Ham Station Utilities with the RTL-SDR The RTL-SDR devices (V3 and V4) have gained popularity among radio amateurs because of their very low cost and rich features. A basic system may consist of a USB based RTL-SDR device (dongle) with a suitable antenna, a Raspberry Pi 5 computer, a USB based external audio input-output adapter, and software installed on the Raspberry Pi 5 computer. With such a modest setup, it is possible to receive signals from around 24 MHz to over 1.7 GHz. This book is aimed at amateur radio enthusiasts and electronic engineering students, as well as at anyone interested in learning to use the Raspberry Pi 5 to build electronic projects. The book is suitable for both beginners through experienced readers. Some knowledge of the Python programming language is required to understand and eventually modify the projects given in the book. A block diagram, a circuit diagram, and a complete Python program listing is given for each project, alongside a comprehensive description. The following popular RTL-SDR programs are discussed in detail, aided by step-by-step installation guides for practical use on a Raspberry Pi 5: SimpleFM GQRX SDR++ CubicSDR RTL-SDR Server Dump1090 FLDIGI Quick RTL_433 aldo xcwcp GPredict TWCLOCK CQRLOG klog Morse2Ascii PyQSO Welle.io Ham Clock CHIRP xastir qsstv flrig XyGrib FreeDV Qtel (EchoLink) XDX (DX-Cluster) WSJT-X The application of the Python programming language on the latest Raspberry Pi 5 platform precludes the use of the programs in the book from working on older versions of Raspberry Pi computers.
€ 39,95
Membres : € 35,96
-

FNIRSI Alimentation USB-C 65 W PD GaN
Avec cette alimentation USB-C PD de 65 W (avec technologie GaN), vous pouvez immédiatement commencer à utiliser le fer à souder FNIRSI HS-01. Bien entendu, vous pouvez également utiliser ce chargeur pour charger rapidement vos tablettes et smartphones via USB-C et USB-A. Inclus Alimentation USB-C 65 W PD GaN (UE)
€ 24,79
-
Elektor Digital Radio Builder's Book (PDF)
Du détecteur à la radio définie par logiciel La technologie des radiofréquences (RF) est l'un des domaines qui permet encore de mettre en pratique ses propres idées. D'innombrables variantes de circuits avec des objectifs particuliers laissent place à des expériences et des projets significatifs. Beaucoup de choses ne sont tout simplement pas disponibles dans le commerce. Des radios à détecteur de cristal sans source d'alimentation propre, de simples récepteurs à tube avec une touche de nostalgie, les premières tentatives de réception de Software Defined Radio, des récepteurs spéciaux pour radioamateur, tout cela peut être réalisé avec peu d'effort et comme une parfaite introduction à l'électronique RF. Pendant longtemps, la construction radio a été le premier pas vers l’électronique. Il existe cependant d’autres moyens, notamment via les ordinateurs, les microcontrôleurs et le numérique. Cependant, les racines analogiques de l’électronique sont souvent négligées. La technologie radio élémentaire et les expériences faciles à réaliser sont particulièrement adaptées comme domaine d'apprentissage de l'électronique, car vous pouvez ici commencer par les bases les plus simples. Mais le lien avec la technologie numérique moderne est également évident, par exemple lorsqu'il s'agit de méthodes de réglage modernes telles que PLL et DDS ou de radios DSP modernes. Ce livre vise à donner un aperçu et à présenter une collection de projets RF simples. L'auteur souhaite vous aider à développer vos propres idées, à concevoir vos propres récepteurs et à les tester.
€ 32,95
Membres : € 29,66
-

FNIRSI FNIRSI 2D15P (3-en-1) Oscilloscope à 2 canaux (100 MHz) + Multimètre + Générateur de signaux
Le FNIRSI 2D15P est un outil de test compact 3-en-1 qui combine un oscilloscope numérique à 2 canaux, un multimètre True RMS et un générateur de formes d'onde dans un seul appareil. Doté d'un écran tactile capacitif de 4,3 pouces, d'une bande passante de 100 MHz, d'une fréquence d'échantillonnage de 500 Méch/s et d'une vitesse d'acquisition jusqu'à 1200 images/s, il est idéal pour le dépannage rapide, l'analyse de signaux et les tests électroniques. Caractéristiques Entrée double canal (100 MHz en monocanal, 50 MHz en bicanal) Profondeurs de mémoire sélectionnables Bande passante limitée à 20 MHz Visualisation en niveaux de gris et température de couleur Opérations mathématiques (addition, soustraction, multiplication, division, etc.) Mode XY et persistance infinie Fonction curseur et 13 mesures automatiques Modes de déclenchement : Auto / Normal / Single Multimètre True RMS (19999 points) Générateur de signal DDS 10 MHz Spécifications Généralités Écran Écran tactile capacitif IPS 4,3 pouces Fonctionnement Tactile + Molette + Boutons physiques Chargement USB-C (charge rapide 12 V/1 A) Batterie Batterie au lithium 5000 mAh Dimensions 19,6 x 12,9 x 5,7 cm Poids 1,1 kg Oscilloscope Canaux 2 Bande passante analogique 100 MHz Fréquence d'échantillonnage 500 Méch/s Profondeur de mémoire 10K, 100K, 1M Impédance d'entrée 1 MΩ Plage de la base de temps 5 ns - 50 s Sensibilité verticale 10 mV - 10 V/div Tension d'entrée max. 800 V (sonde x10) Mode de déclenchement Auto, Normal, Single Type de déclenchement Montant, Descendant, Fronts montants et descendants Couplage CA/CC Persistance min / 2s / 5s / 10s / 20s / 50s / ∞ Calcul Opérations Oui Capture de forme d'onde Oui Exportation de forme d'onde Oui Mesure du curseur Oui Multimètre Tension CC 1.9999V / 19.999V / 199.99V / 1000V Tension CA 1.9999V / 19.999V / 199.99V / 750.0V Courant CC 19.999mA / 199.99mA / 1.9999A / 9.999A Courant CA 19.999mA / 199.99mA / 1.9999A / 9.999A Résistance 19.999MΩ / 1.9999MΩ / 199.99KΩ / 19.999KΩ / 1.9999KΩ / 199.99Ω Capacité 999.9uF / 99.99uF / 9.999uF / 999.9nF / 99.99nF / 9.999nF / 9.999mF / 99.99mF Diode Oui Continuité Oui Générateur de signaux Canaux 1 Fréquence 0–10 MHz Amplitude 0,1–3,0 Vpp Rapport cyclique 0–100% Inclus 1x FNIRSI 2D15P oscilloscope 2x Sondes d'oscilloscope P6100 1x Sonde multimètre 1x Sonde à pince crocodile 1x Câble de données USB 1x Manuel Téléchargements Manual Firmware V2.7.0.7
€ 209,00€ 179,95Meilleur prix
-

Elektor Digital KiCad Like A Pro – Fundamentals and Projects (E-book)
Getting started with the world’s best open-source PCB tool The latest iteration of KiCad, the world’s best free-to-use Printed Circuit Board tool, is packed with features usually found only in expensive commercial CAD tools. This modern, cross-platform application suite built around schematic and design editors, with auxiliary applications is a stable and mature PCB tool. KiCad 8 is a perfect fit for electronic engineers and makers. Here are the most significant improvements and features in KiCad 8, both over and under the hood: Modern user interface, completely redesigned from earlier versions Improved and customizable electrical and design rule checkers Theme editor allowing you to customize KiCad on your screen Ability to import projects from Eagle, CADSTART, and more Python scripting API Improved integrated SPICE circuit simulator Multi-sheet schematics Filters define selectable elements Enhanced interactive router helps you draw single tracks and differential pairs with precision New or enhanced tools to draw tracks, measure distances, tune track lengths, etc. Advanced interactive router Built-in bill of materials generator Realistic ray-tracing capable 3D viewer Customizable teardrops Plug-in manager for quick installation of themes, libraries and functionalities such as autorouters and BOM generators This book will teach you to use KiCad through a practical approach. It will help you become productive quickly and start designing your own boards. Example projects illustrate the basic features of KiCad, even if you have no prior knowledge of PCB design. The author describes the entire workflow from schematic entry to the intricacies of finalizing the files for PCB production and offers sound guidance on the process. Further full-fledged projects, of incremental difficulty, will be presented in a second book, together with a variety of advanced recipes.
€ 44,95
Membres : € 40,46
-
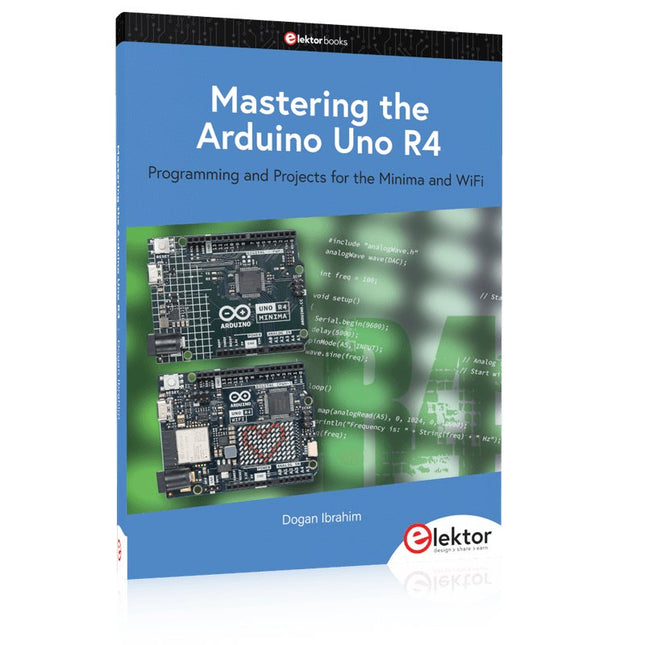
Elektor Publishing Mastering the Arduino Uno R4
Programming and Projects for the Minima and WiFi Based on the low-cost 8-bit ATmega328P processor, the Arduino Uno R3 board is likely to score as the most popular Arduino family member, and this workhorse has been with us for many years. Eleven years later, the long-overdue successor, the Arduino Uno R4, was released. It is built around a 48 MHz, 32-bit Arm Cortex-M4 microcontroller and provides significantly expanded SRAM and Flash memory. Additionally, a higher-precision ADC and a new DAC are added to the design. The Uno R4 board also supports the CAN Bus with an interface. Two versions of the board are available: Uno R4 Minima, and Uno R4 WiFi. This book is about using these new boards to develop many different and interesting projects with just a handful of parts and external modules. All projects described in the book have been fully tested on the Uno R4 Minima or the Uno R4 WiFi board, as appropriate. The project topics include the reading, control, and driving of many components and modules in the kit as well as on the relevant Uno R4 board, including LEDs 7-segment displays (using timer interrupts) LCDs Sensors RFID Reader 4x4 Keypad Real-time clock (RTC) Joystick 8×8 LED matrix Motors DAC (Digital-to-analog converter) LED matrix WiFi connectivity Serial UART CAN bus Infrared controller and receiver Simulators … all in creative and educational ways with the project operation and associated software explained in great detail.
€ 44,95
Membres : € 40,46


